Hoopfit User Manual
What Is Hoopfit?
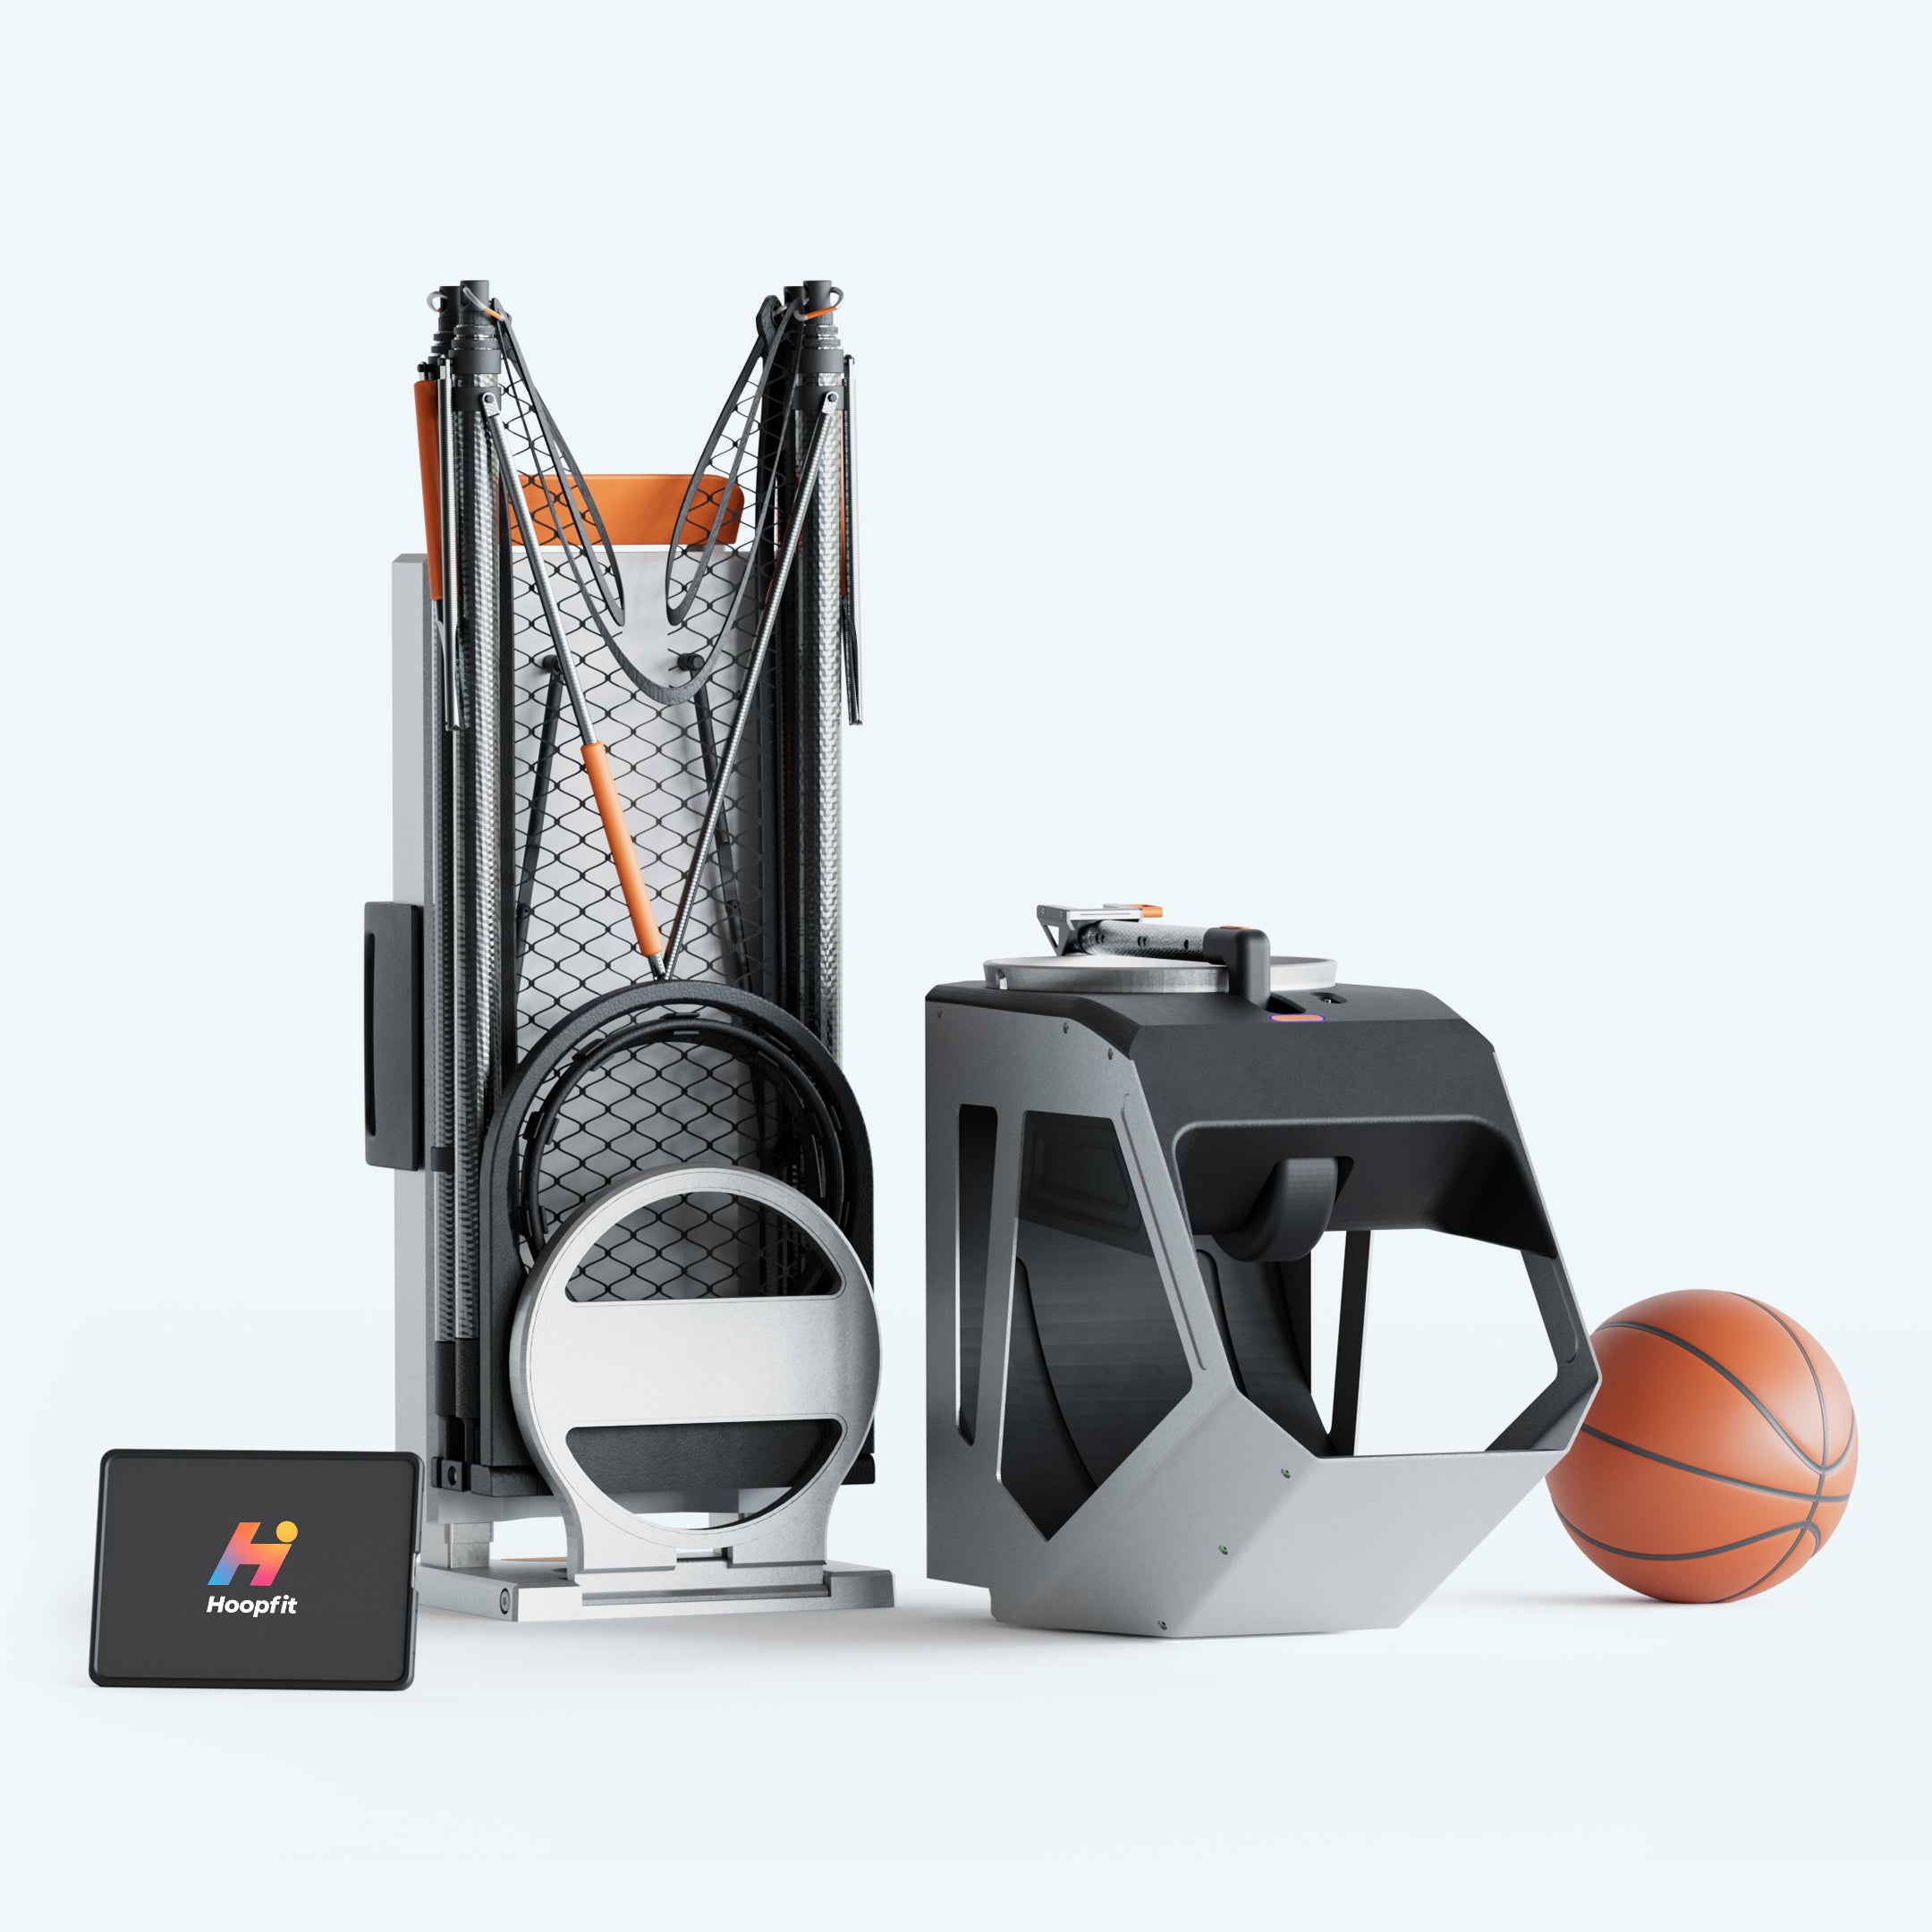
Hoopfit is the most advanced basketball training machine in the world. You can set it up on any standard basketball hoop, and in under 90 seconds, it will rebound your made or missed shots and pass the ball back to you anywhere on the court. Whether it’s your backyard hoop, the park, or the gym, Hoopfit is ultra-portable and battery-powered, allowing you to get up to 1,000 shots an hour without ever chasing a rebound.
We’ve used the latest advances in hardware and software, paired with world-class basketball training and fitness content, to create a truly unique experience. It’s like having your own personal basketball trainer available anytime, anywhere. Hoopfit is designed for players of all ages and skill levels, and it can provide a personalized training program tailored to your specific goals.
Warnings
Important Safety Information: Please Read Carefully
The Hoopfit basketball shooting machine includes a high-capacity lithium-ion battery and various moving parts, including a fast-spinning hub motor. To ensure your safety and the longevity of the device, it is crucial to follow all safety guidelines and precautions outlined in this manual. Always handle the machine with care and avoid exposing it to water, extreme temperatures, or direct sunlight for prolonged periods. Improper handling or use can result in serious injury or damage to the equipment. Do not attempt to open, disassemble, or modify any parts of the machine, especially the battery and motor components, as this can cause electrical hazards or malfunction.
When operating the Hoopfit machine, ensure that the area is clear of obstructions and that no individuals, especially children or pets, are near the device. The rotating and moving parts can pose a risk of injury if not handled properly. Always turn off the machine and disconnect it from the power source before performing any maintenance or adjustments. Keep fingers, hair, and loose clothing away from moving parts to avoid entanglement and potential injury. In the event of any unusual sounds, smells, or malfunction, immediately stop using the machine and contact customer support for assistance. Follow all safety instructions and warnings to ensure a safe and enjoyable experience with your Hoopfit machine.
Warranty
Hoopfit offers a standard one-year limited warranty on all our basketball shooting machines. This warranty covers any defects in material or workmanship under normal use during the warranty period. During the warranty period, Hoopfit will repair or replace, at no charge, products or parts of a product that proves defective because of improper material or workmanship, under normal use and maintenance. This warranty does not cover any damage or malfunctions caused by improper use, unauthorized modifications, neglect, accidents, or normal wear and tear. To obtain warranty service, please contact our customer service team with your proof of purchase and details of the issue. warranty@hoopfit.com
Dimensions
Parts
Unboxing
Unboxing and Setup Video
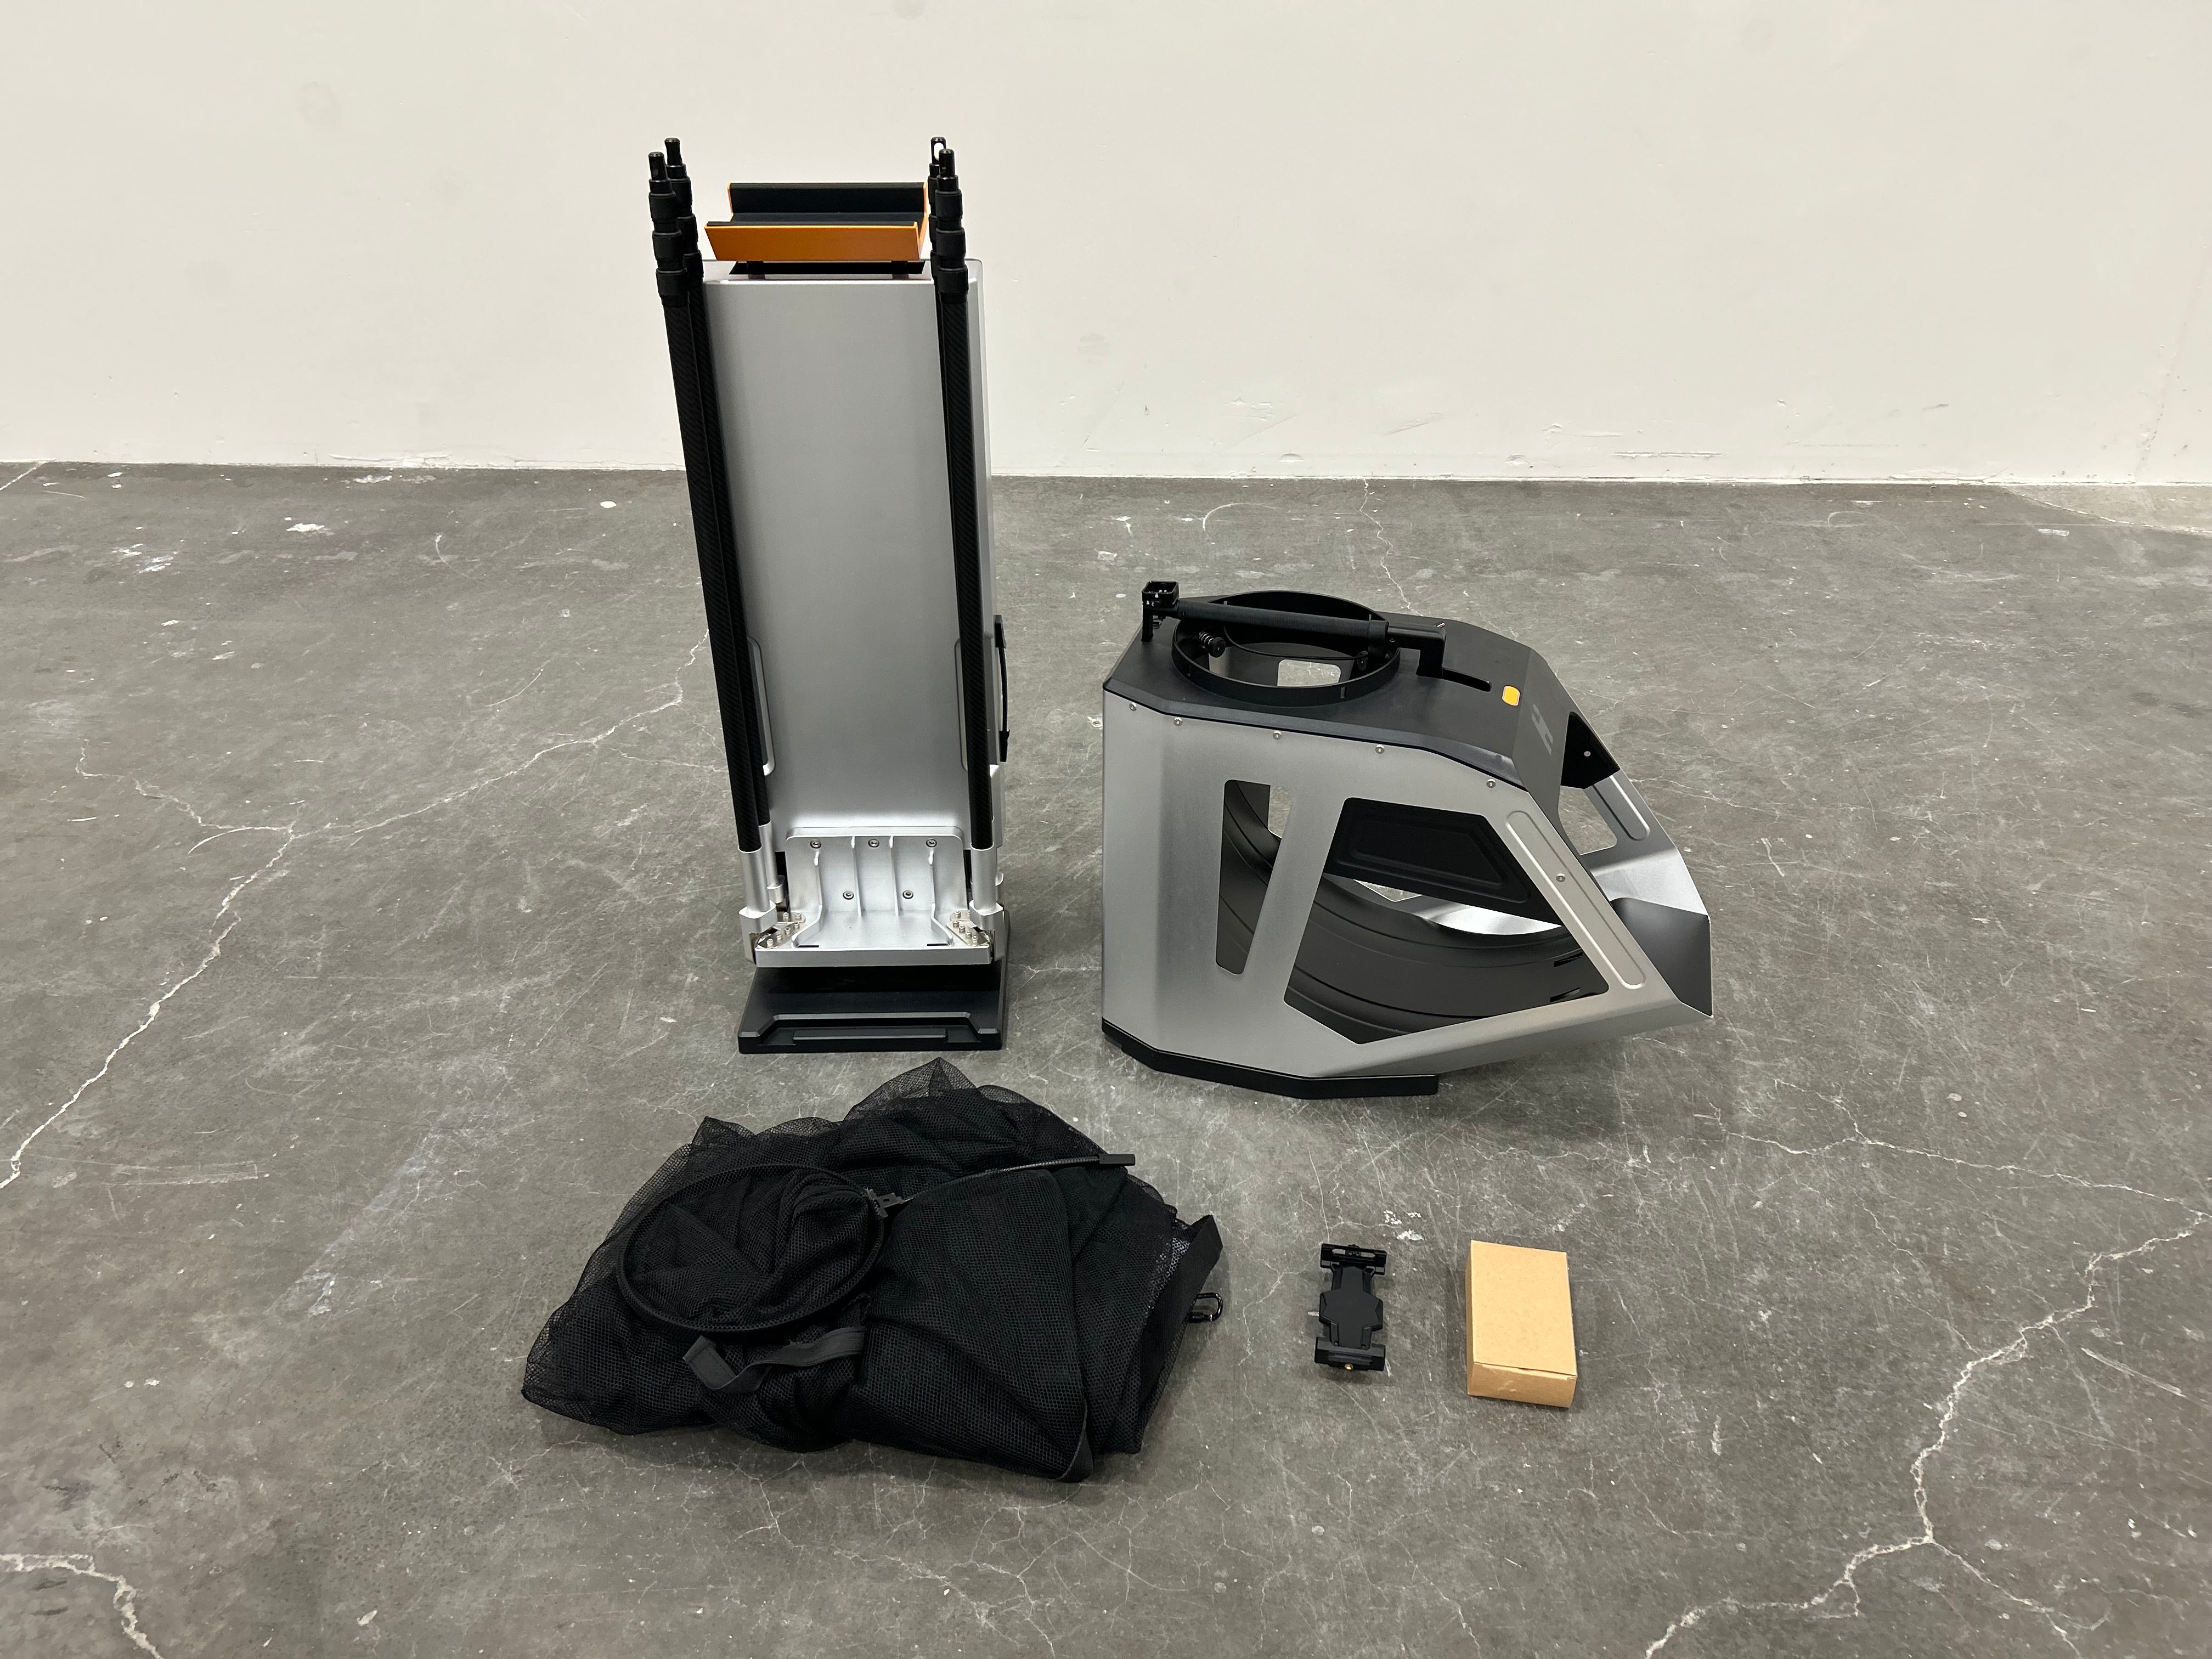
Materials
You will receive the following materials:
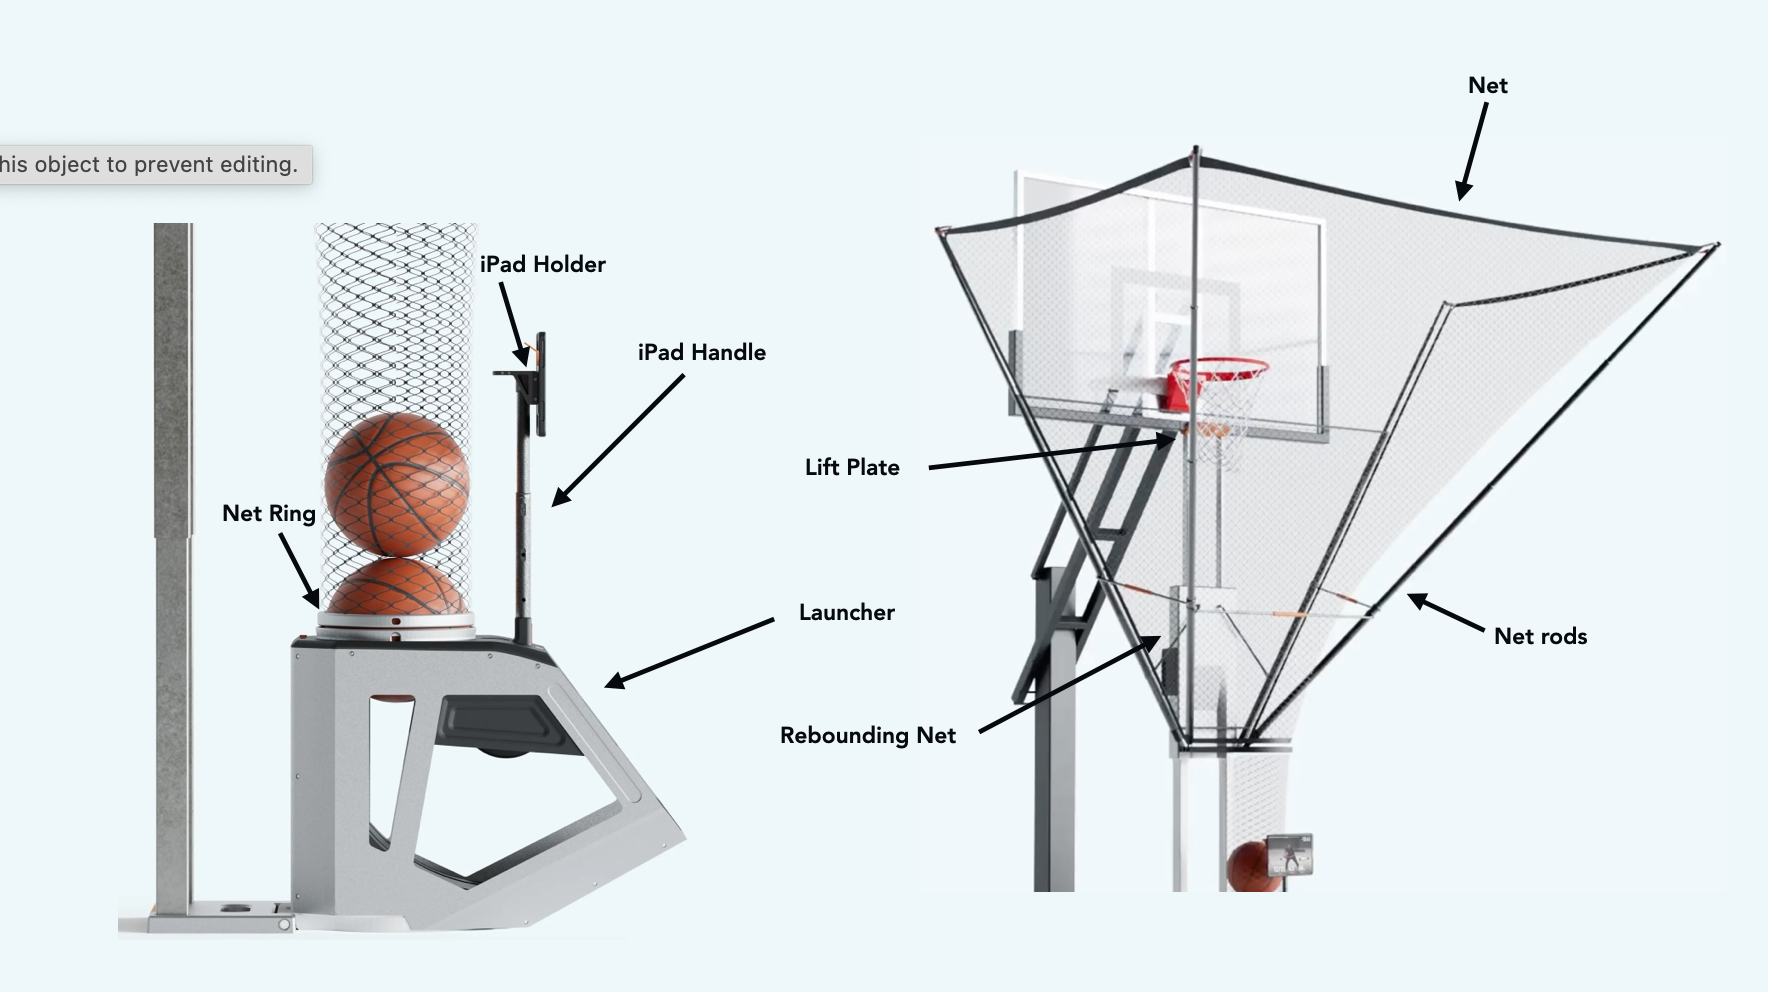
1. Ball Launcher
2. Rebounding Net
3. Launcher Charger
4. iPad Holder
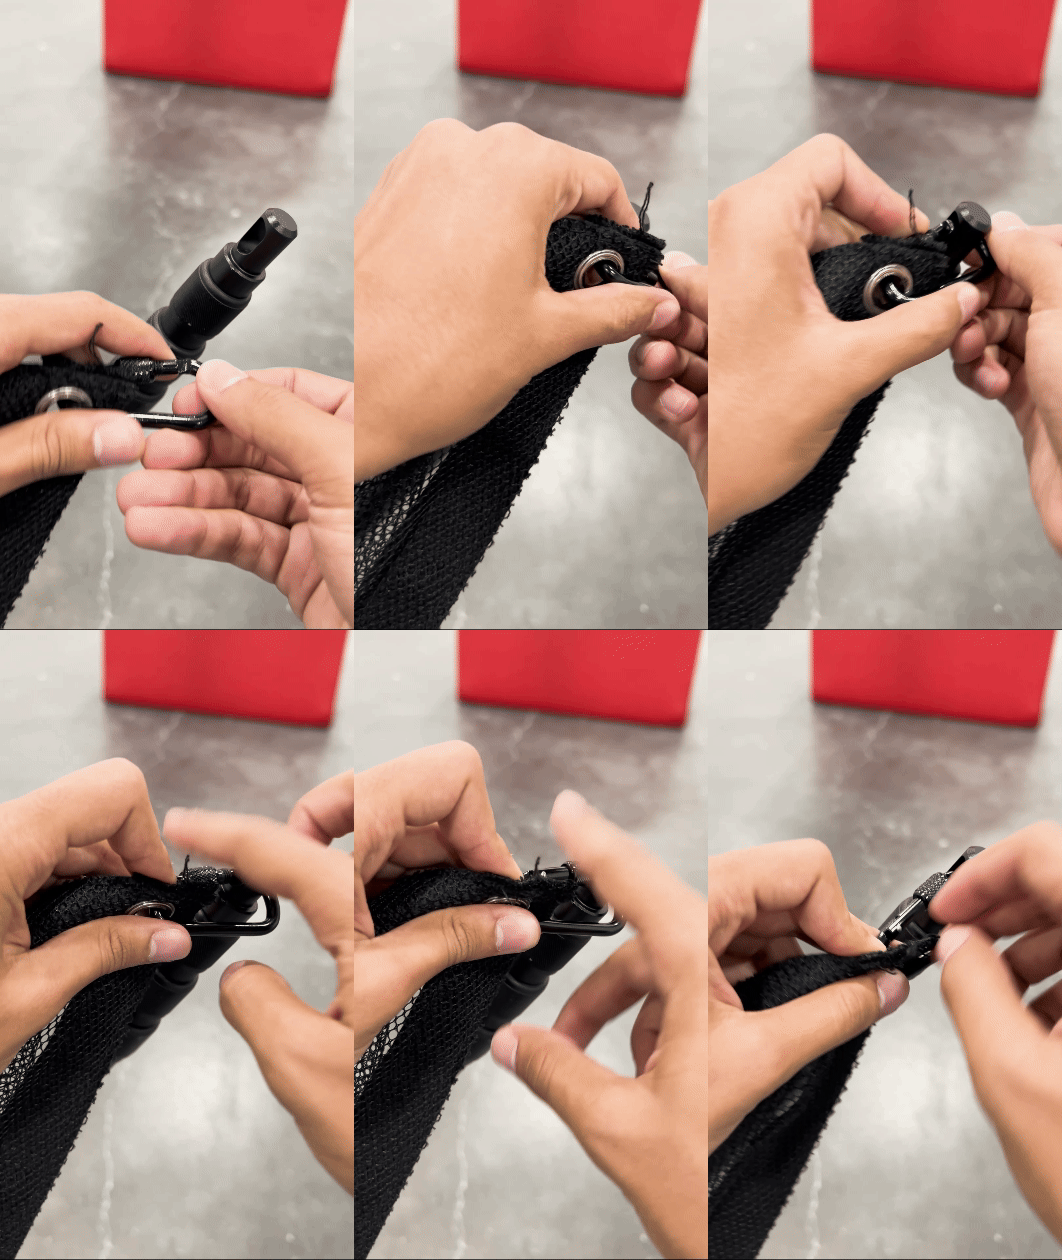
Hooks
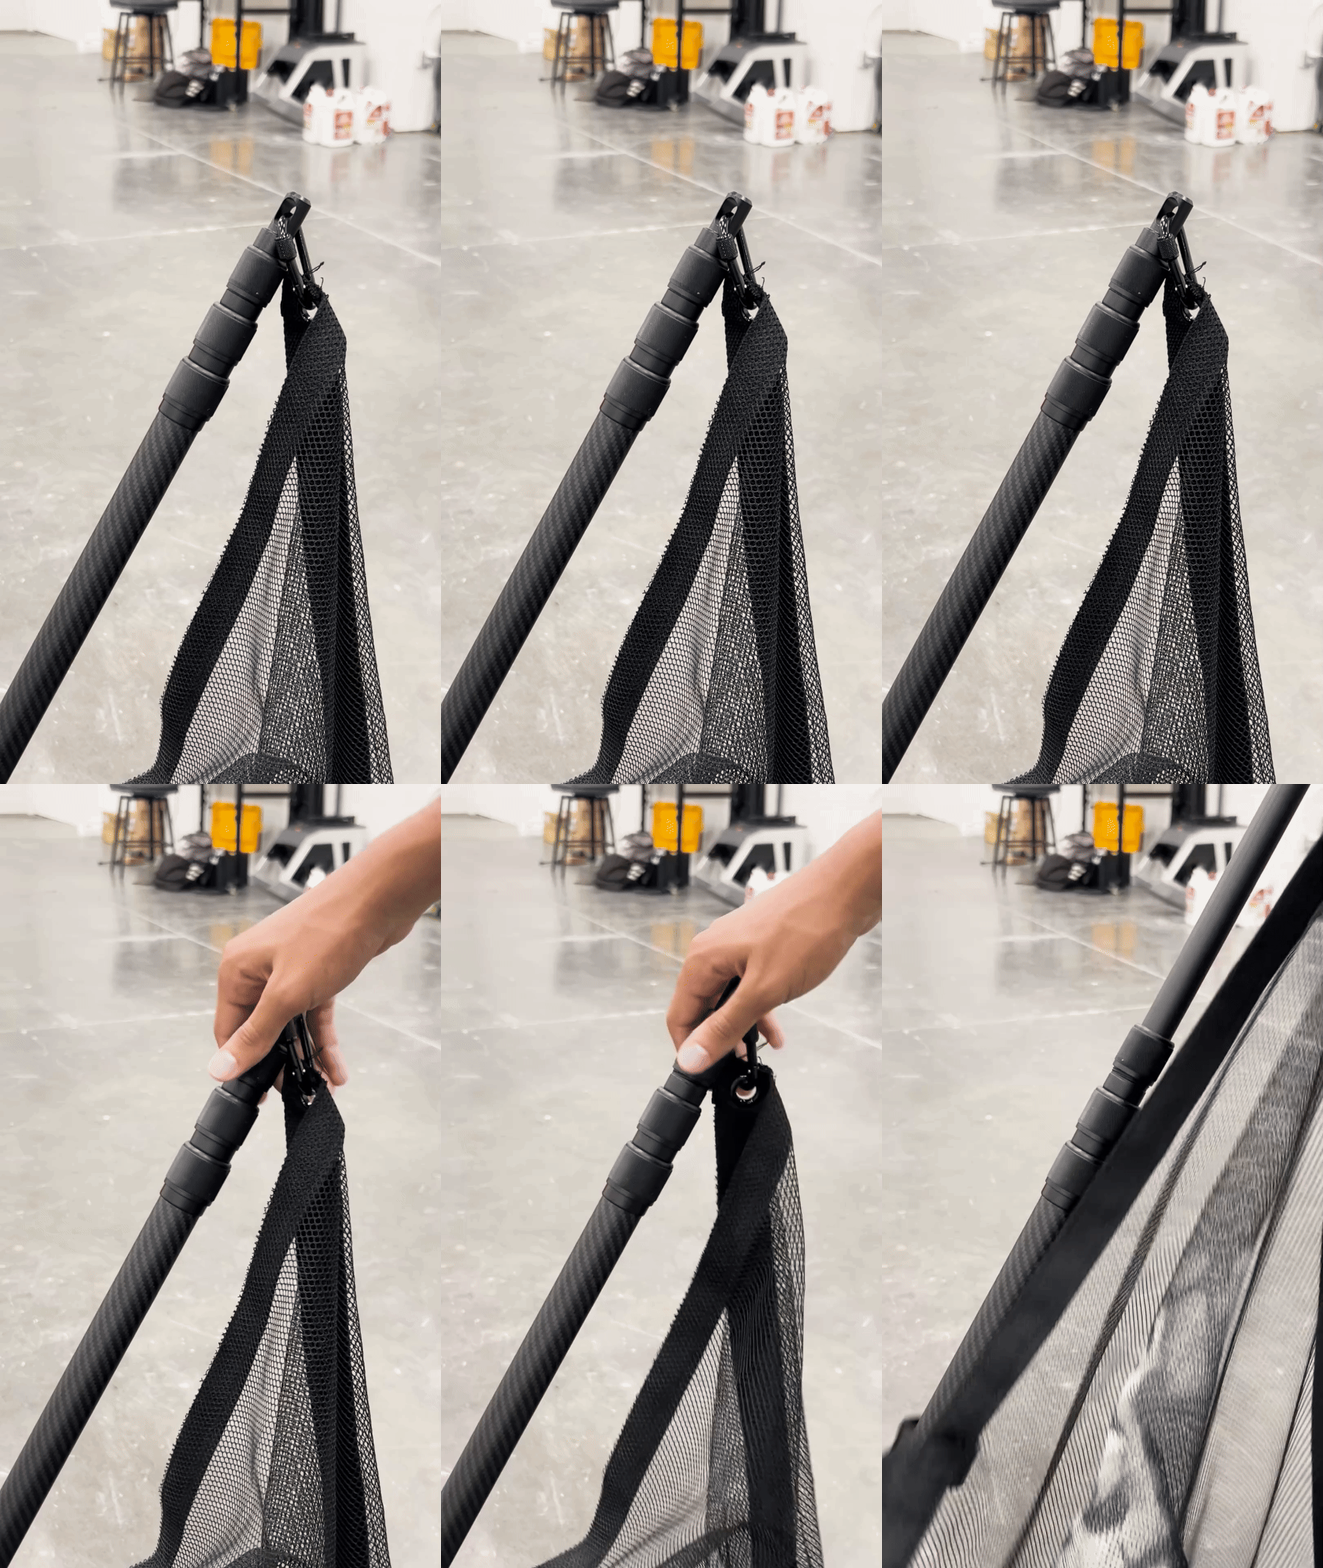
Attach each clip to its designated rod. Ensure each clip is pre-attached to the correct rod for accurate setup.
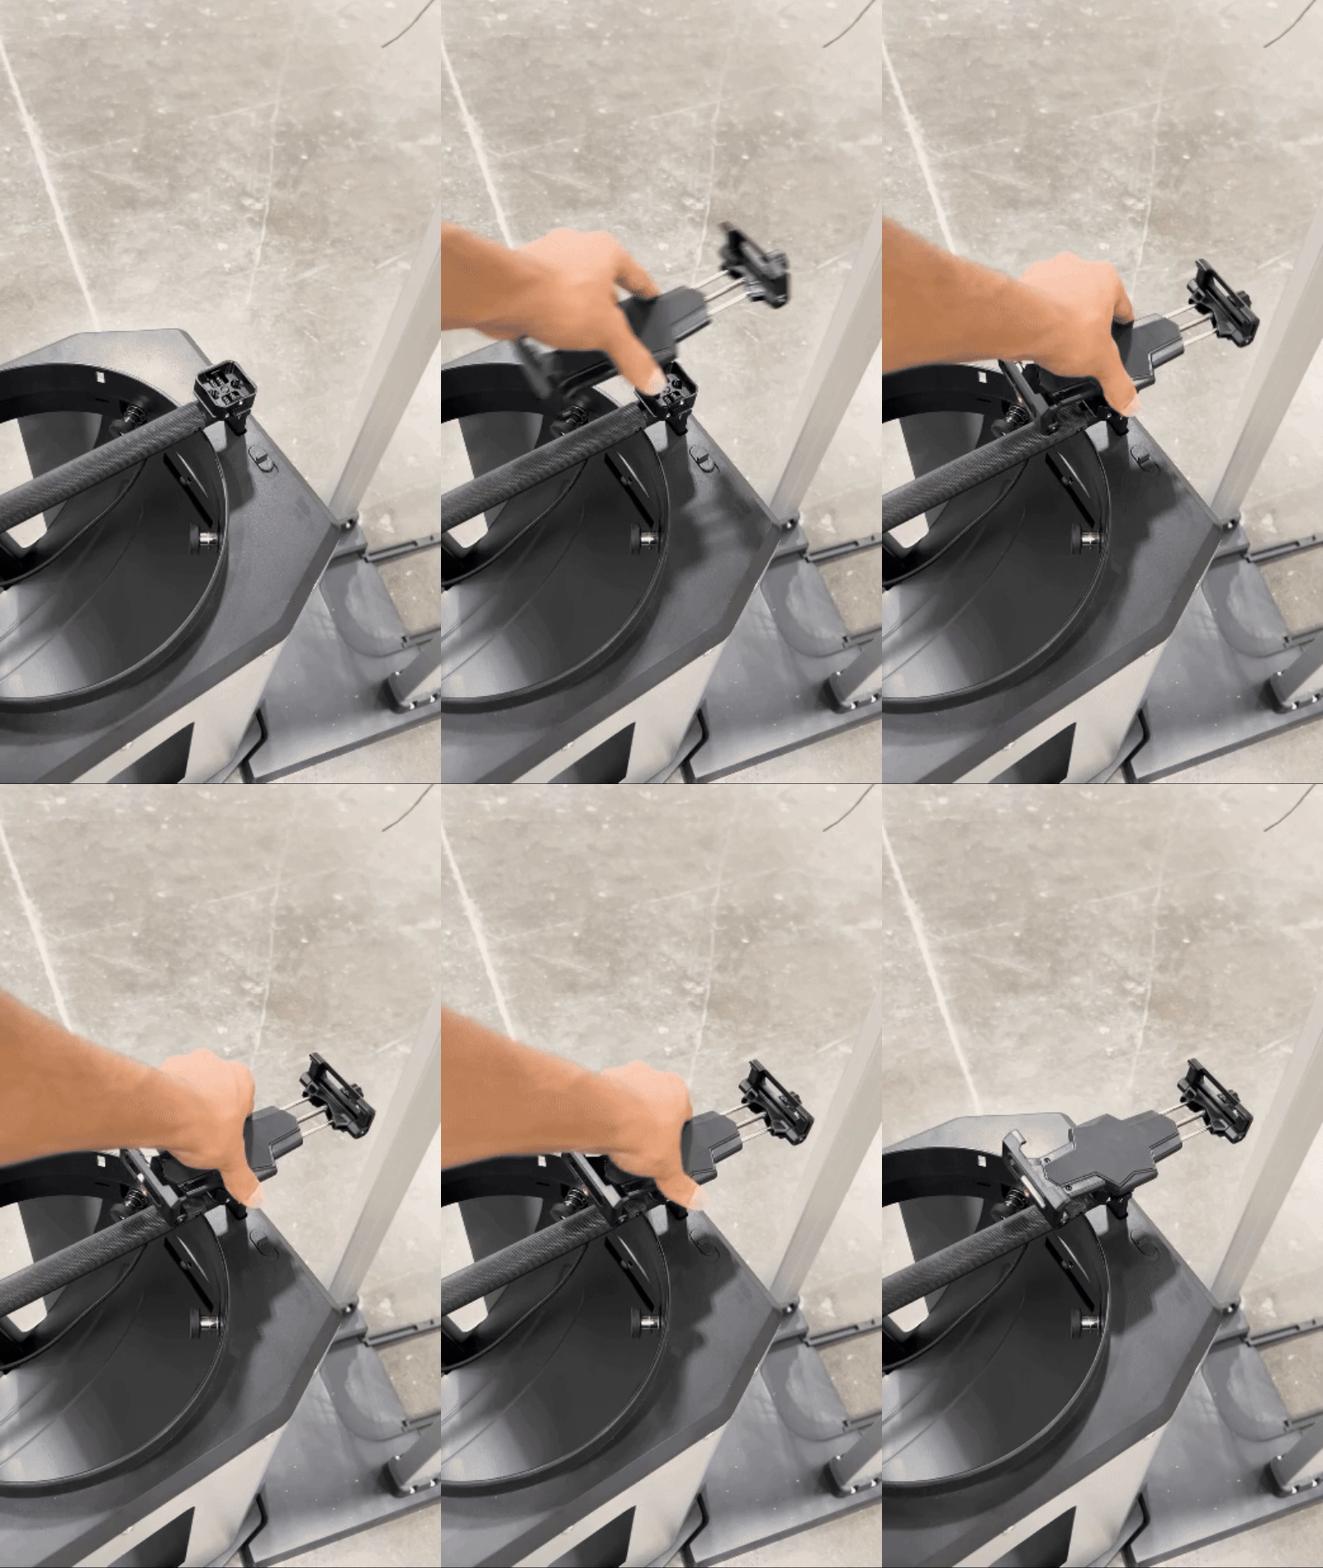
Ipad Holder
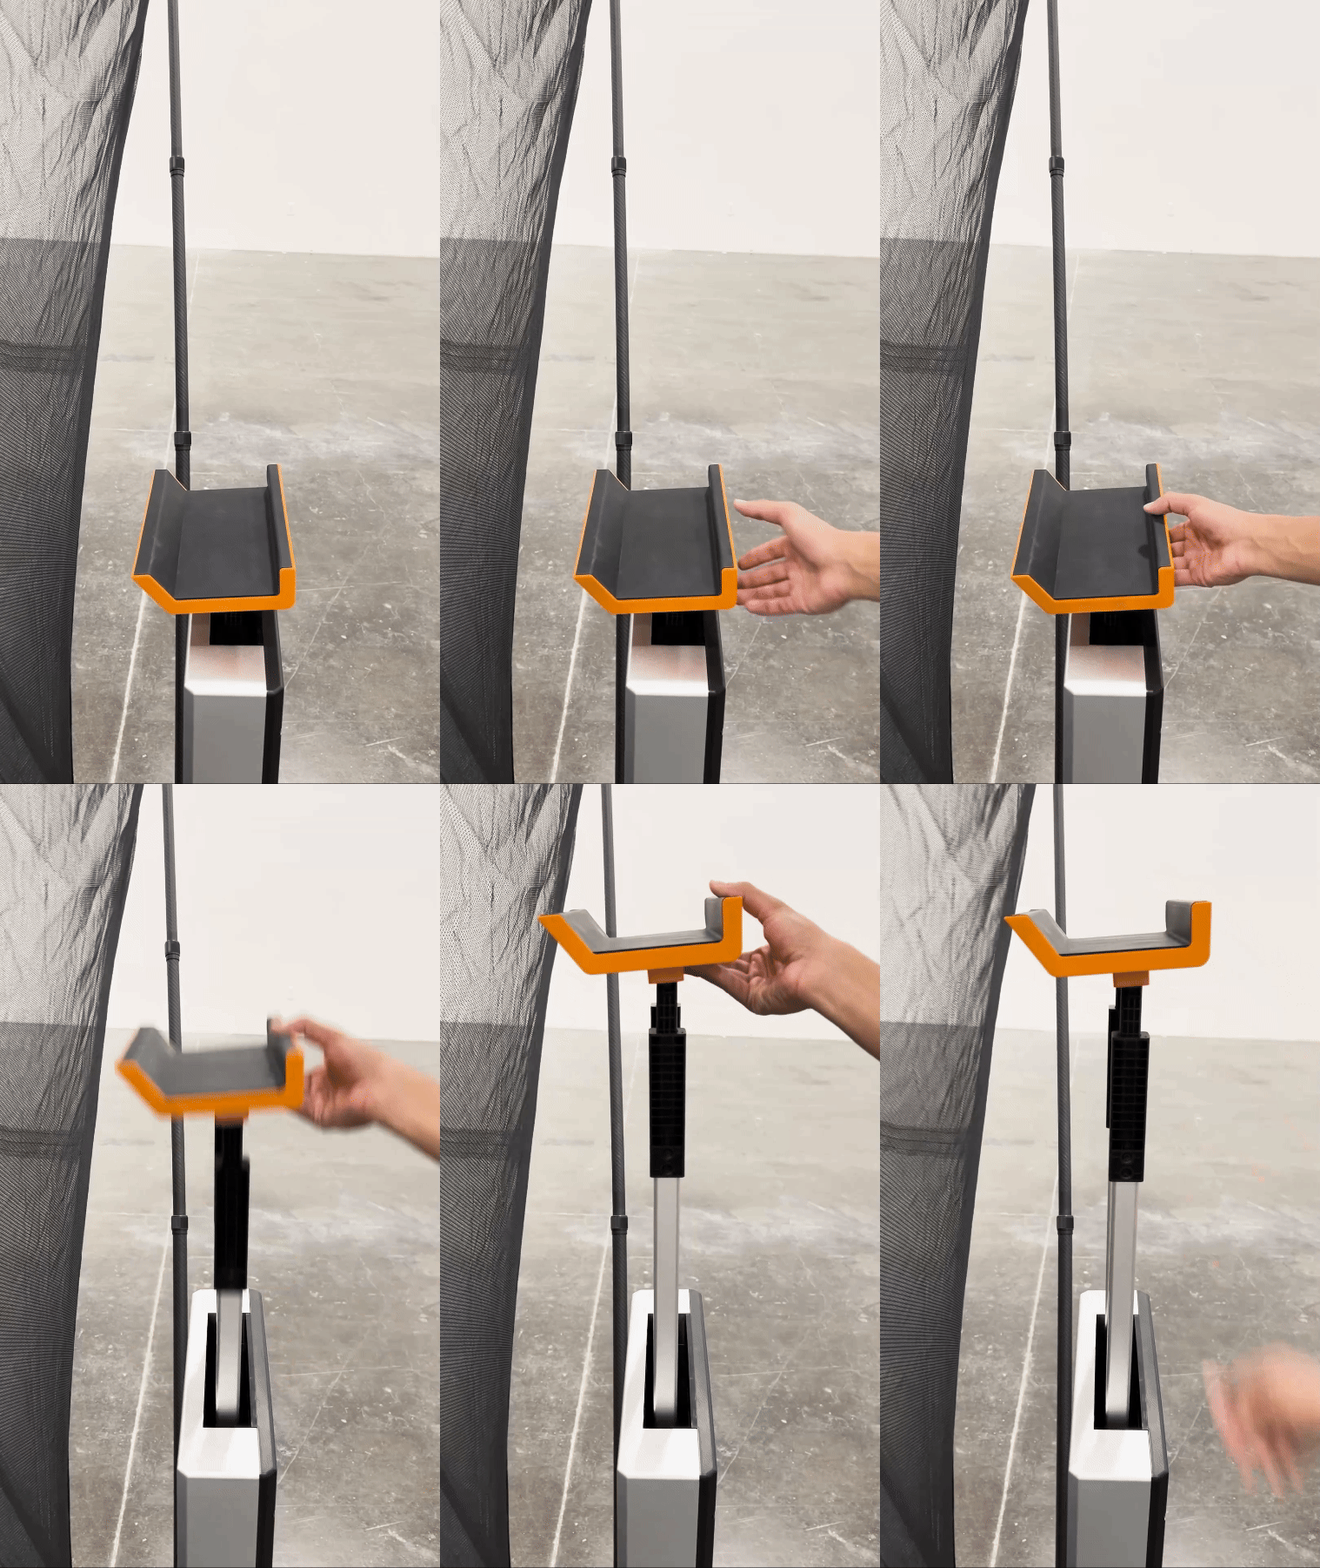
Attach the iPad holder to its designated mount. Ensure it is securely fastened and stable before use.
Setup
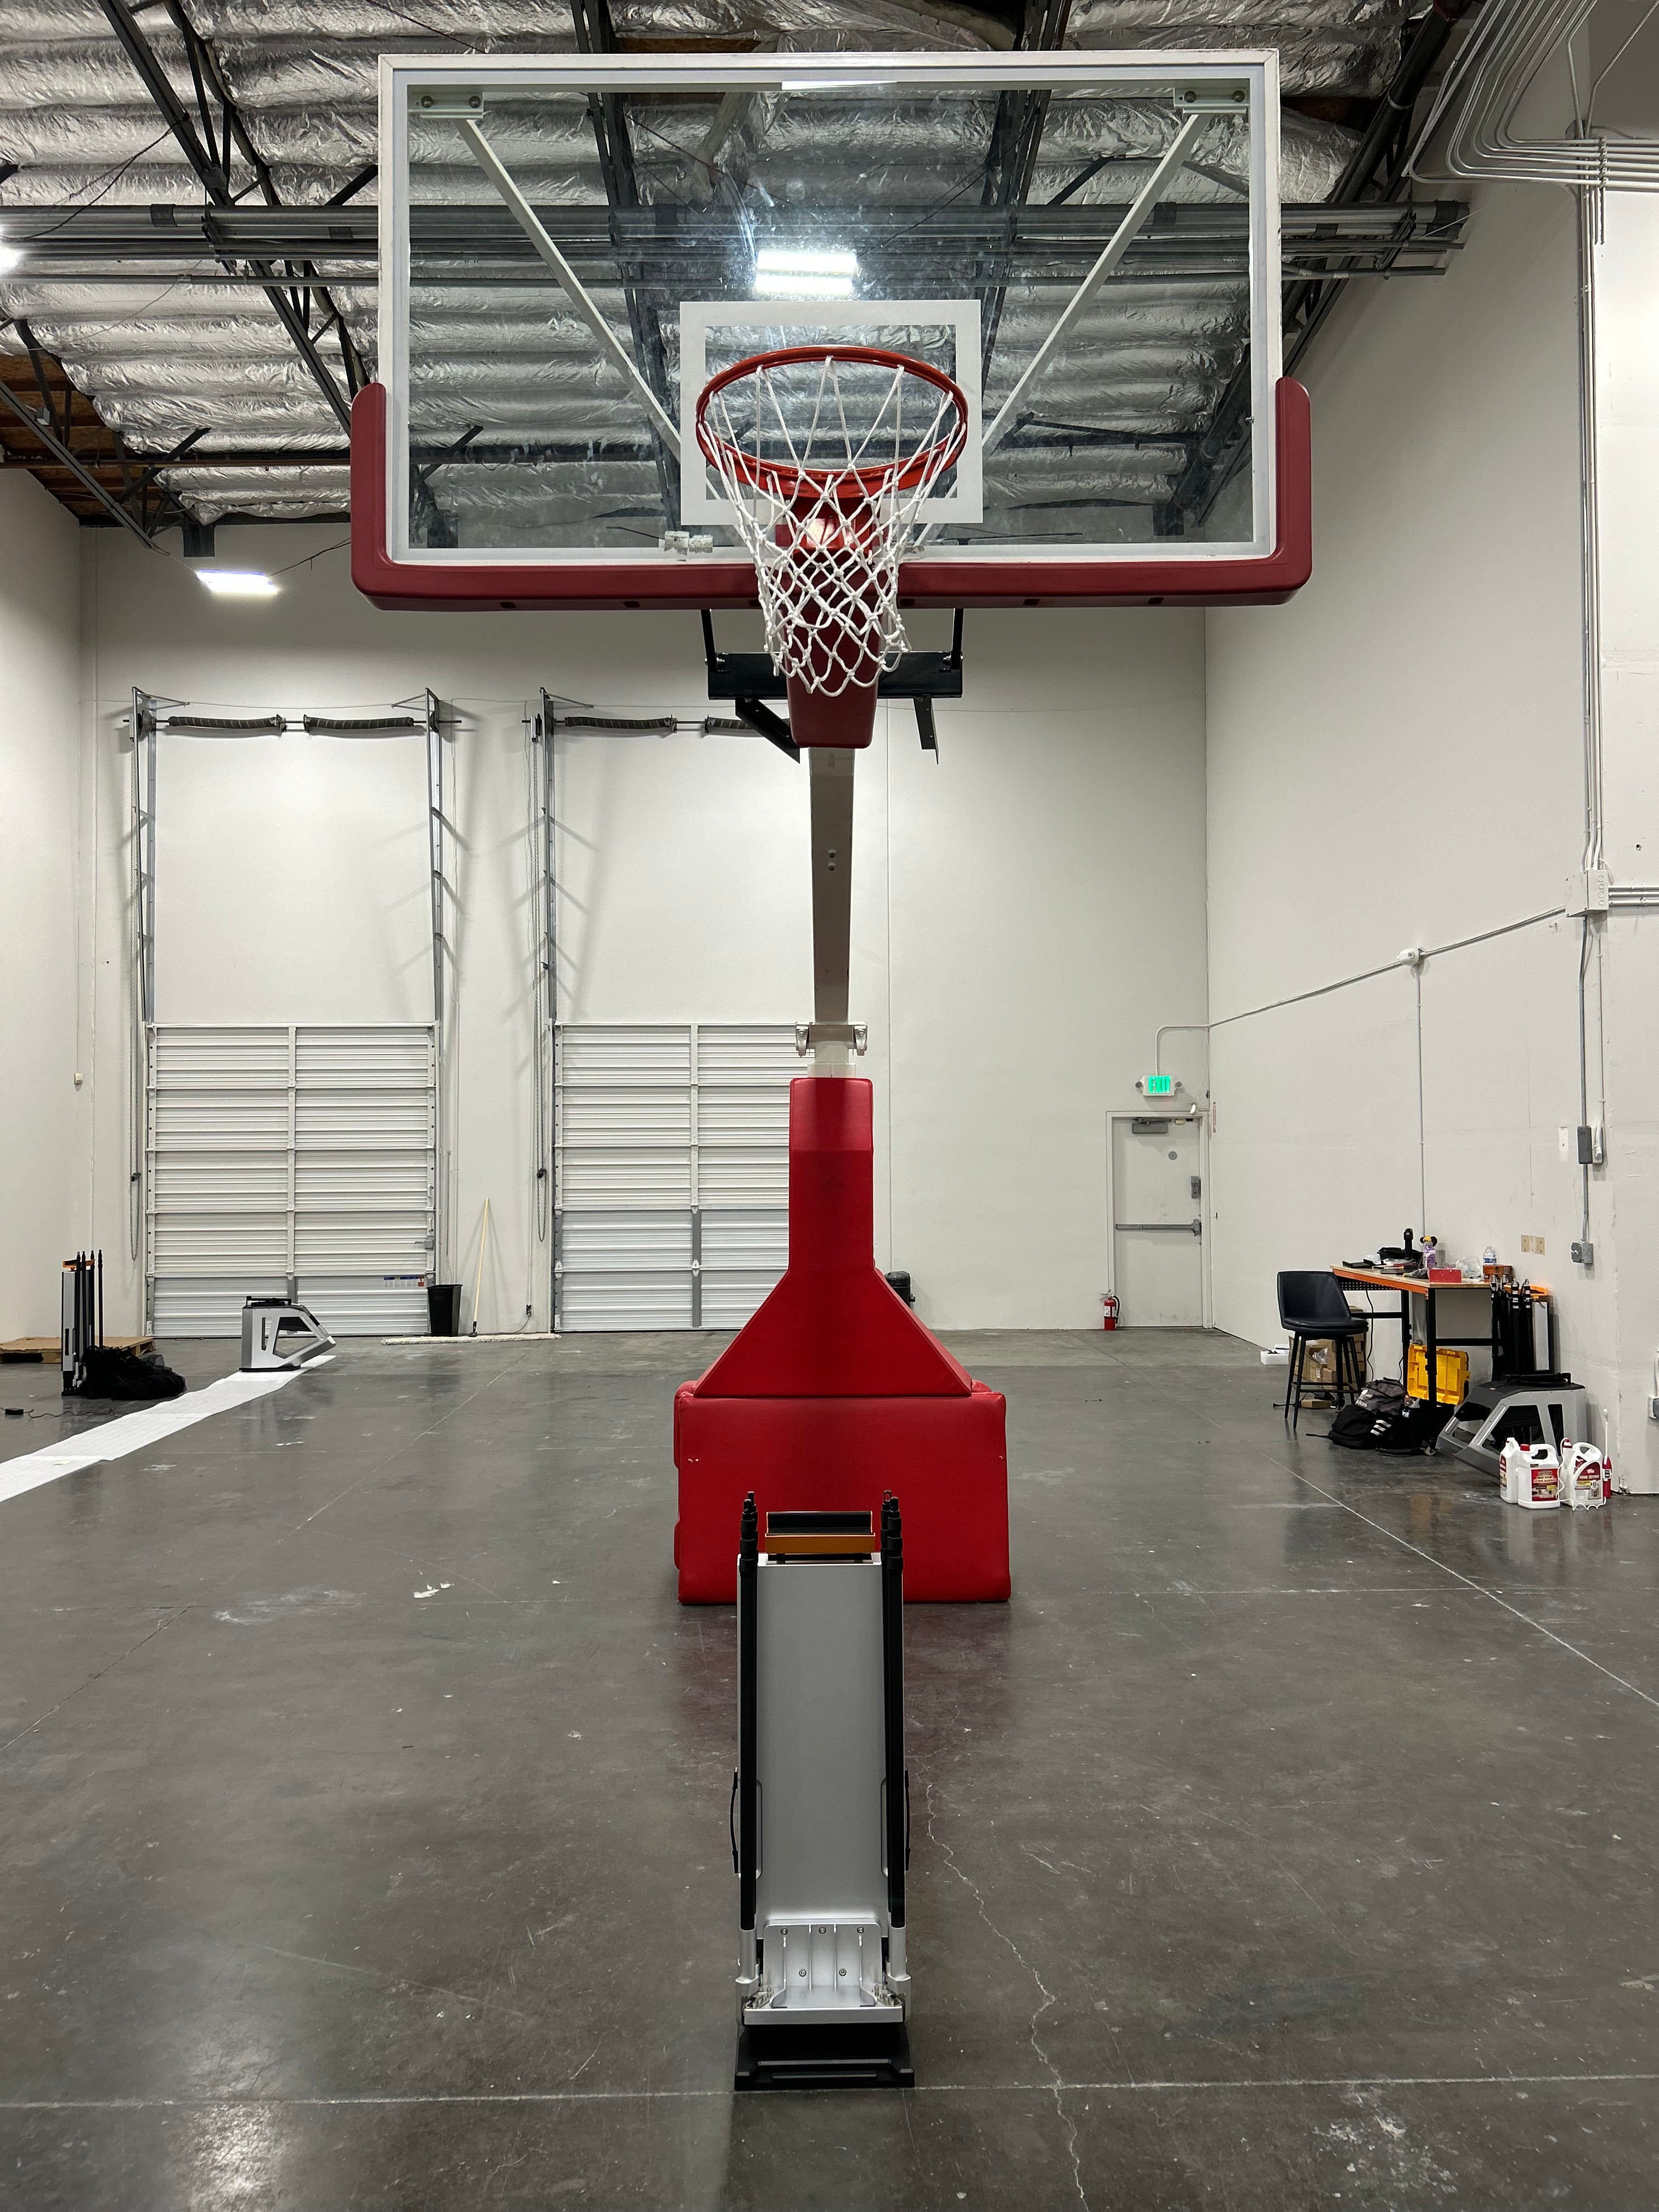
Step 1 :
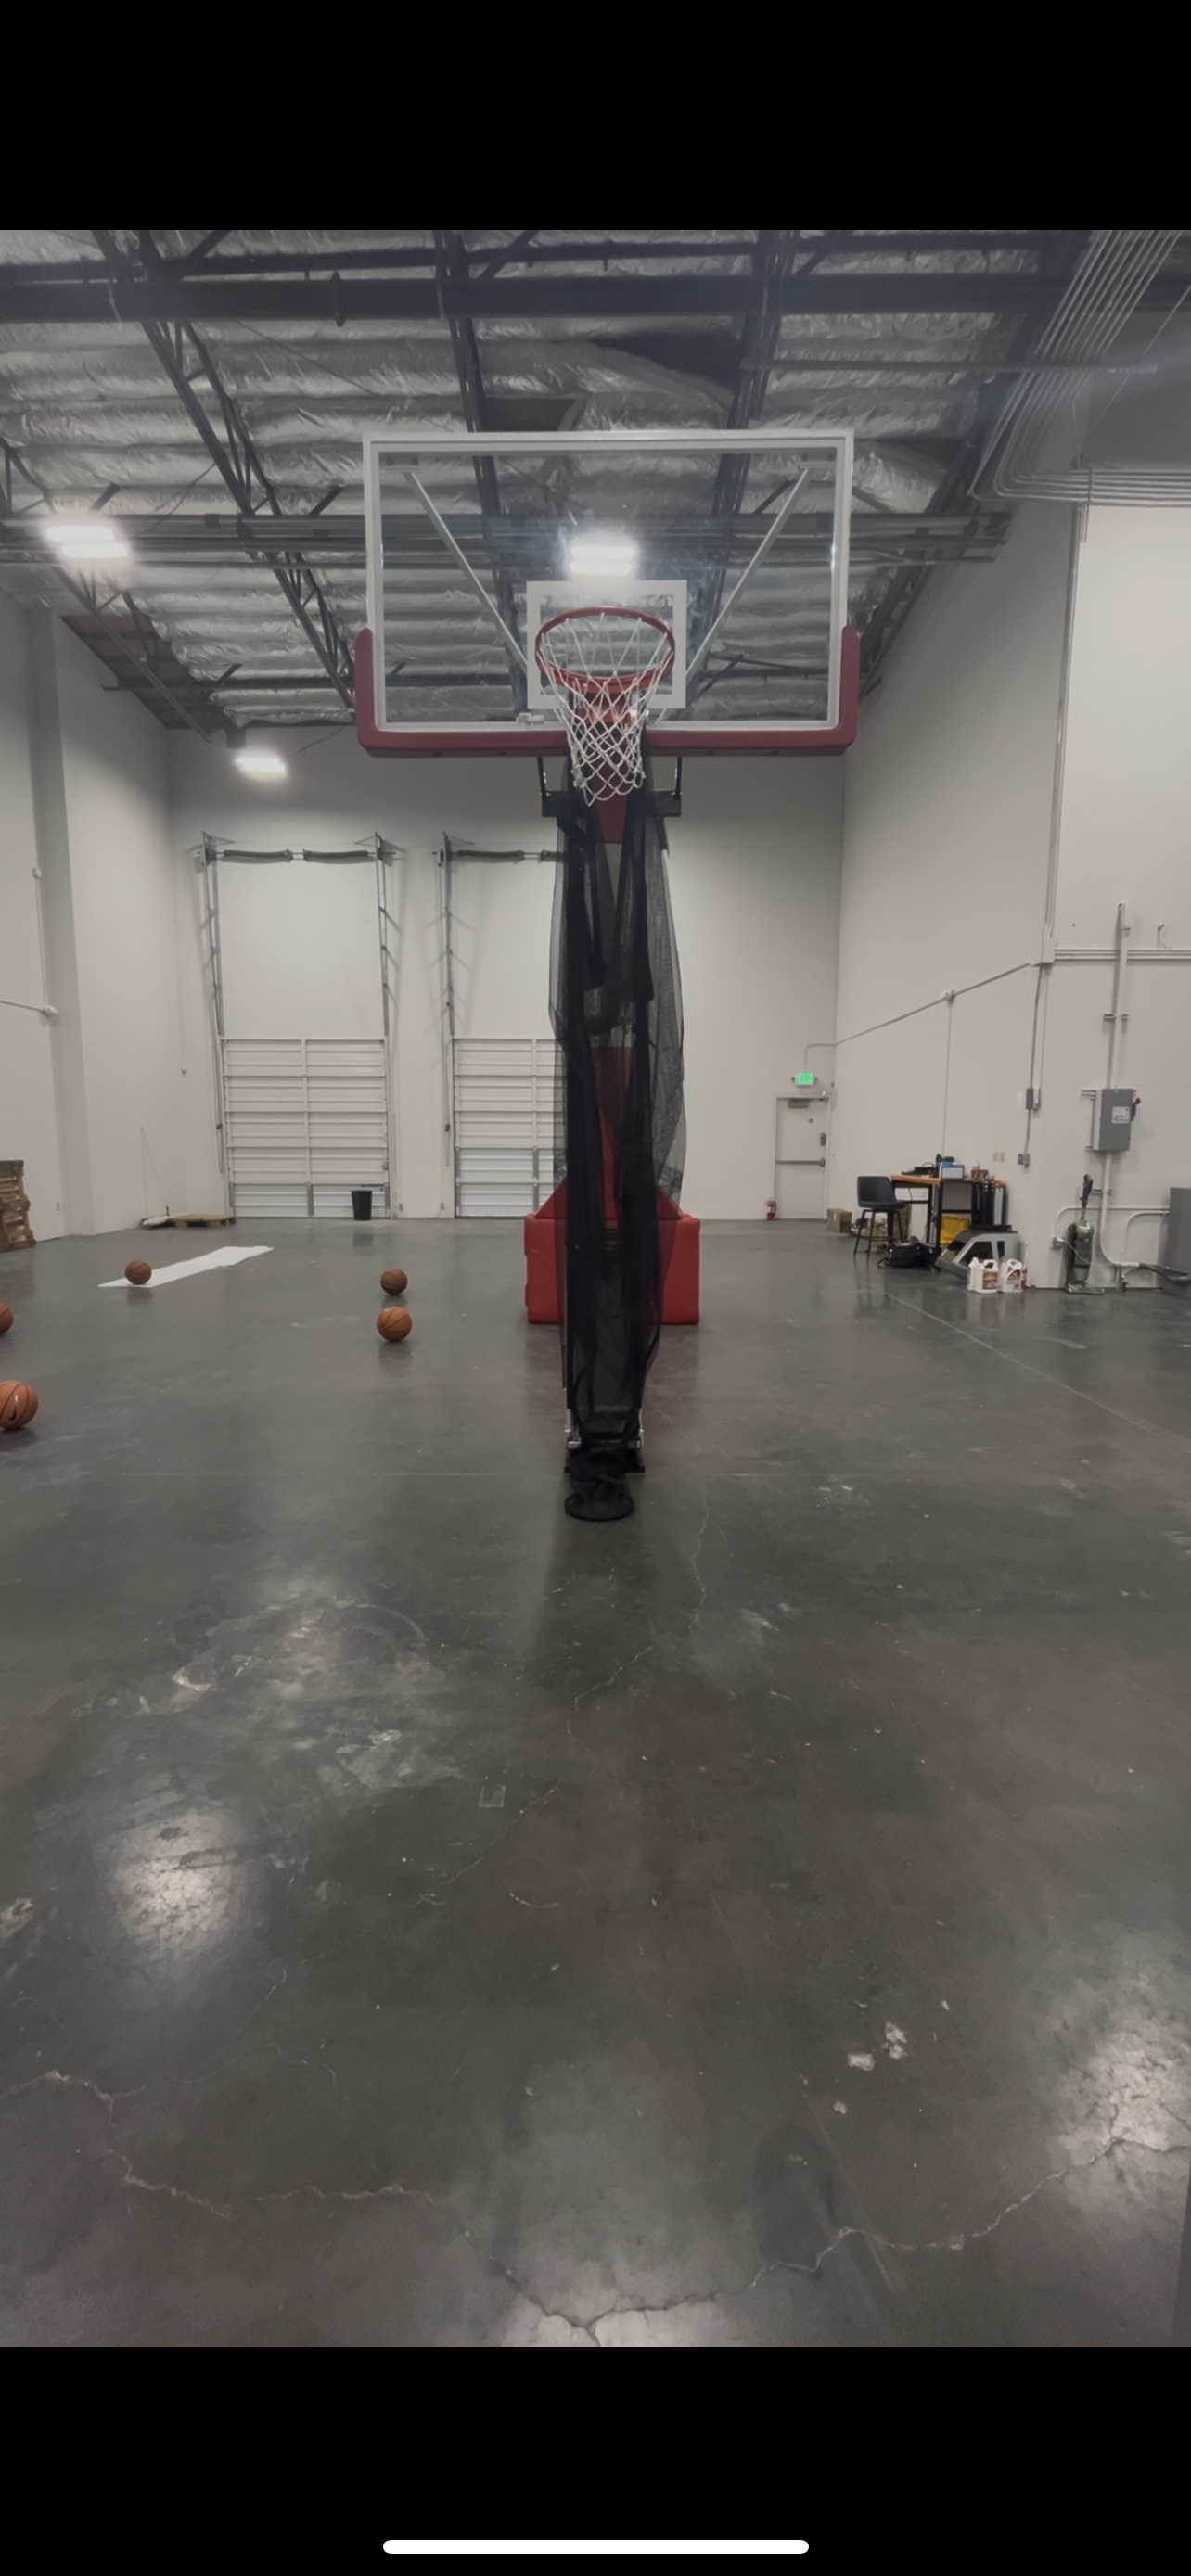
Position the rebounding net directly under the basketball hoop, ensuring it is centered and stable.
Step 2 :
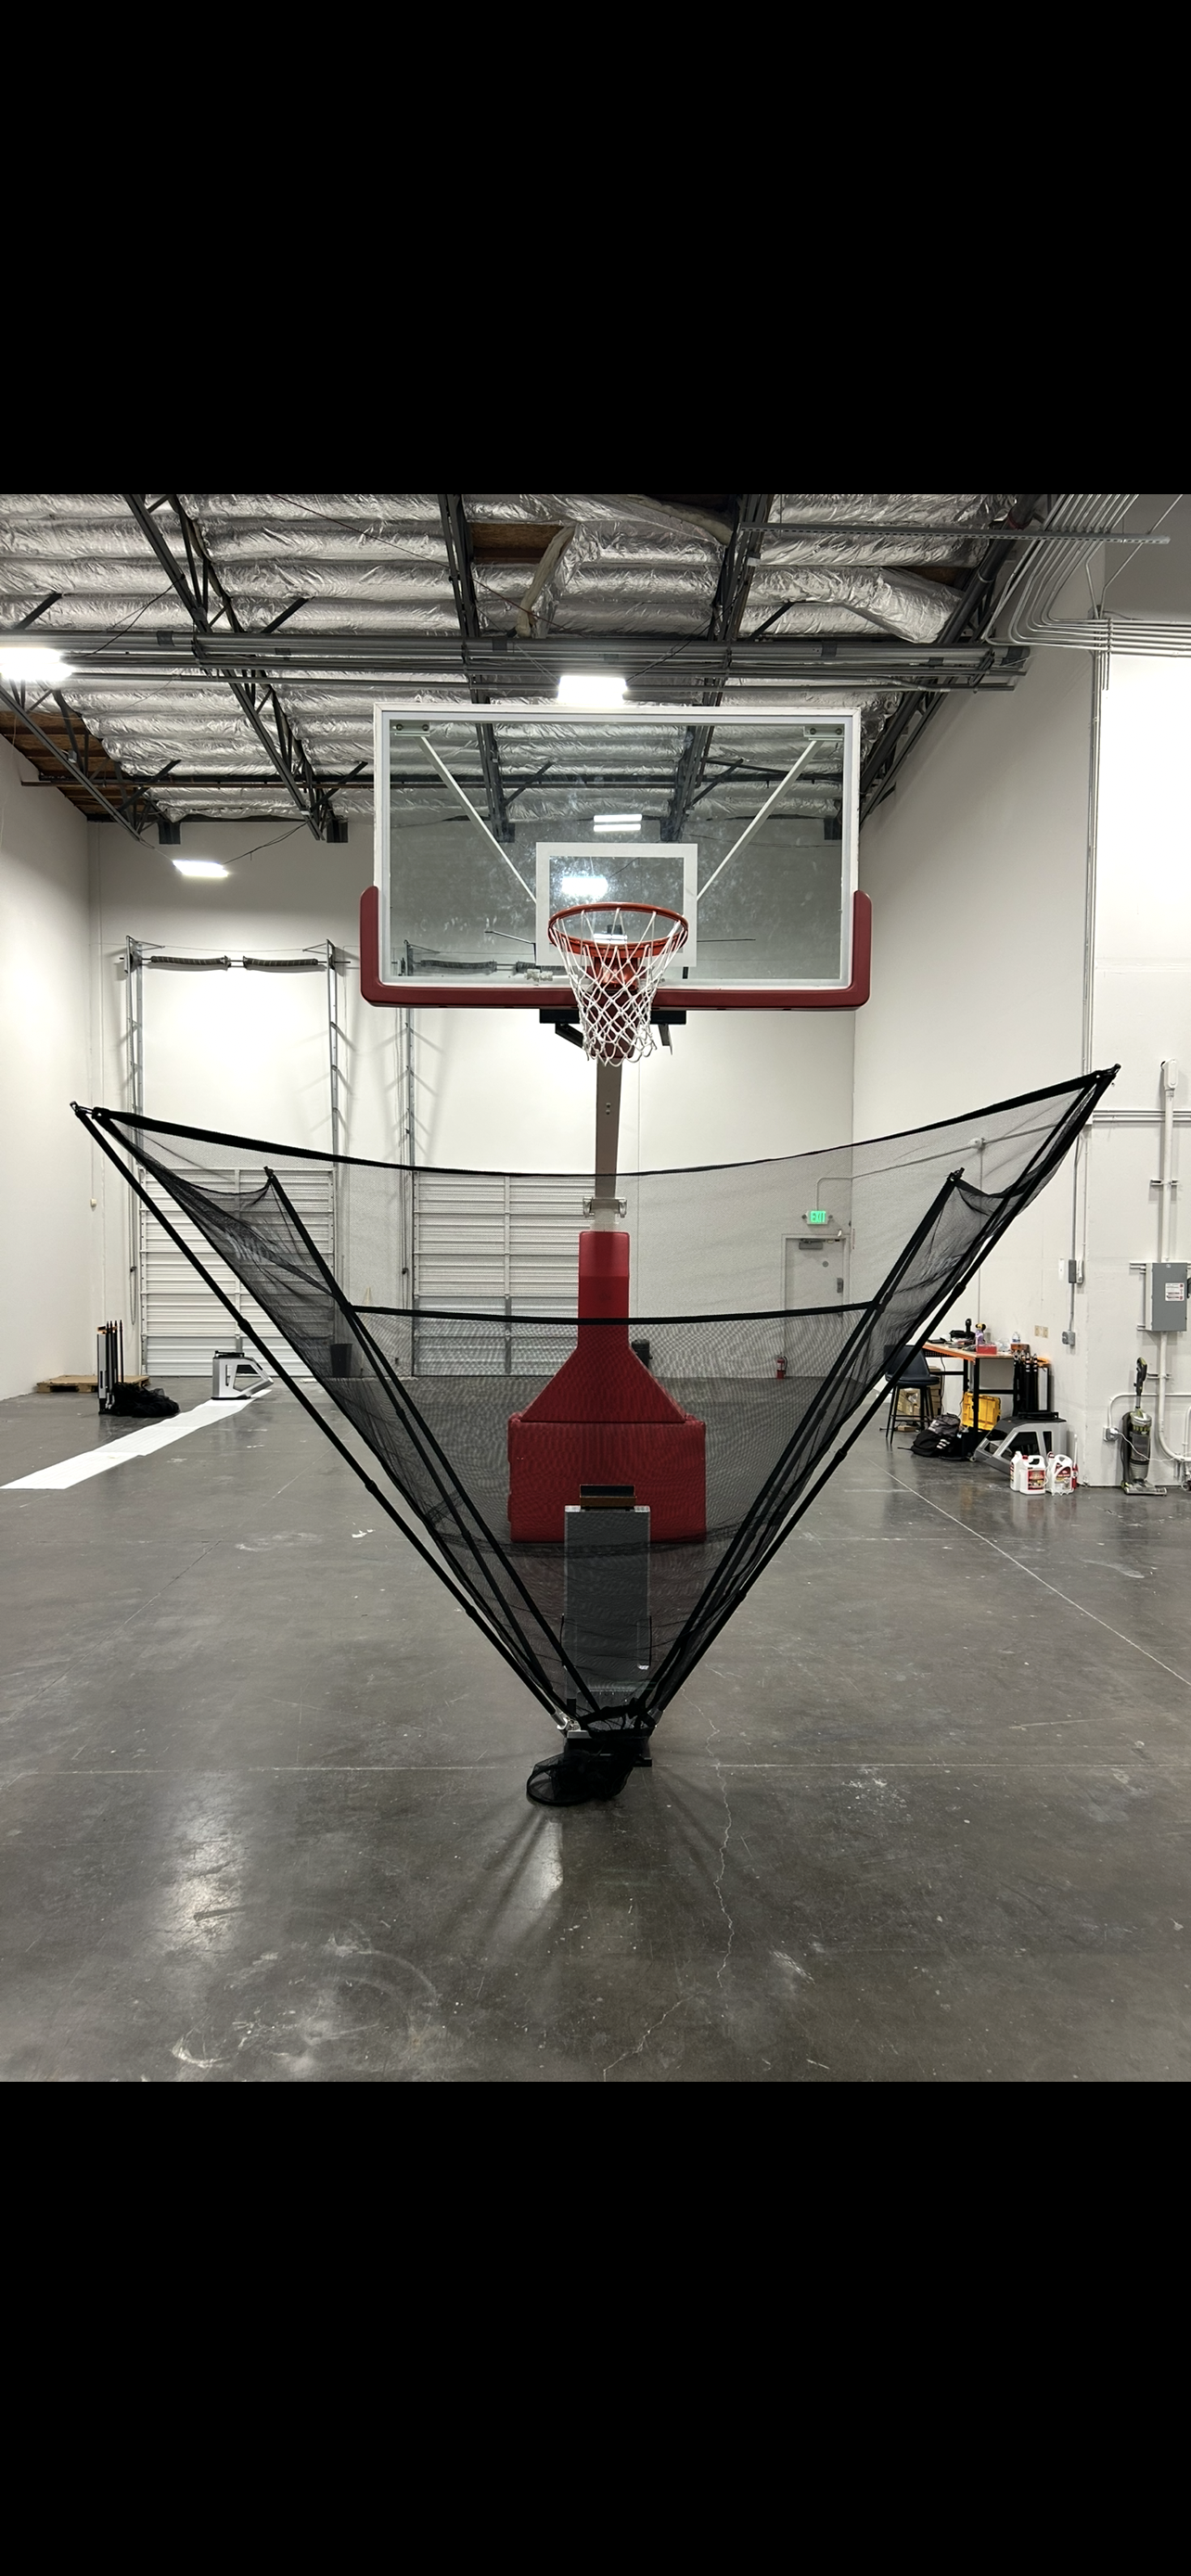
Fully extend the net rods and tighten. You’ll know the net rods are fully extended when a black marker becomes visible at the end of each rod. Ensure this marker is clearly seen before tightening the knobs.
Step 3
Extend all 4 net rods.
Step 4 :
After the net rods are a open pull them out completely.
Step 5 :
Extend the lift plate located at the back of the rebounding net until it is fully raised. Ensure it is locked in place before moving forward.
Step 6 :
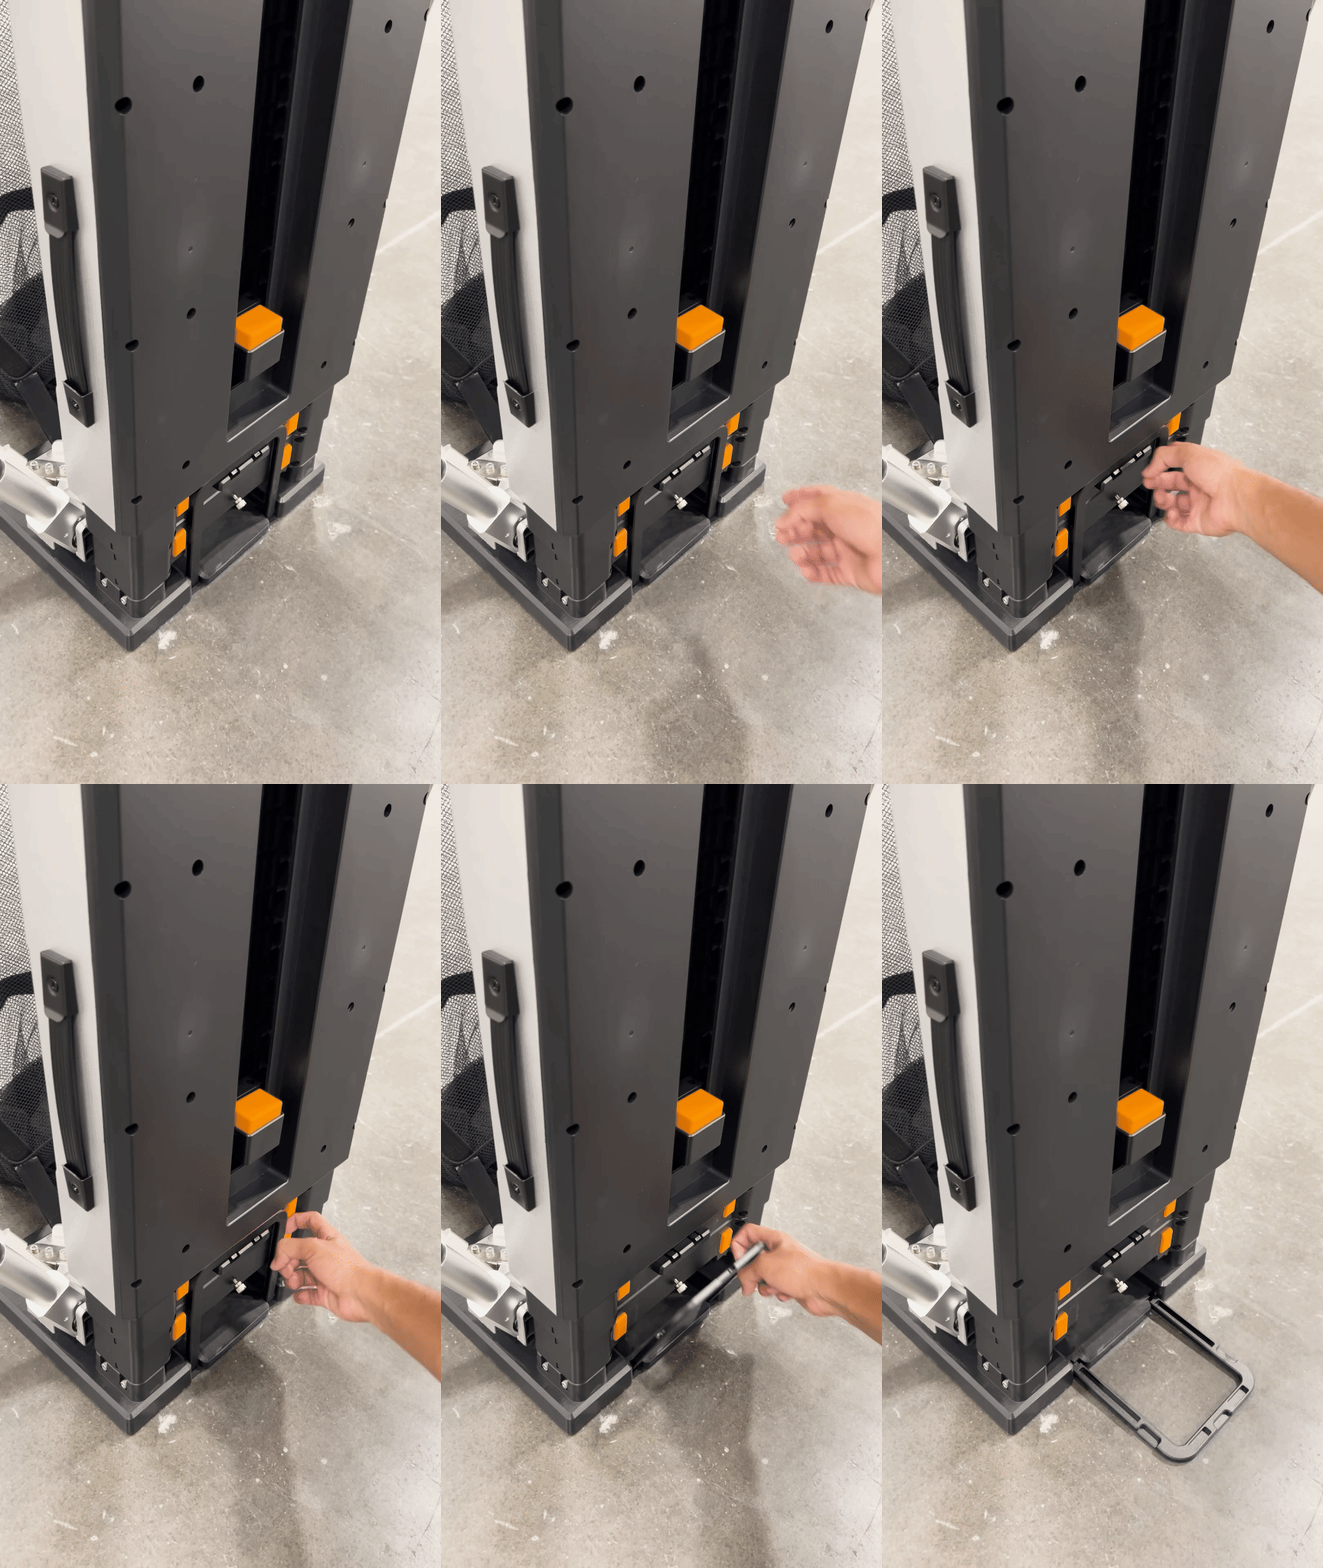
Unlock the latch at the bottom by pulling it downward until it releases.
Step 7 :
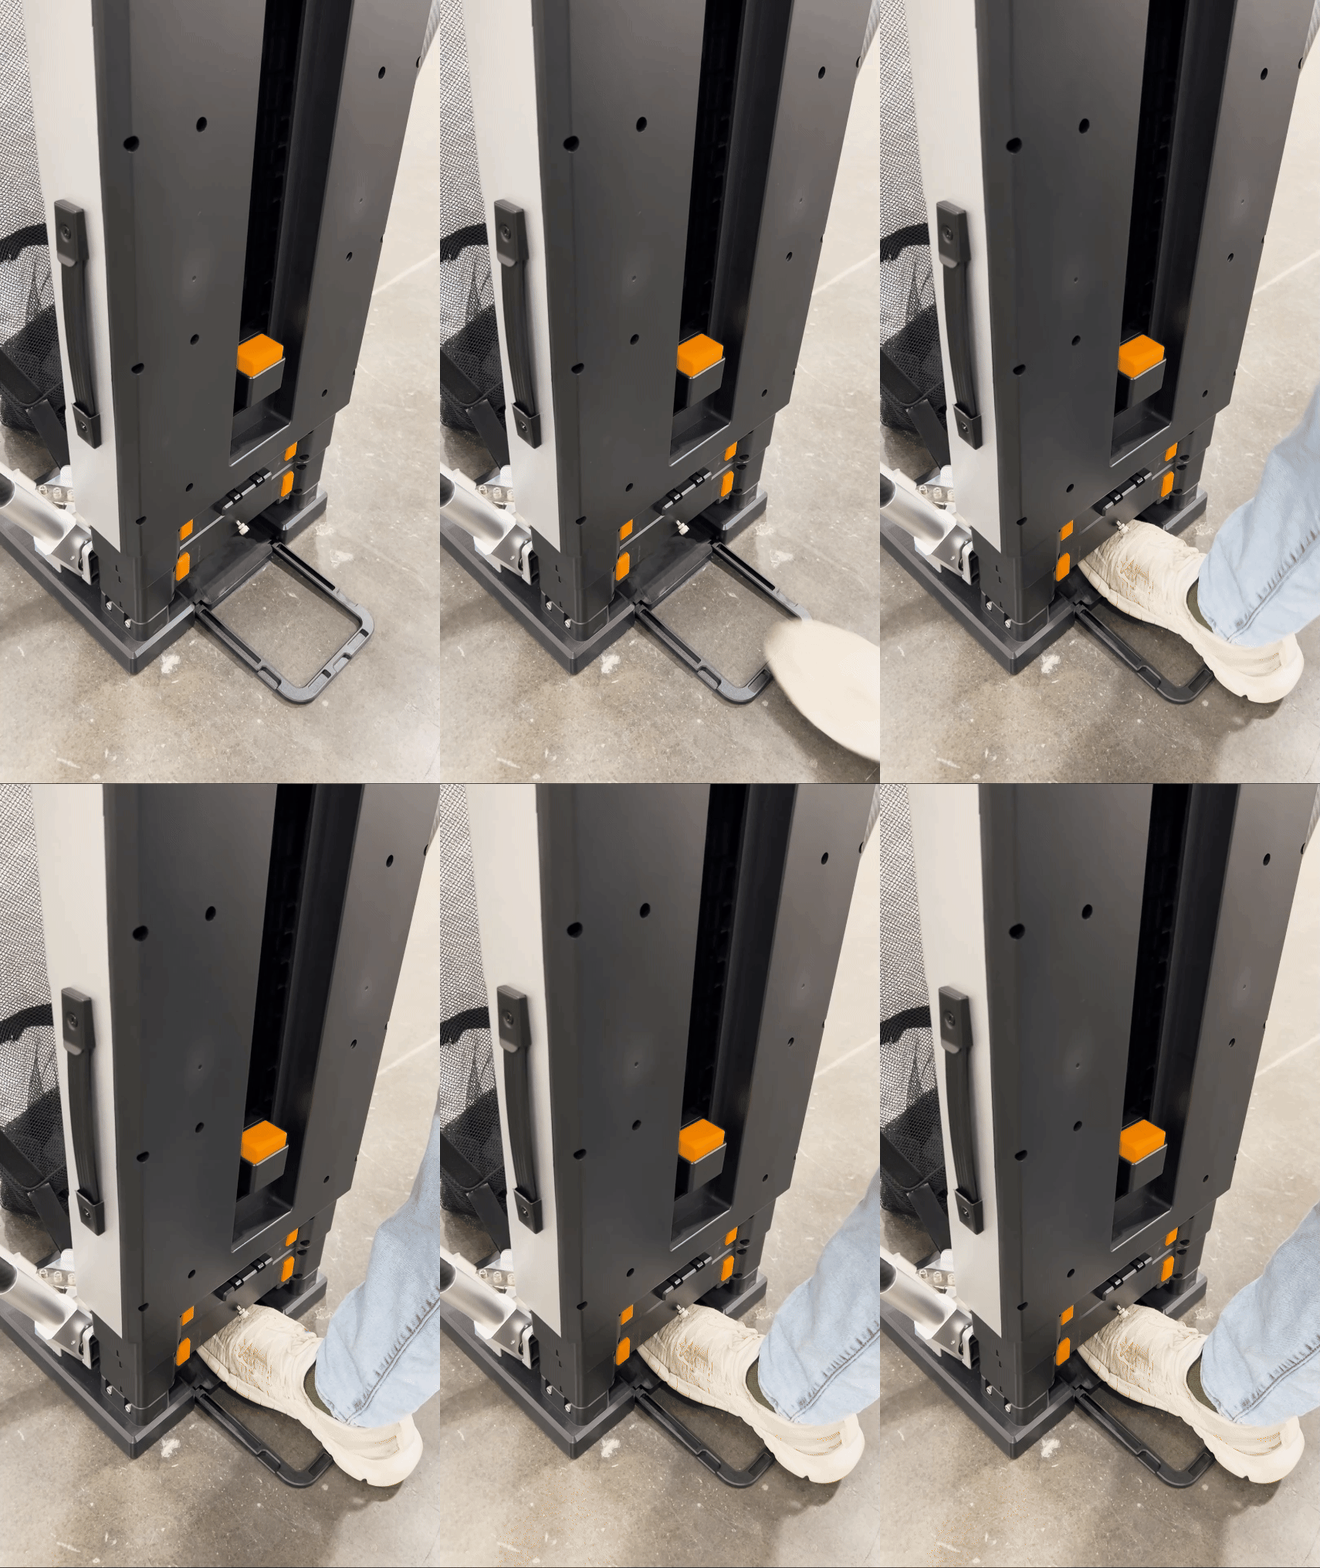
Place your foot securely into the created cubby.
Step 8 :
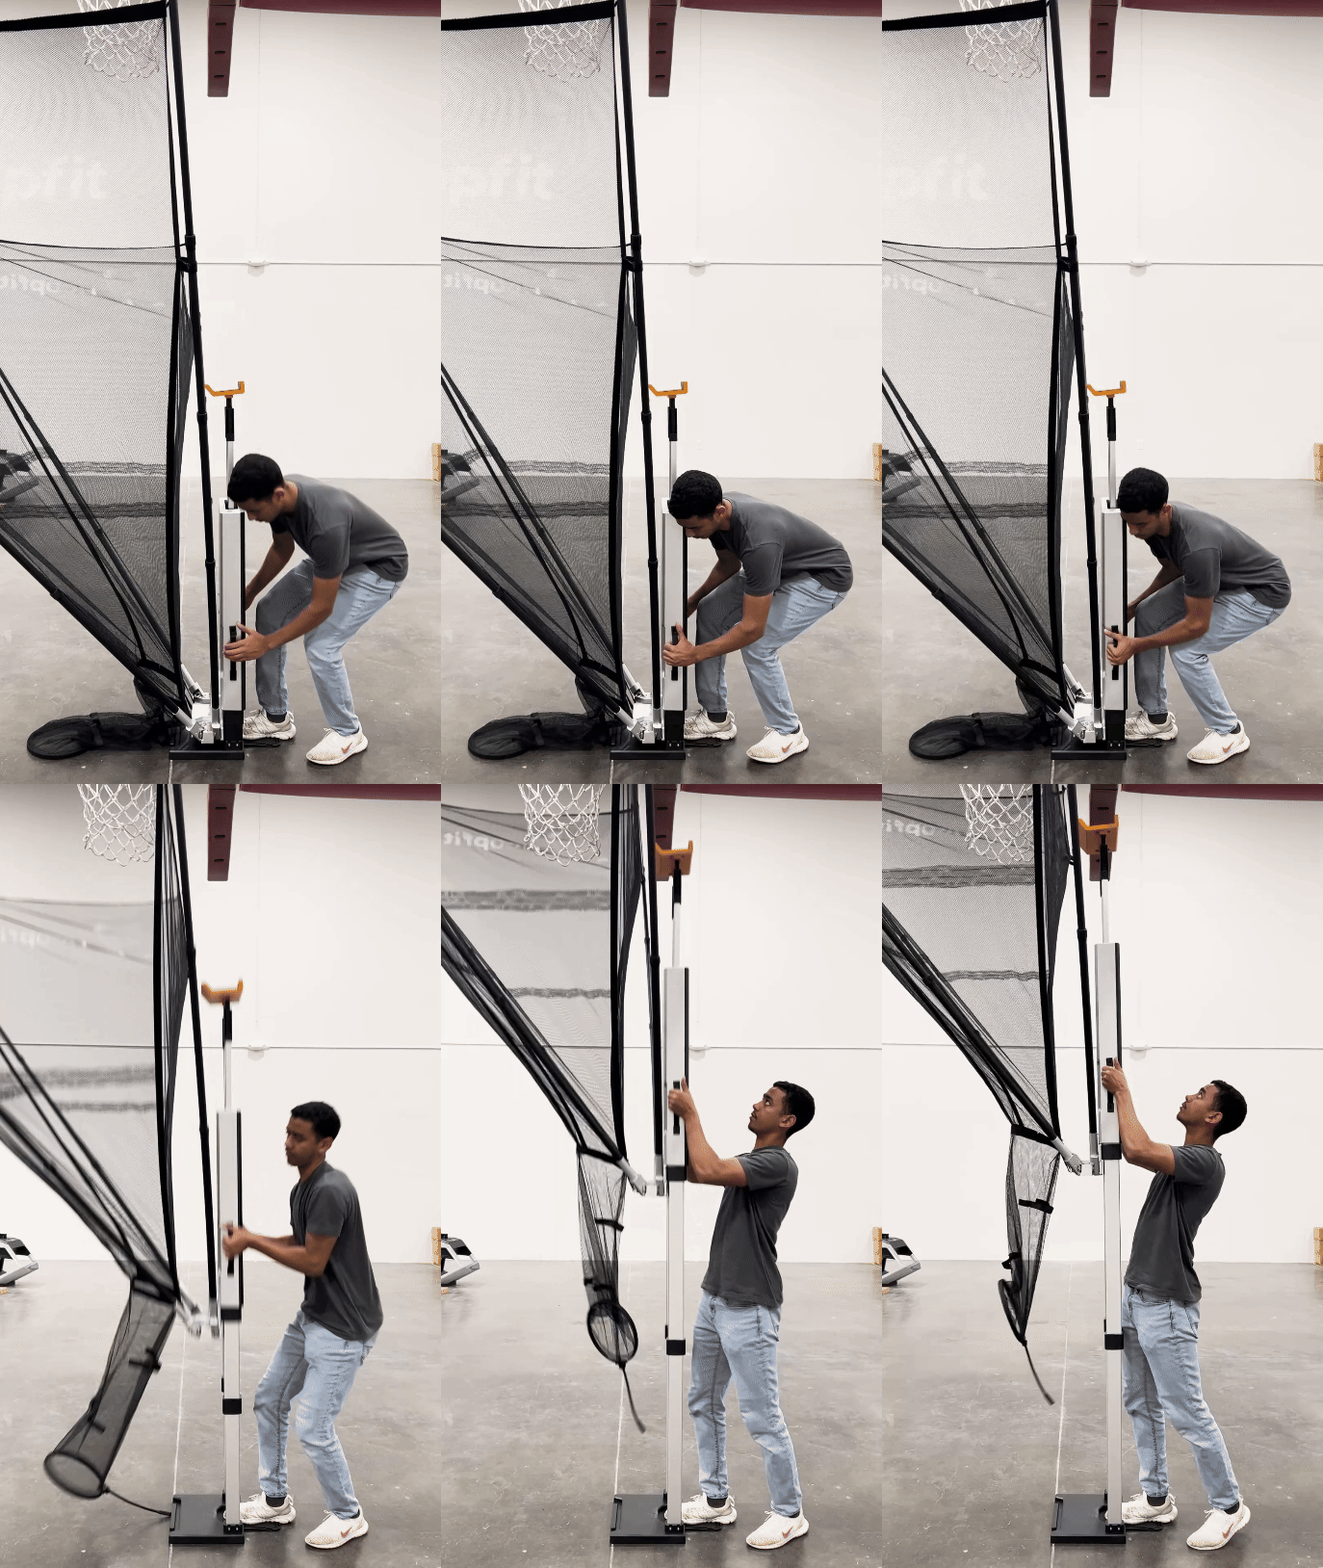
Grip either the handles or the sides of the rebounding net, then lift upward in the manner shown. Ensure a firm hold to maintain control while lifting.
Step 9 :
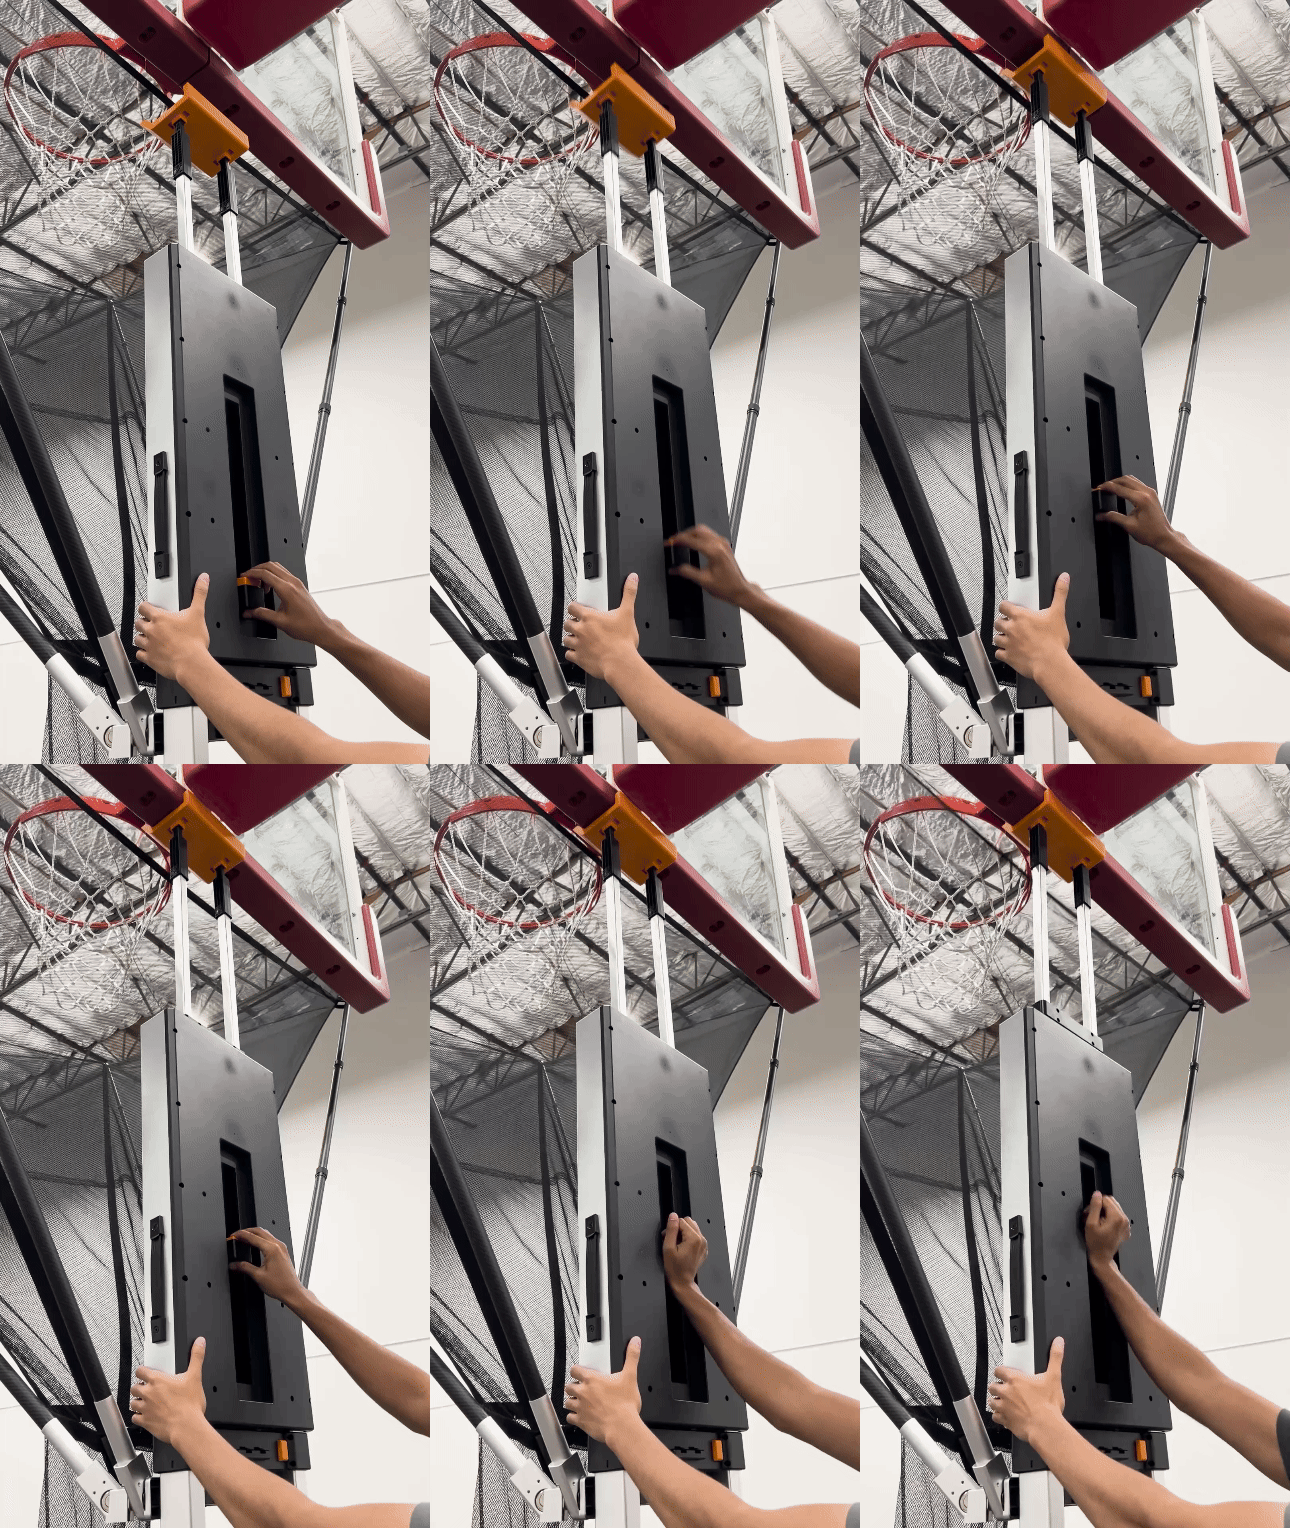
Push the lift plate against the bottom of the backboard until you feel the springs engage. Ensure the plate is securely positioned before moving on.
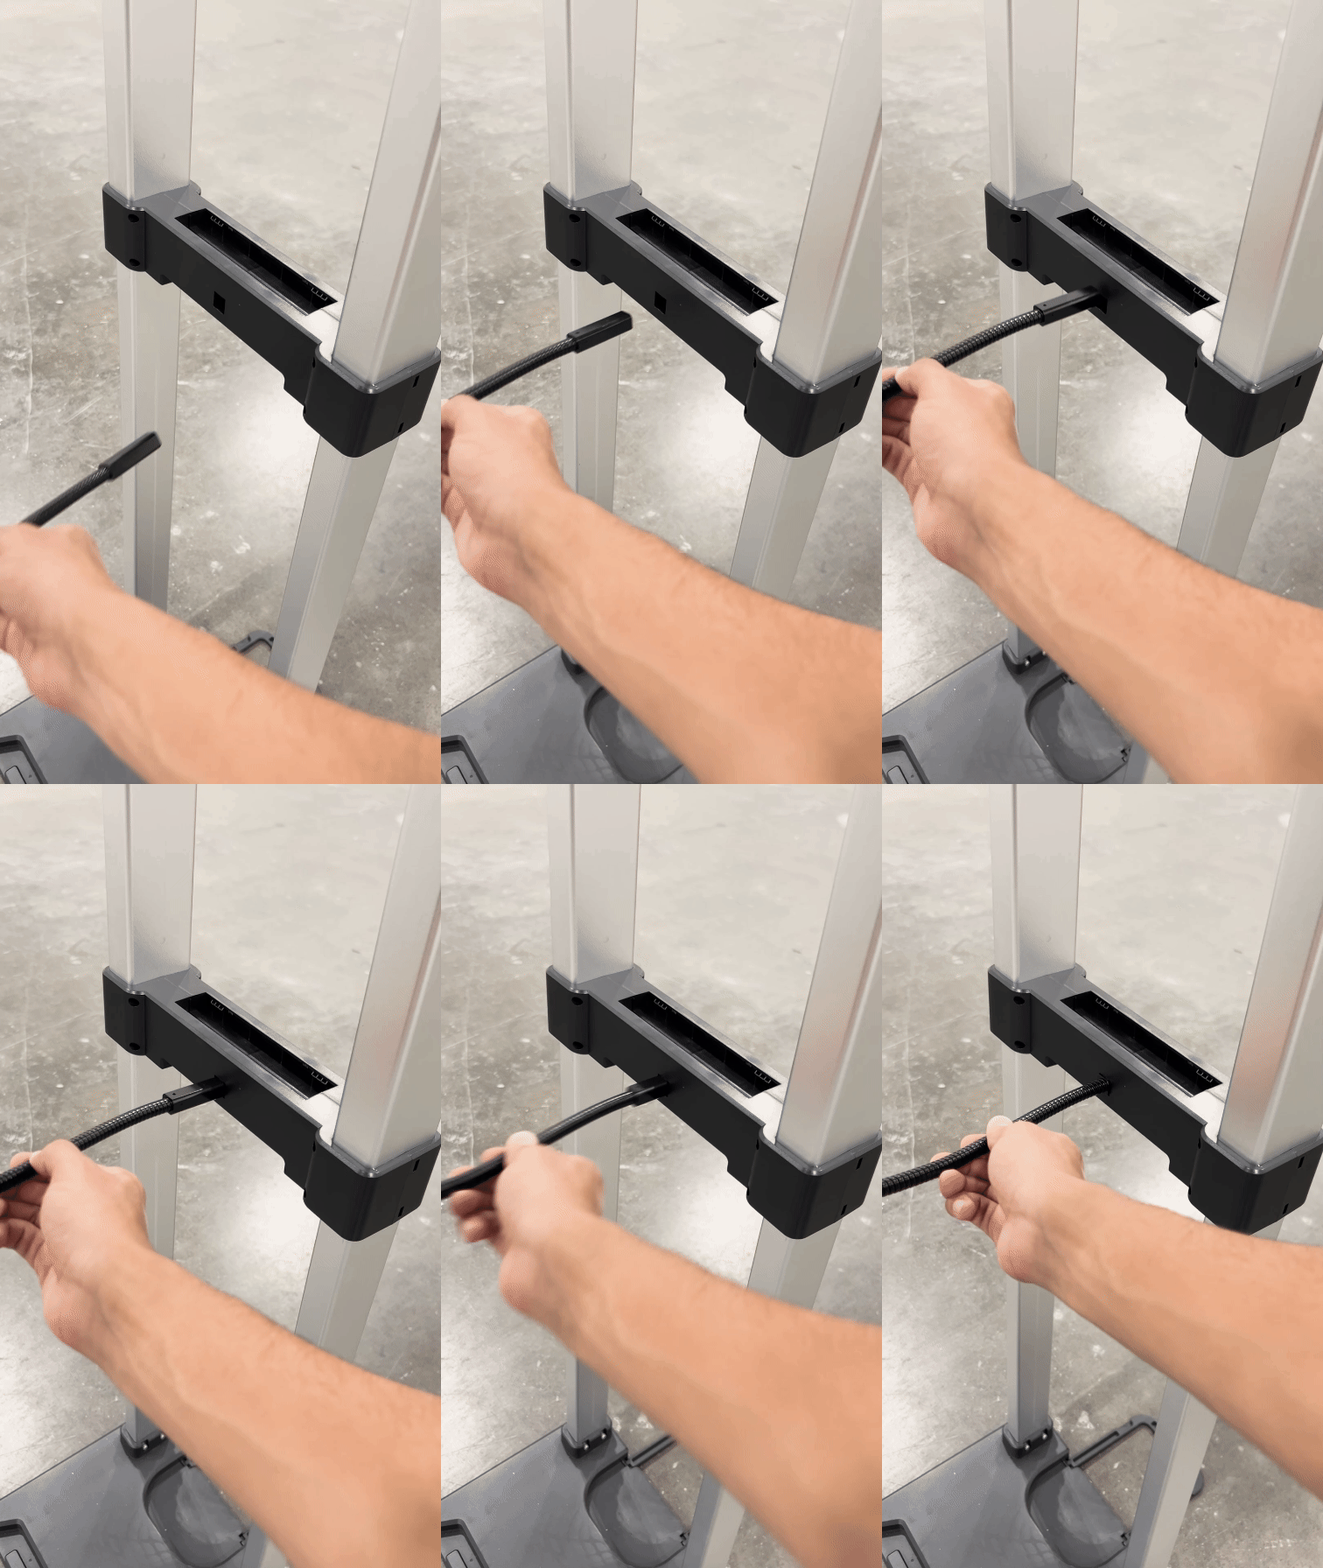
Step 10 :
Insert the ring at the front into the designated slot, then screw it firmly into place.
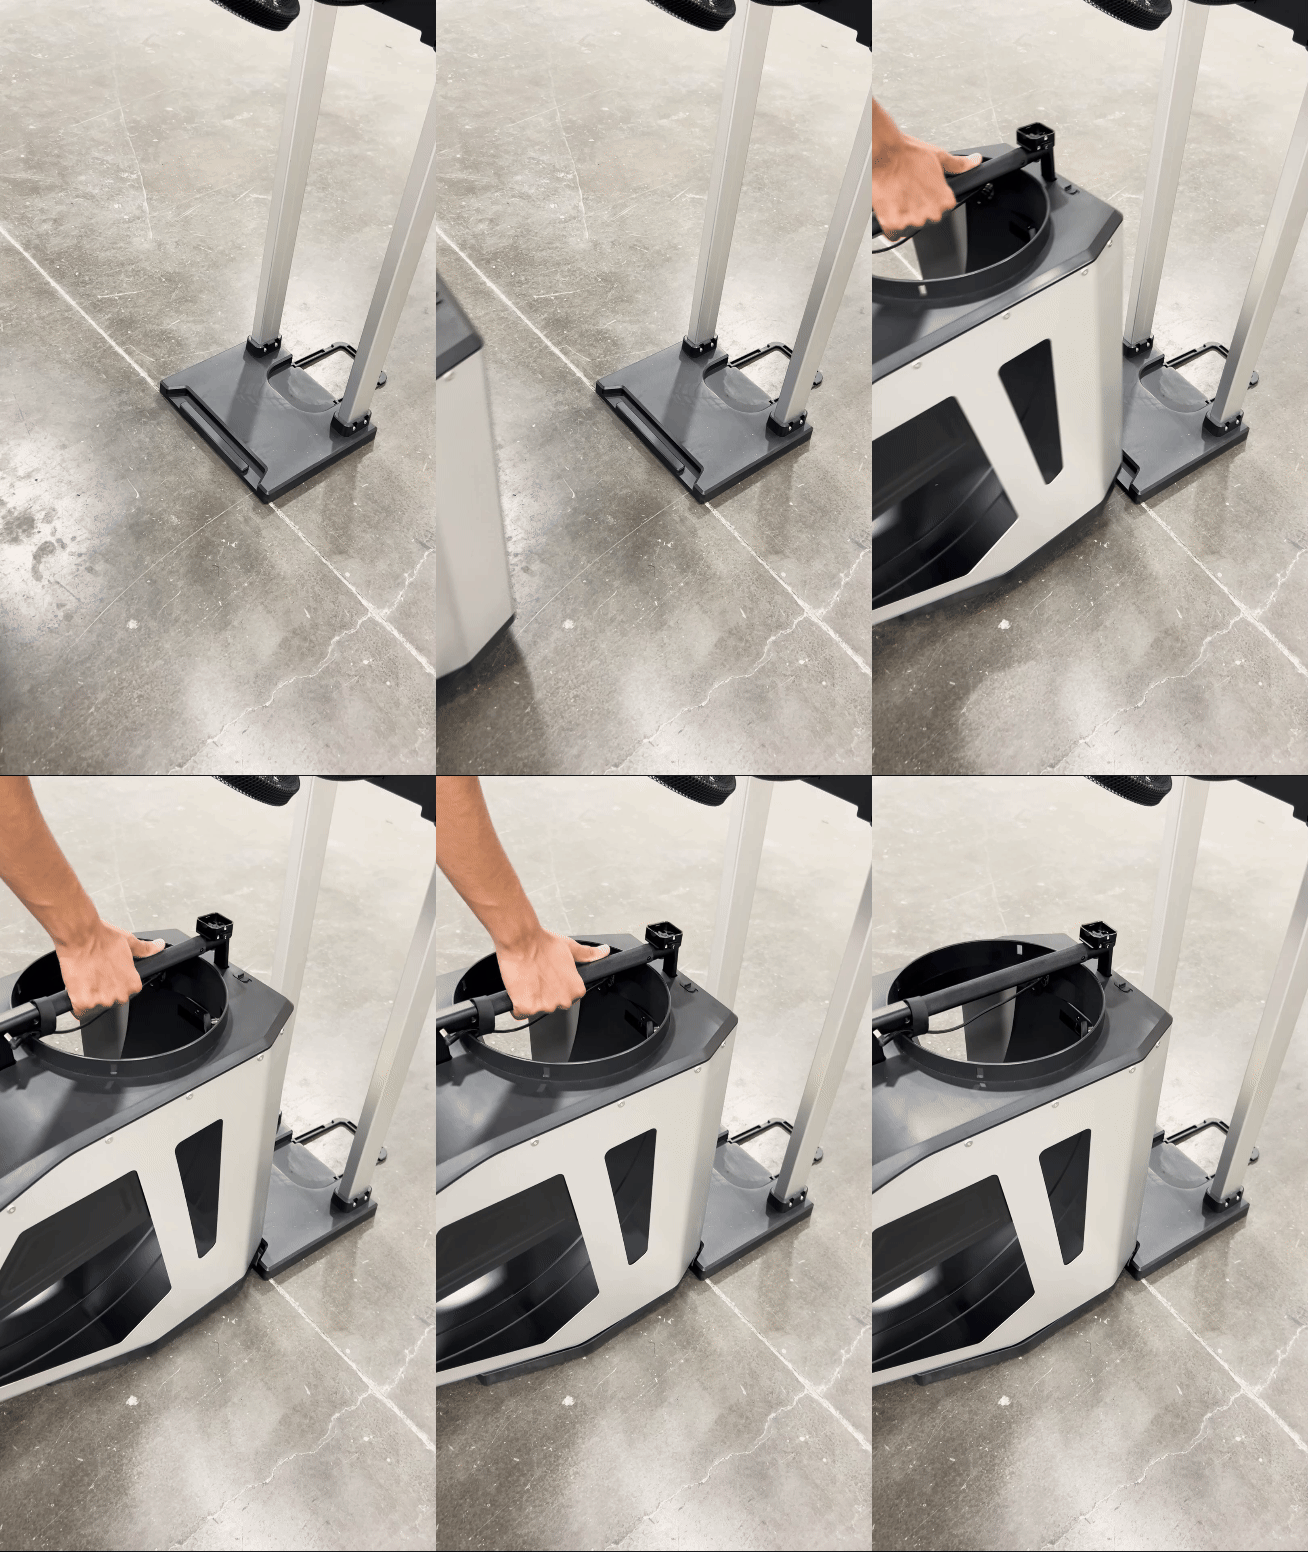
Step 11 :
Place the launcher into the designated groove, ensuring it fits securely. Check for proper alignment before continuing.
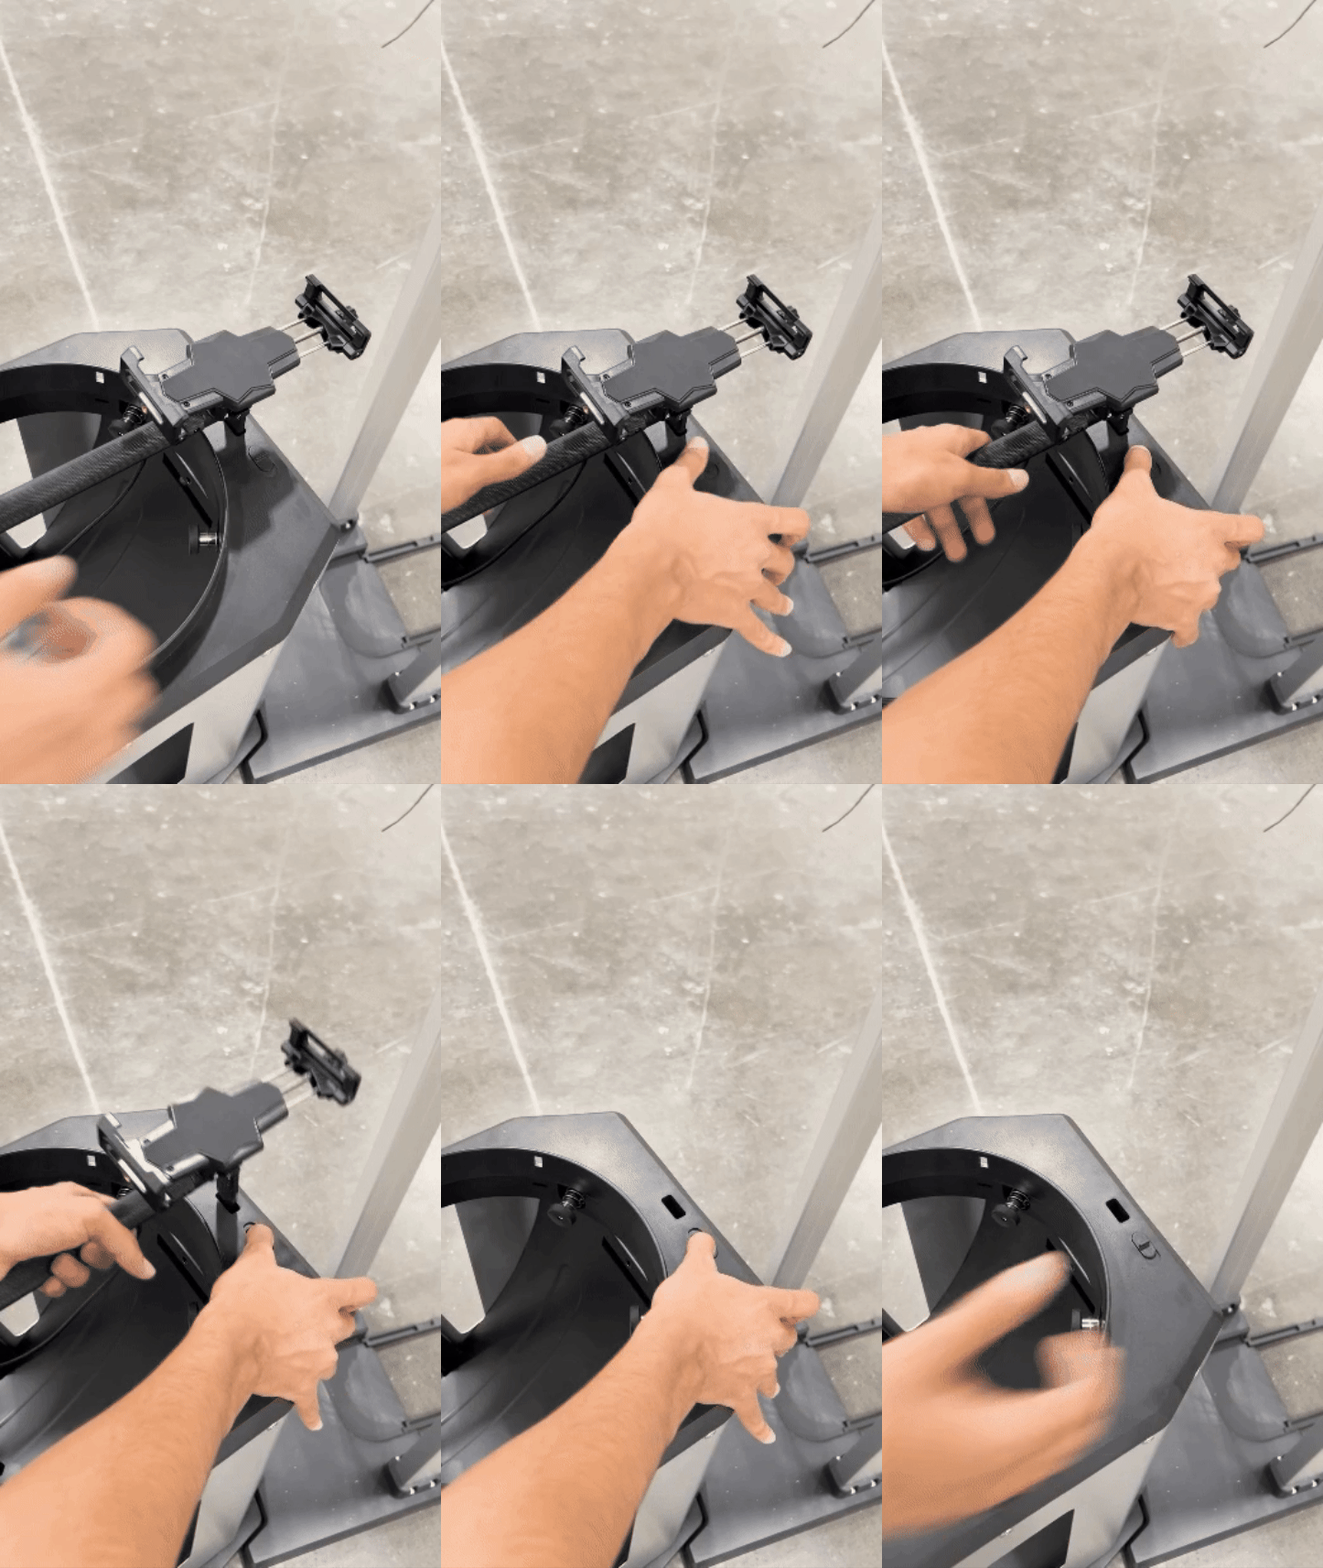
Step 12 :
Unlatch the handle and lift it up.
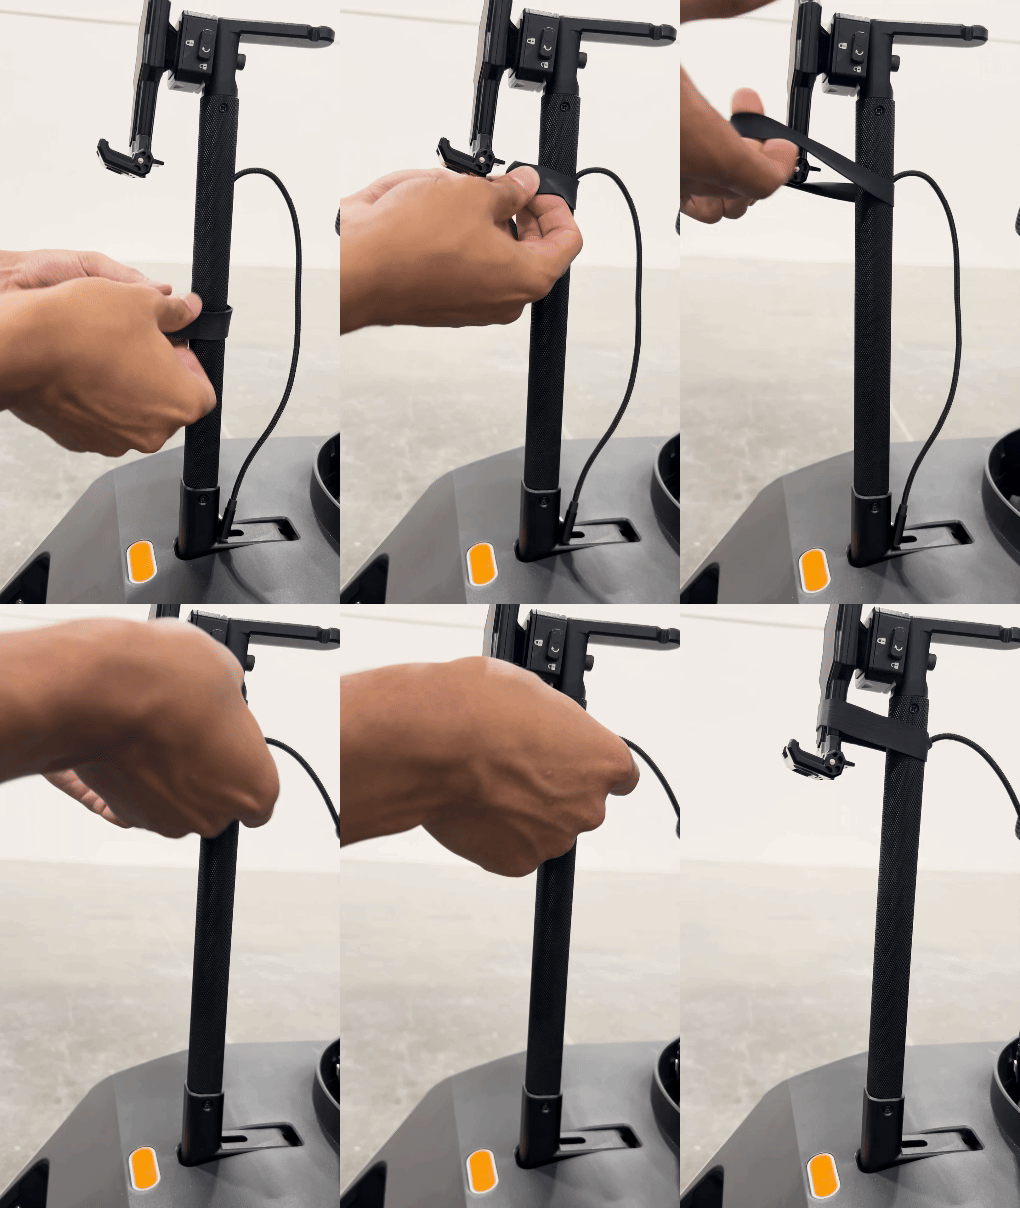
Step 13 :
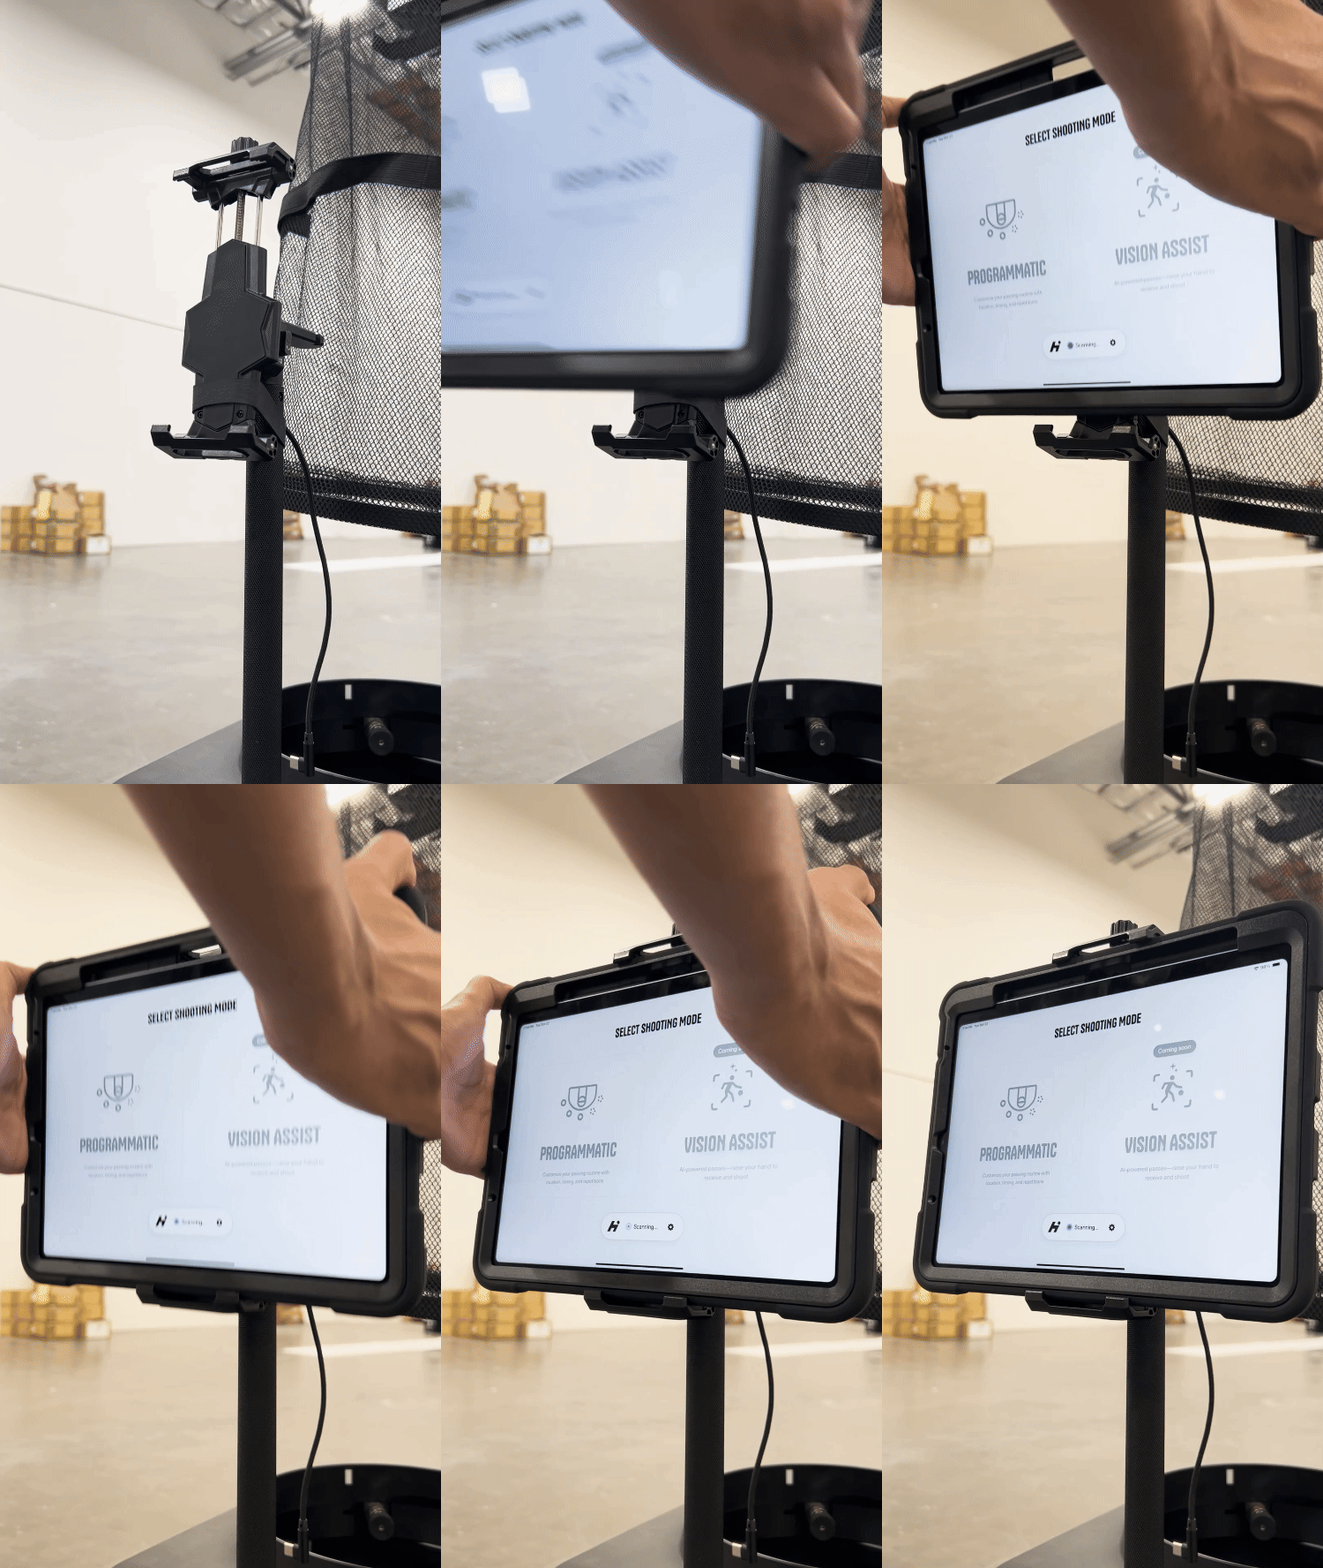
Secure the rubber around the iPad holder
Step 14 :
Place the iPad into the holder, making sure it is centered and securely fastened. Double-check for stability before use.
Step 15 :
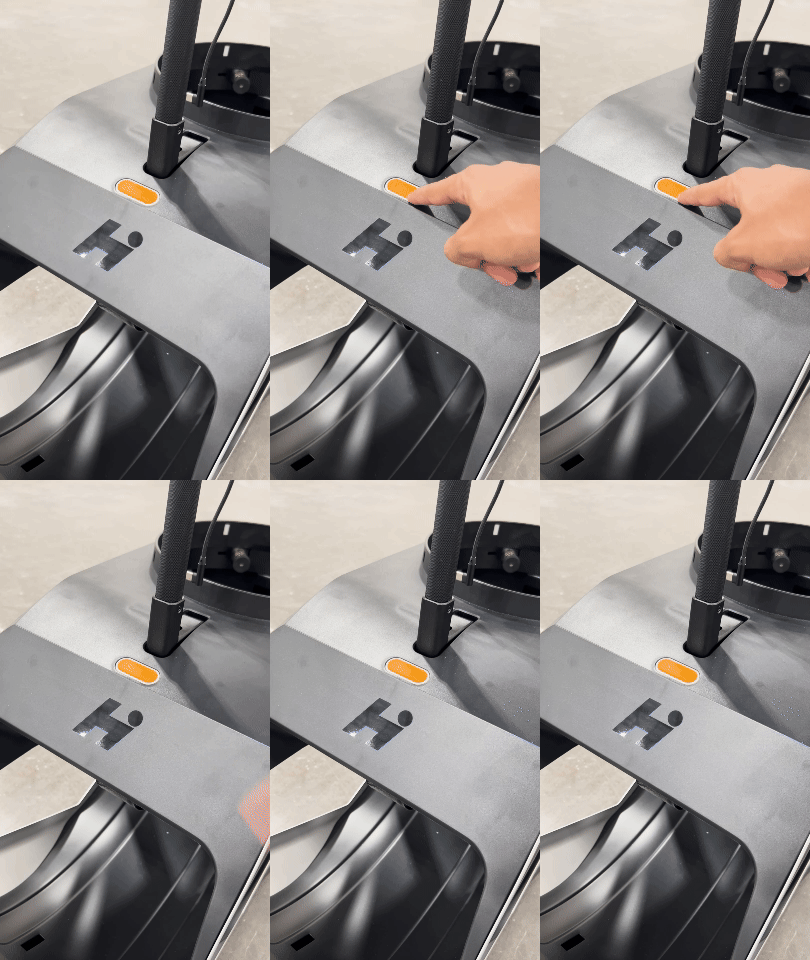
Press and hold the power button for 3 seconds until the indicator light starts blinking blue, signaling that it is ready.
TakeDown
Step 1 :
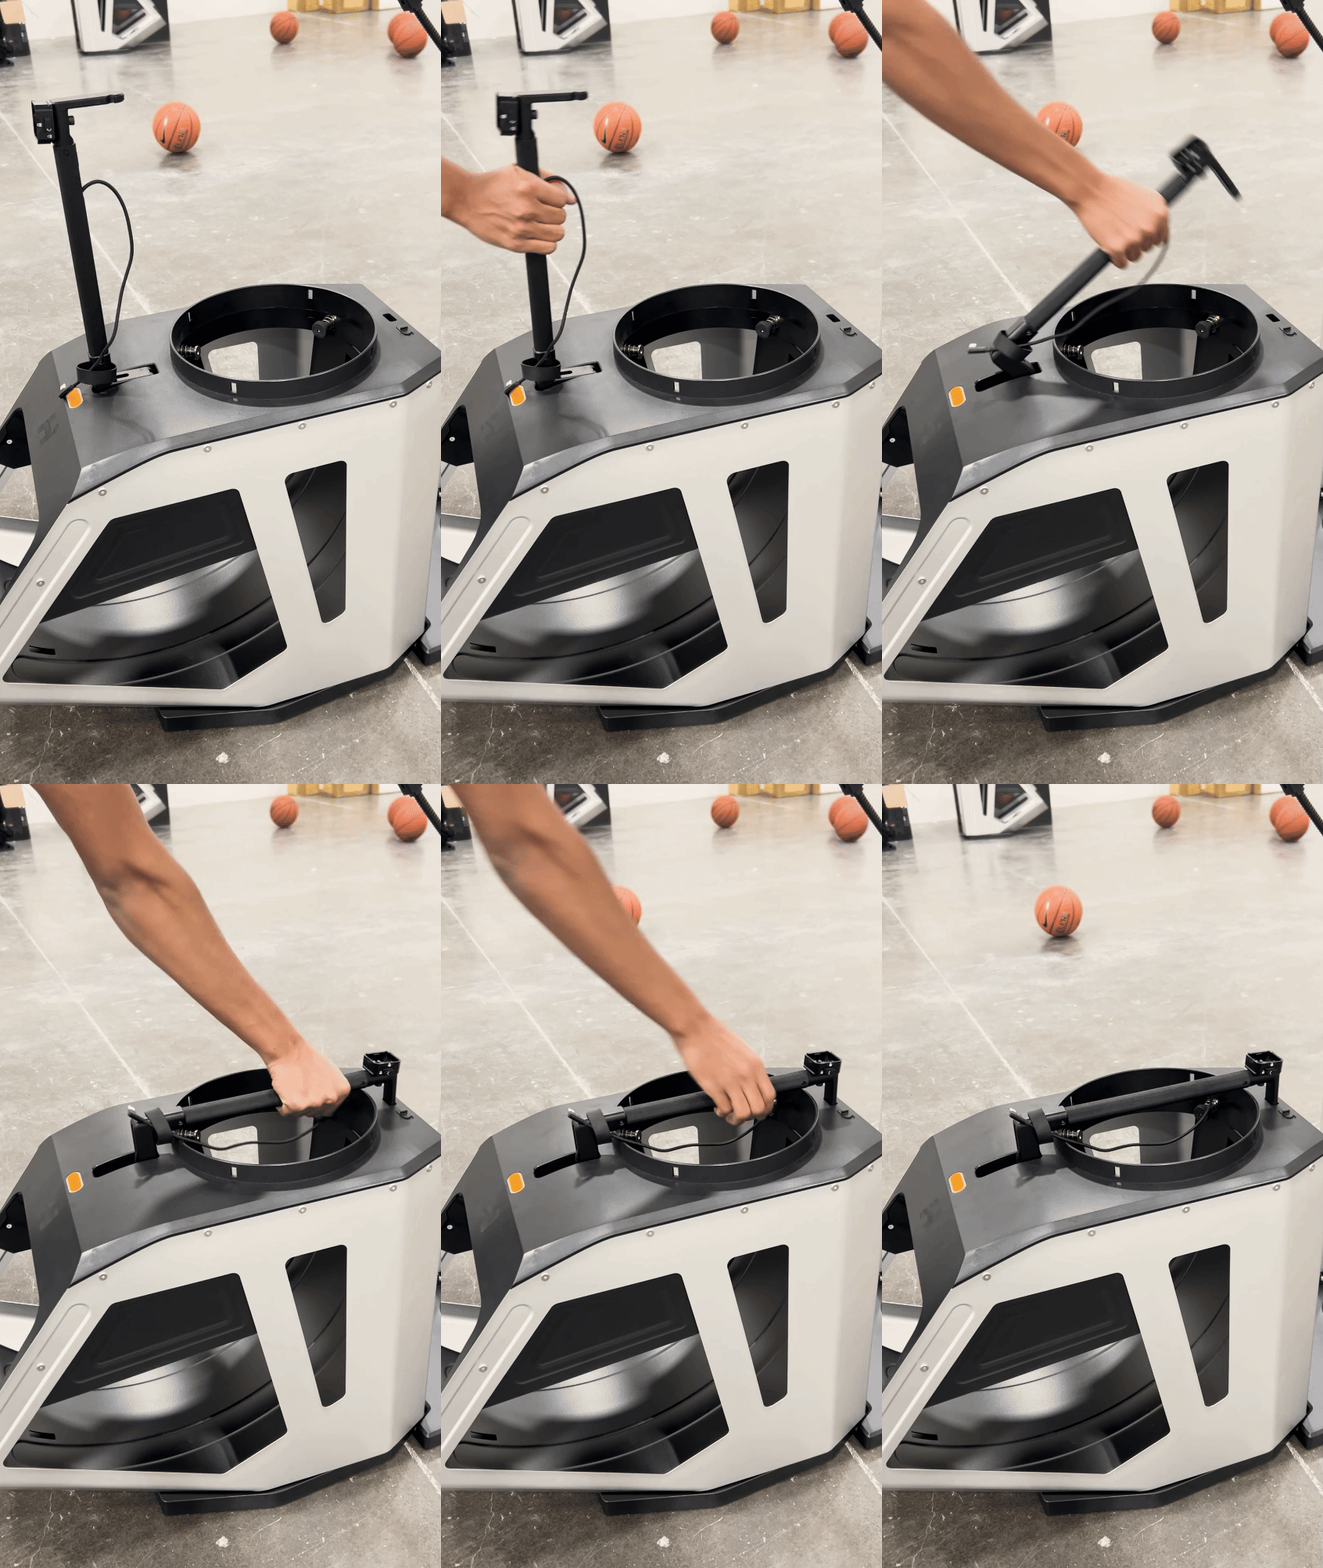
Press down on the handle until you hear a click, indicating it’s securely engaged.
STEP 2 :
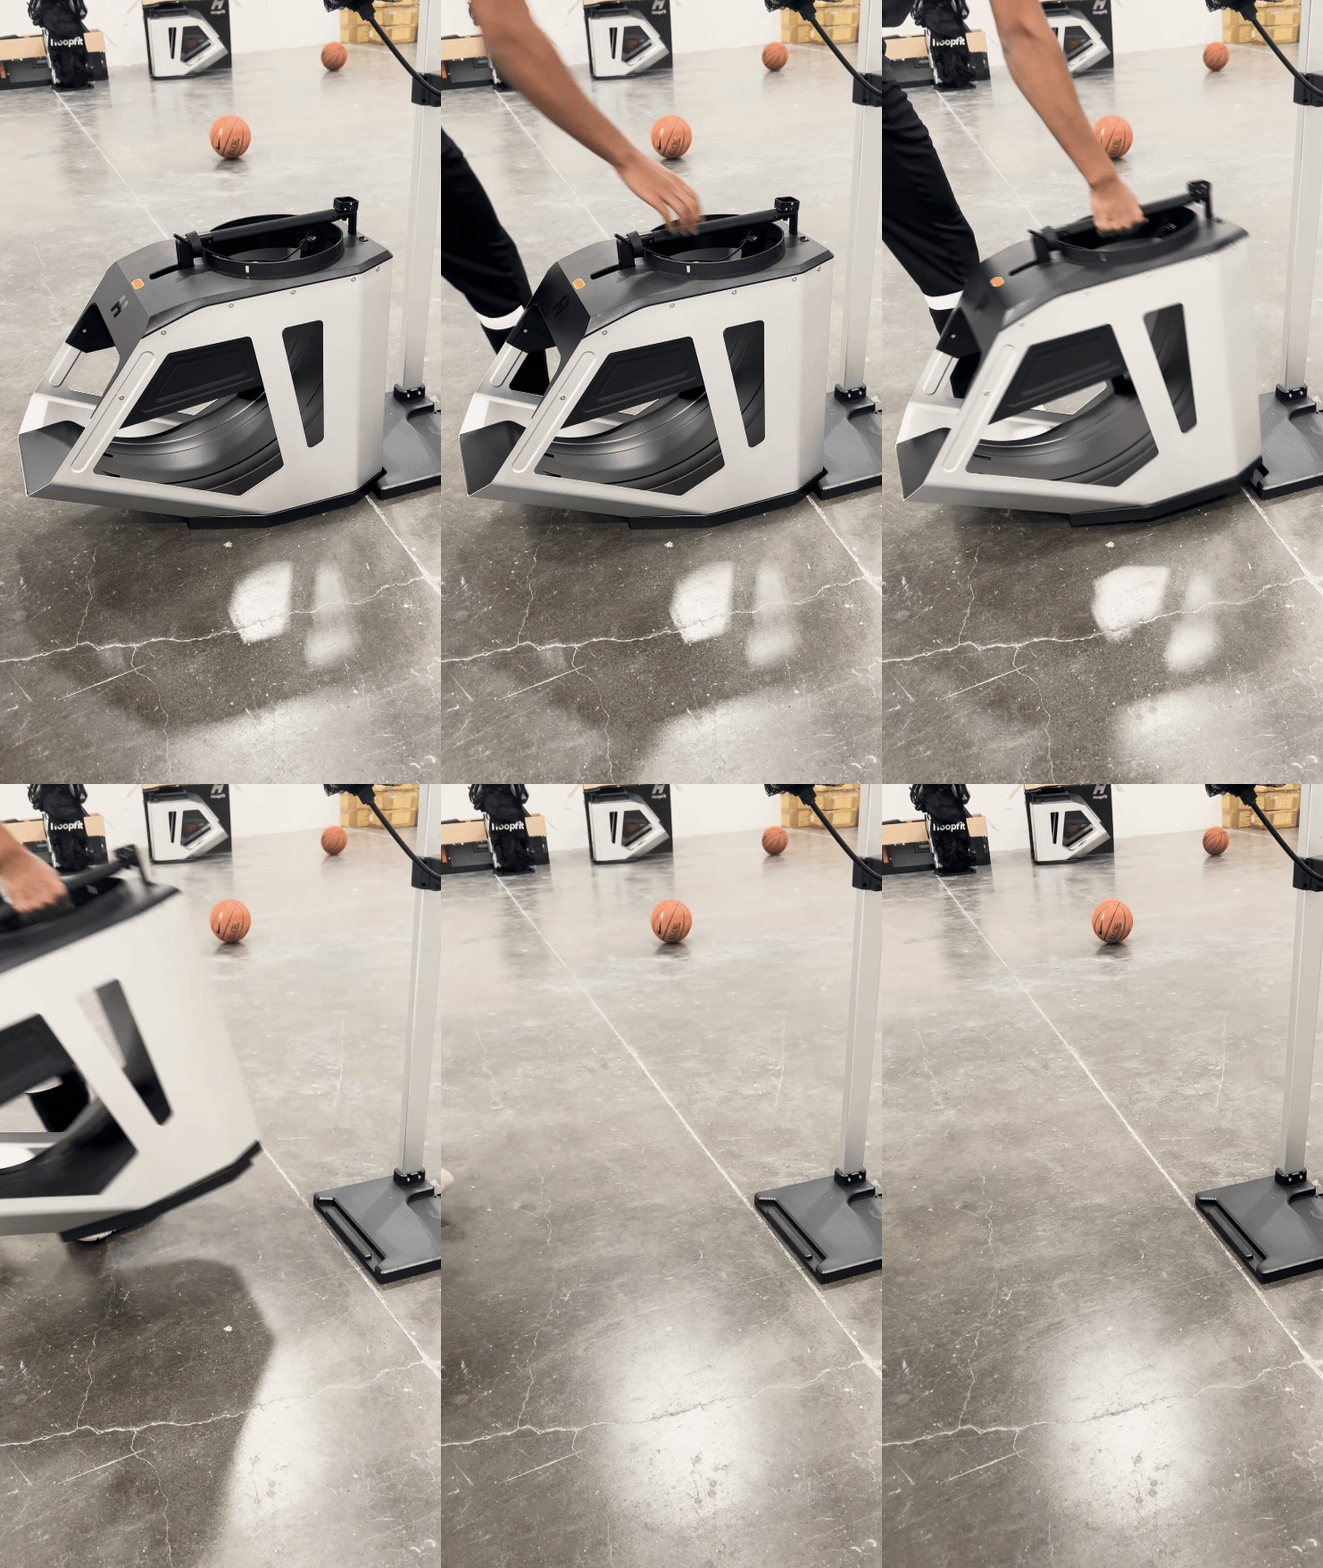
Using the lever, lift the launcher out of the way.
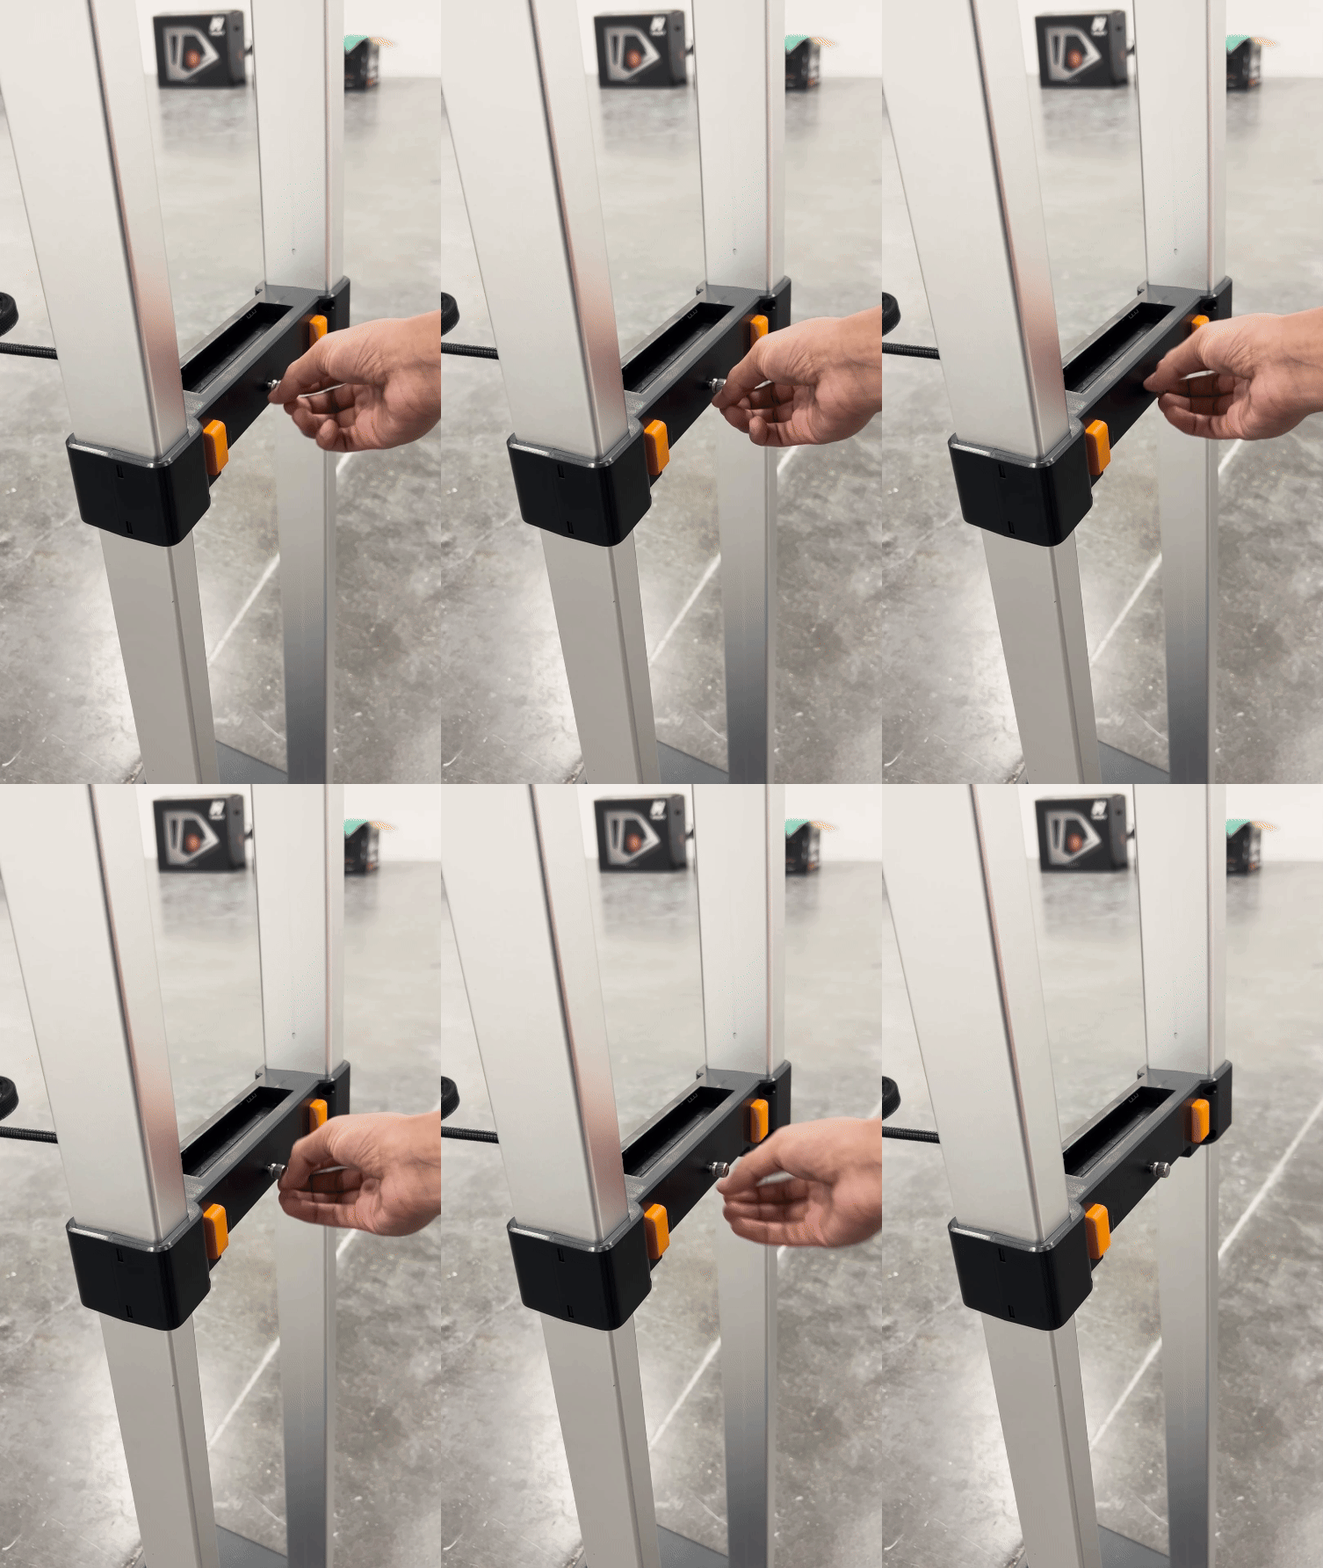
Step 3 :
Loosen the ring screw completely, then gently slide off and remove the ring from its position.
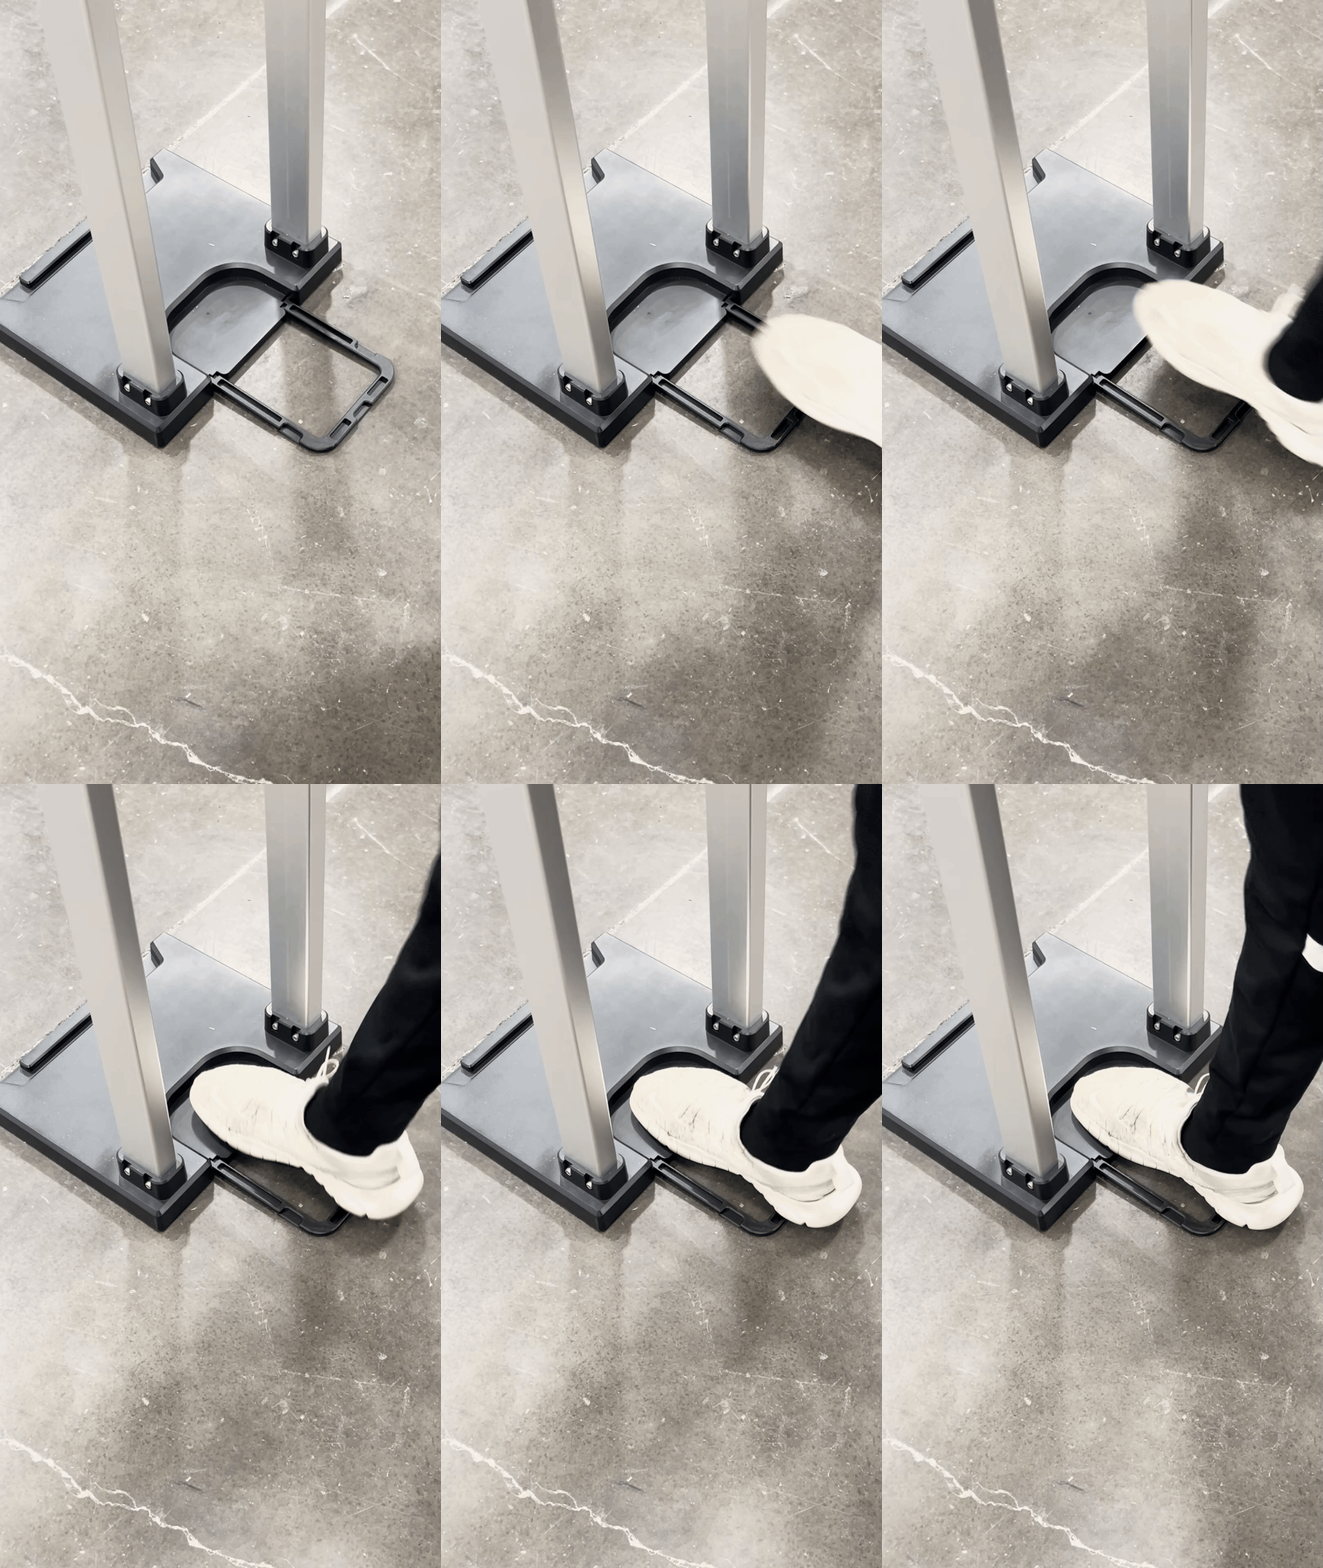
Step 4 :
Place your foot securely here. Ensure your foot is firmly positioned before continuing.
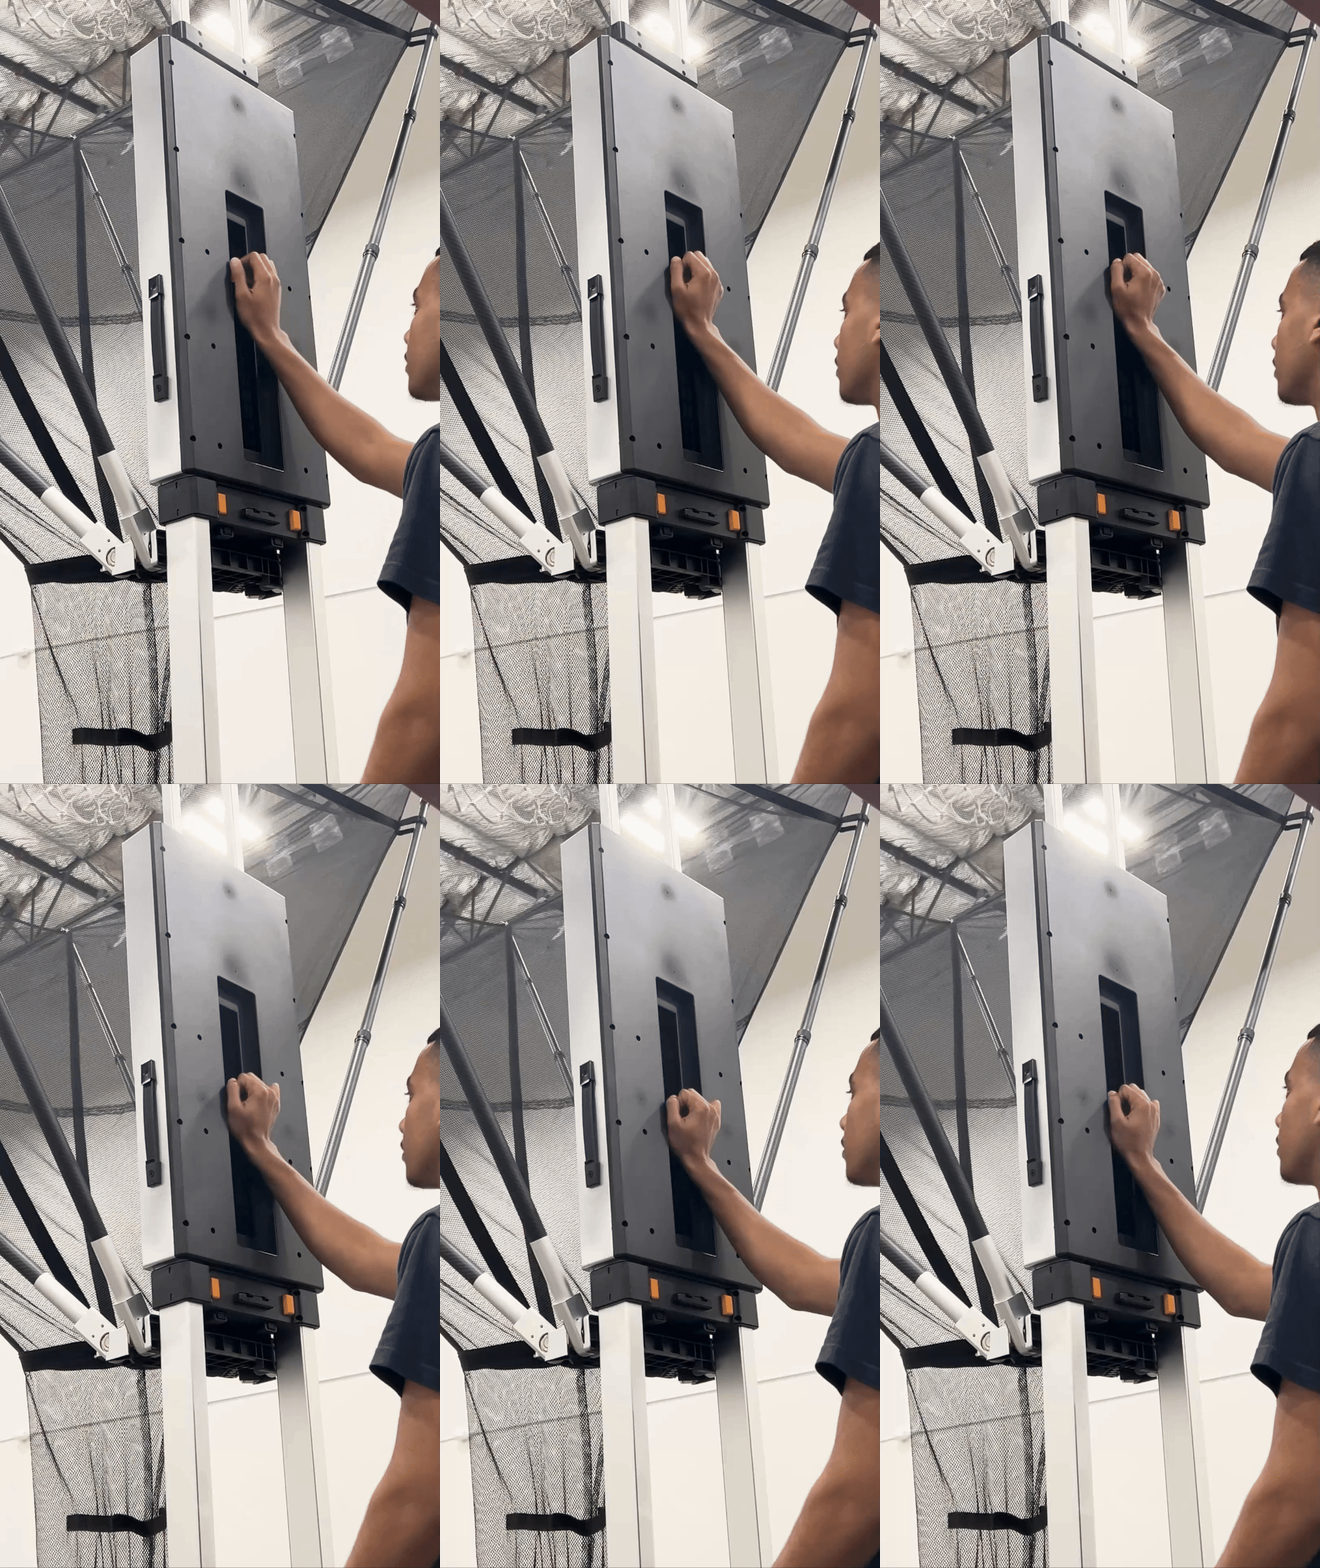
Step 5 :
Push down to disengage the springs from the bottom of the backboard.
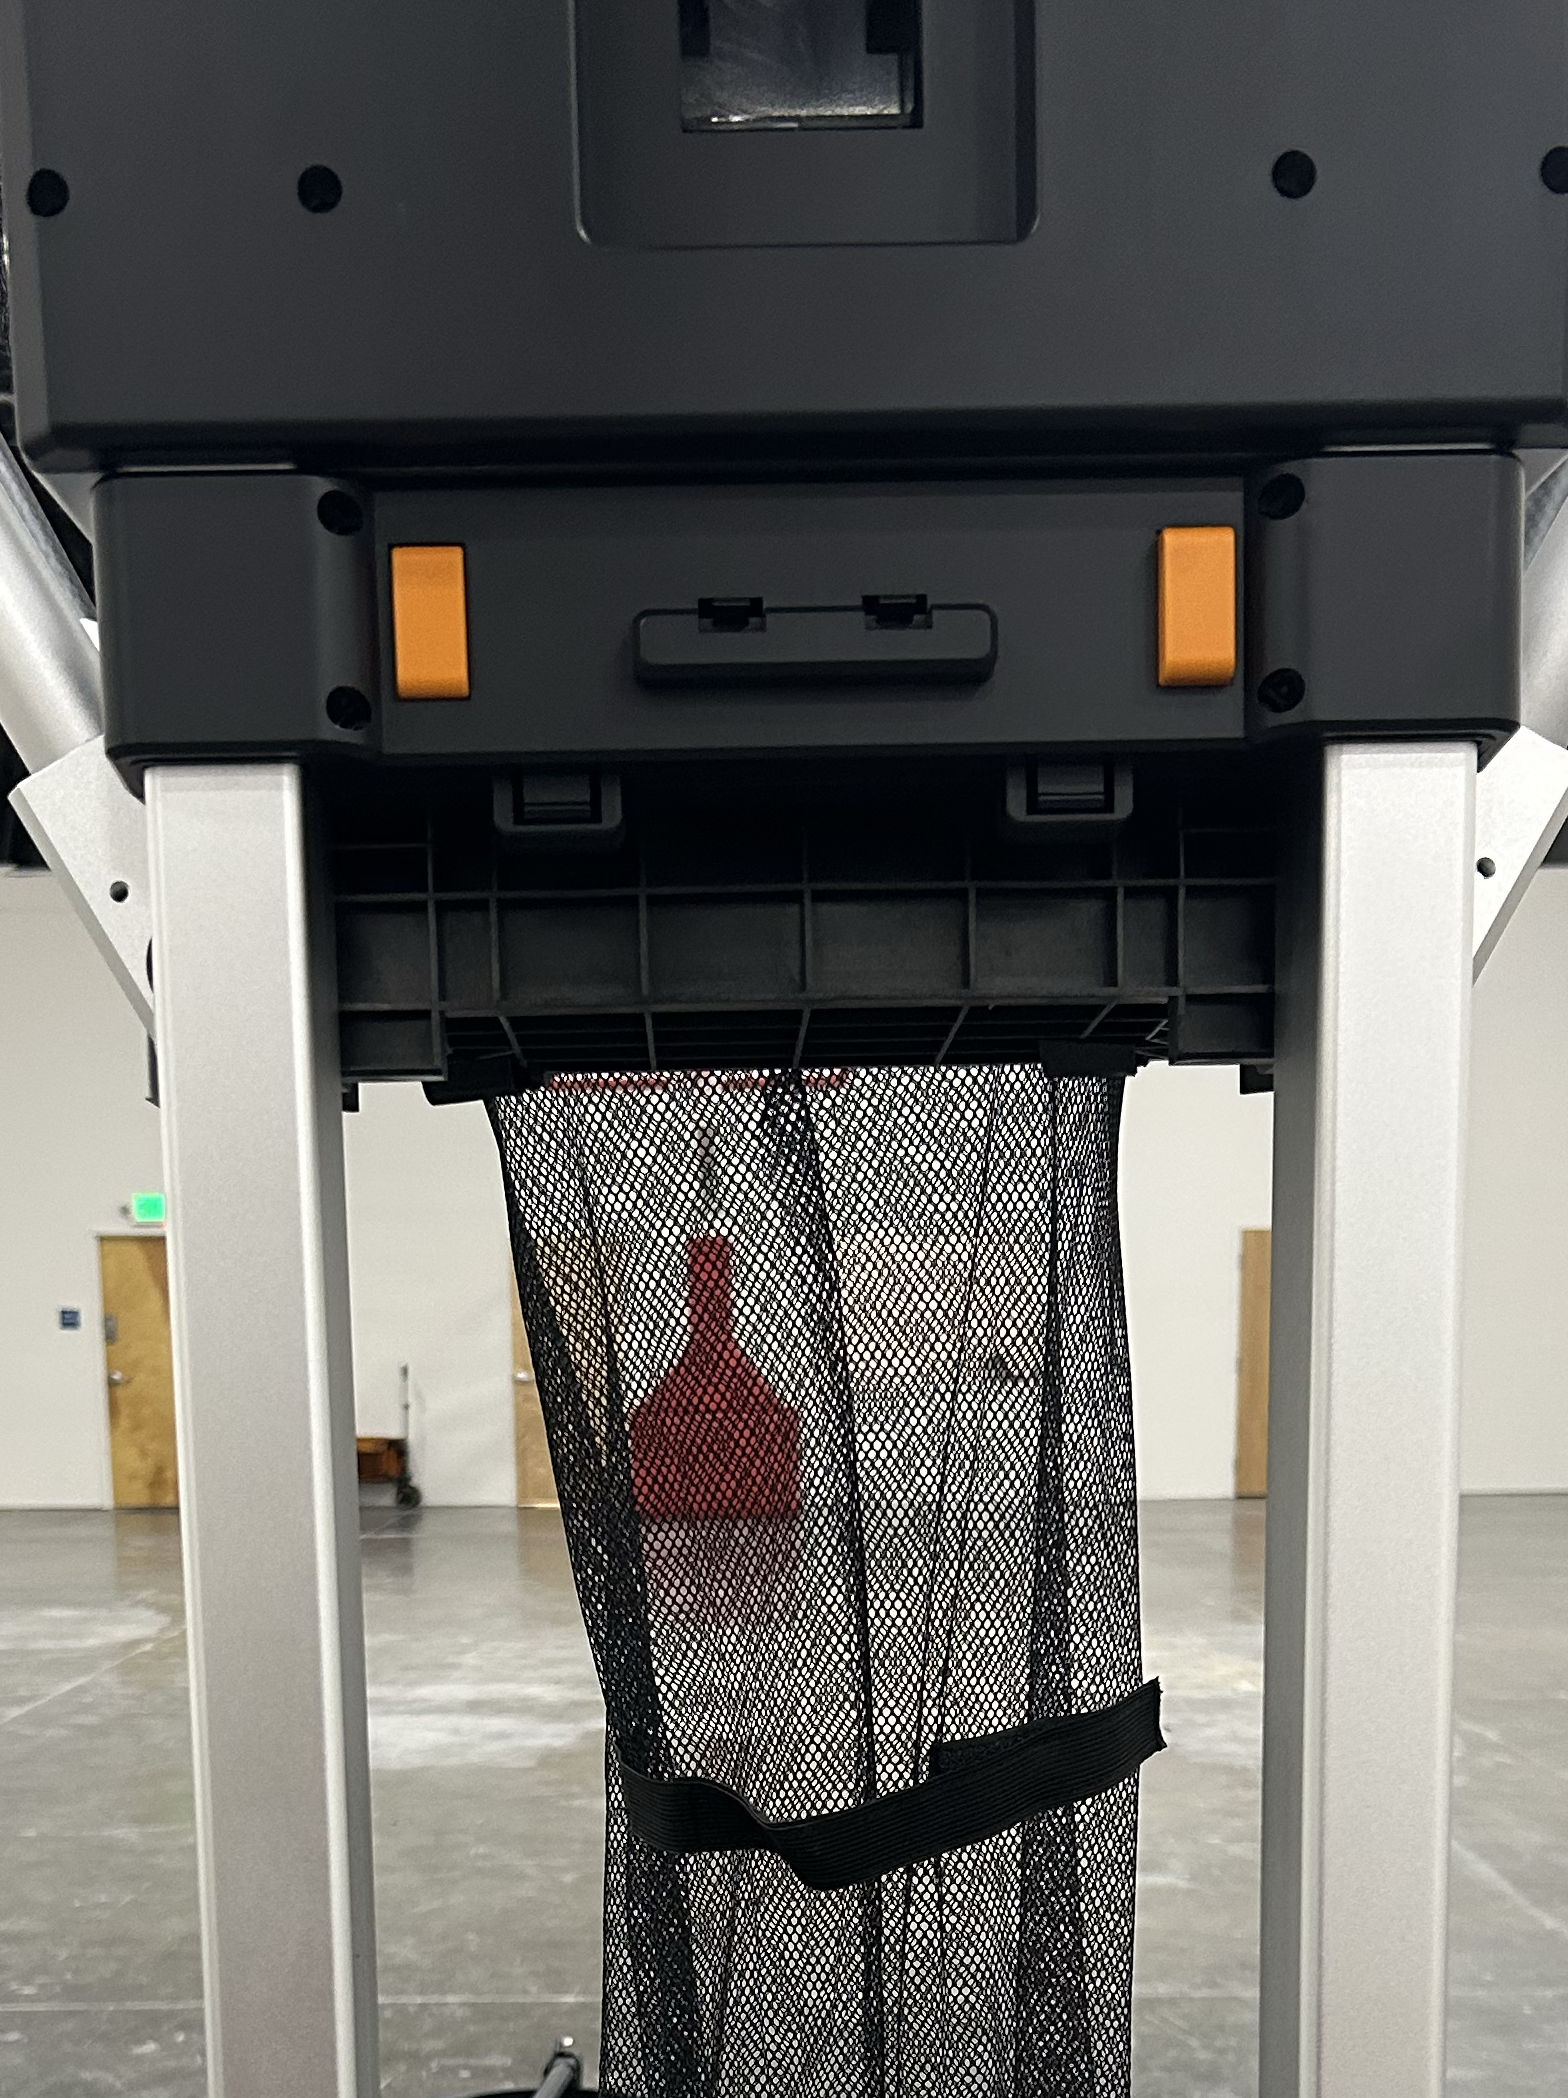
Step 6 :
Press both buttons simultaneously and hold them, allowing the rebounding net to lower gradually into position.
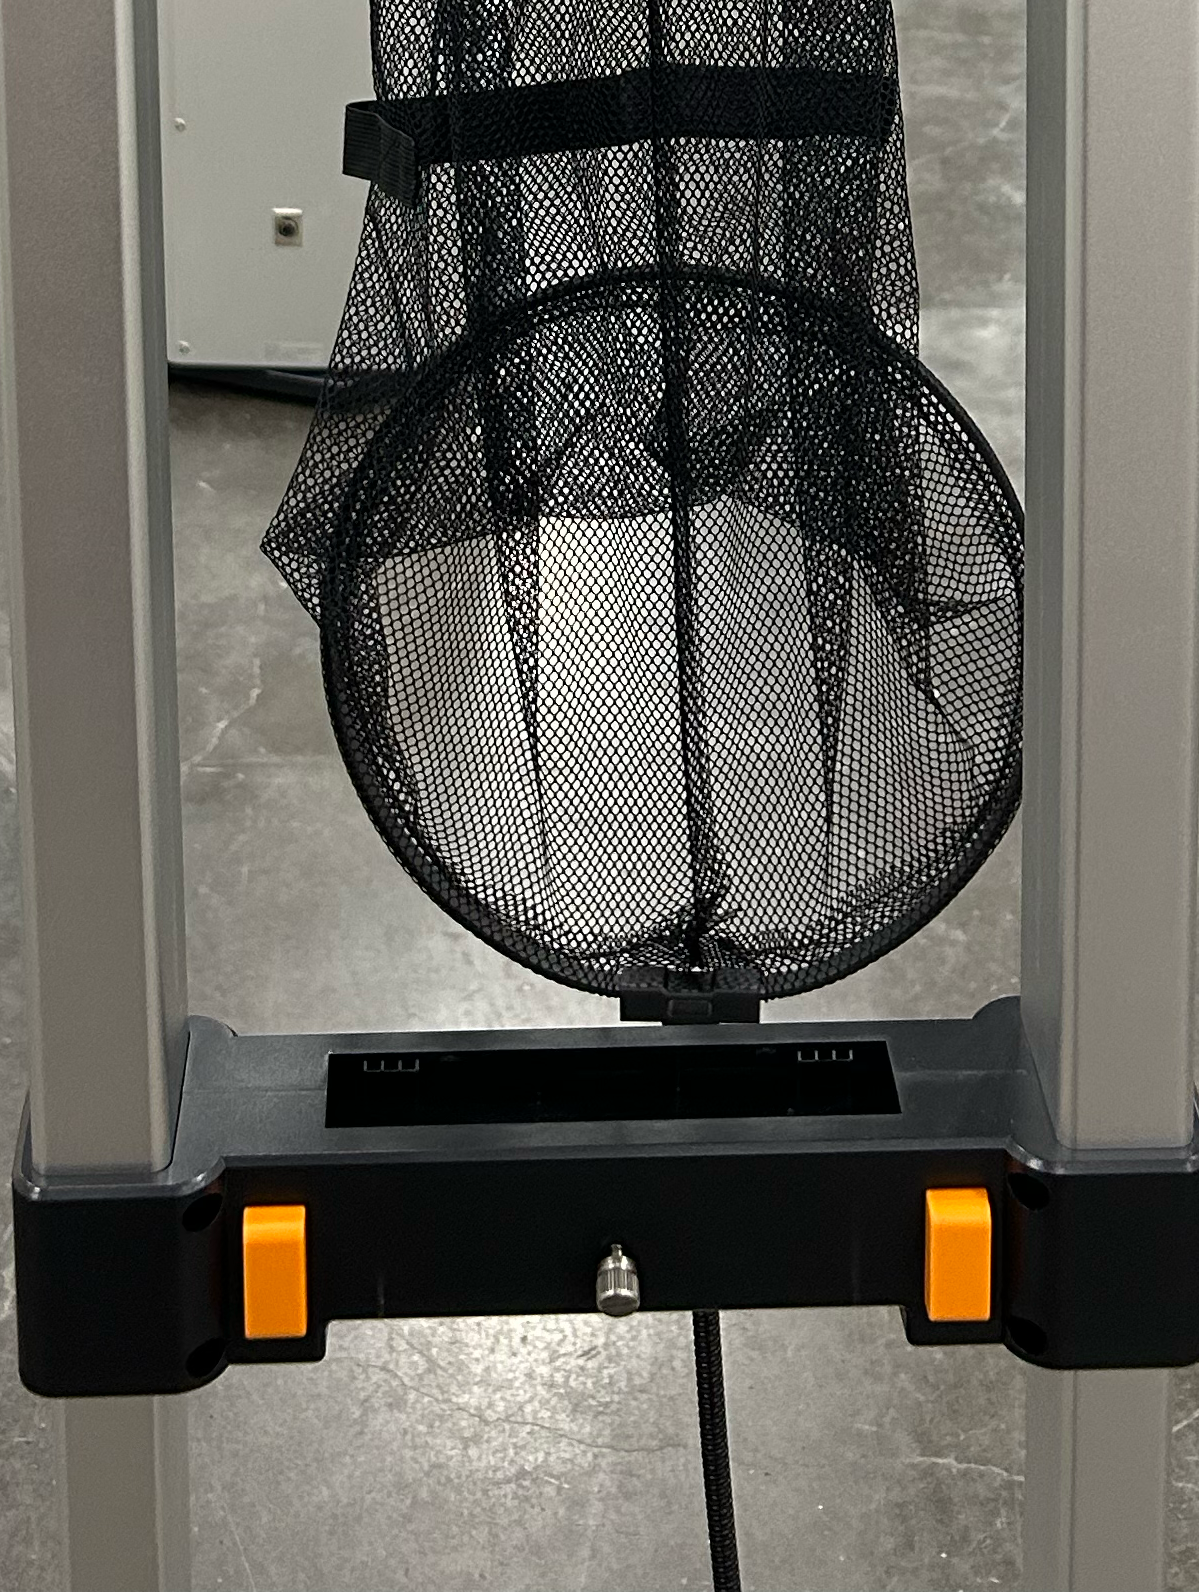
Step 7 :
Now press both these buttons simultaneously and hold them, allowing the machine to lower gradually into position.
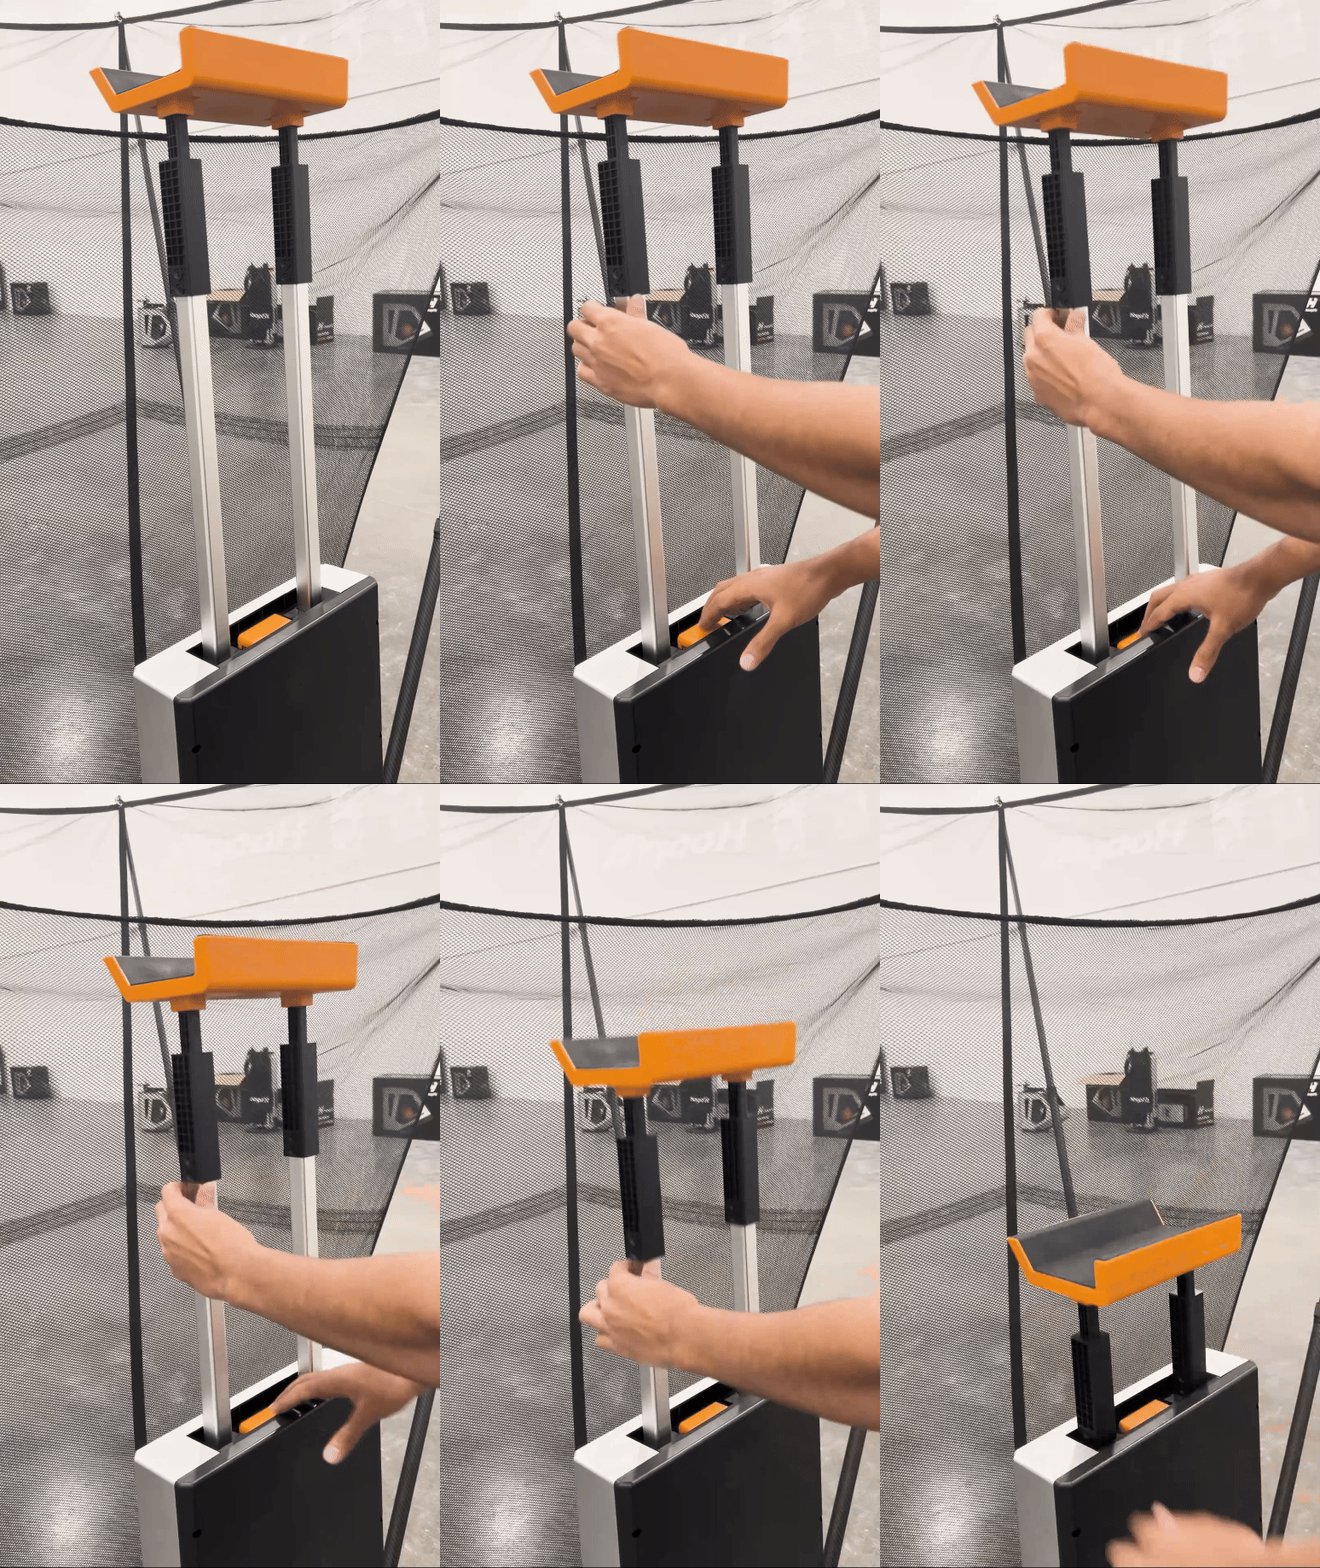
Step 8 :
Press this button to fully lower the lift plate.
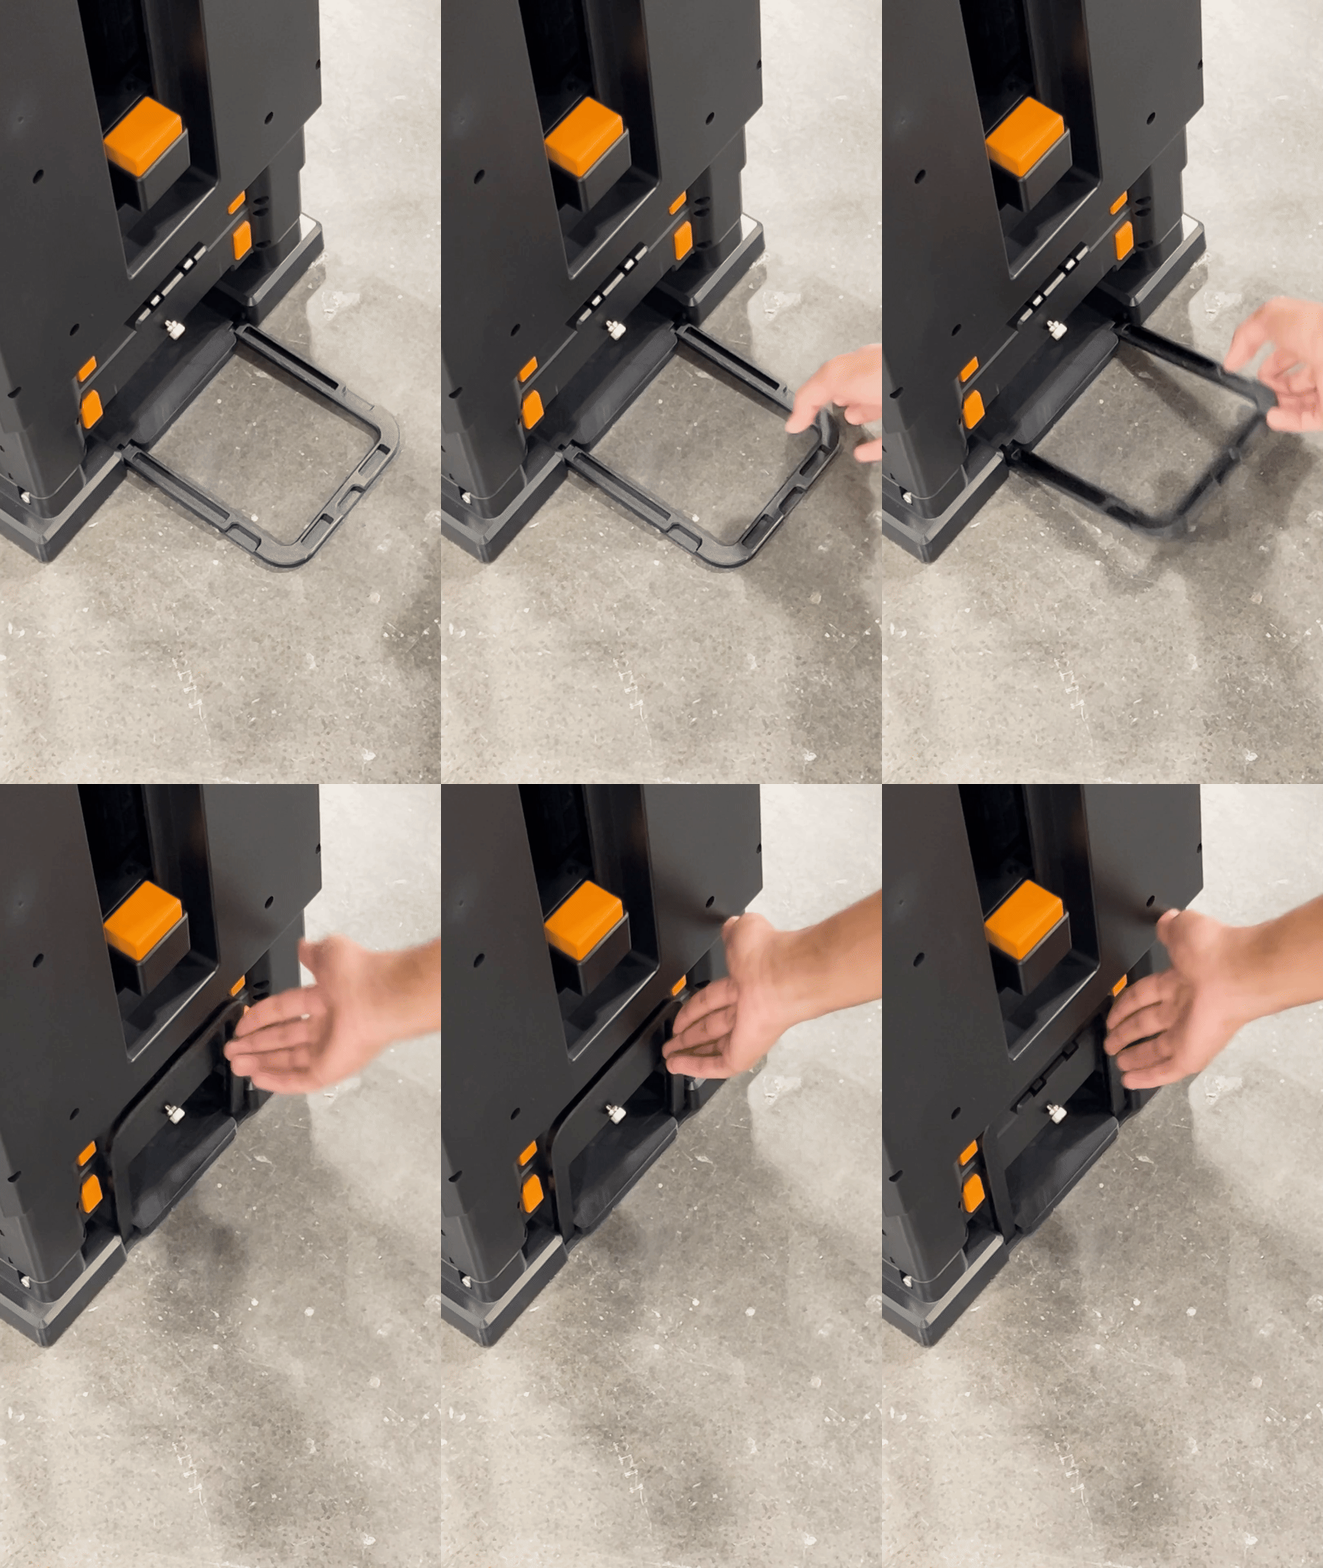
Step 9 :
Return the latch to the closed position and ensure it clicks securely before proceeding.
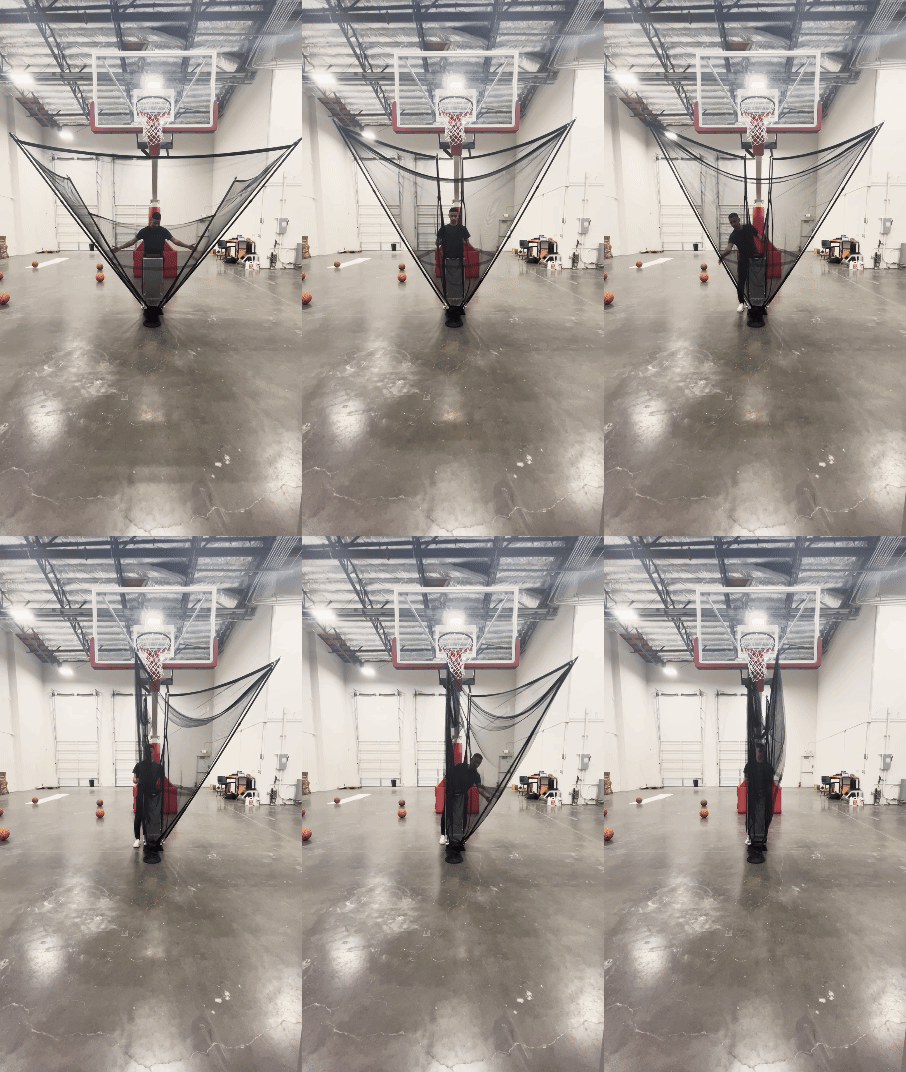
Step 10 :
Align all rods to match the shown arrangement.
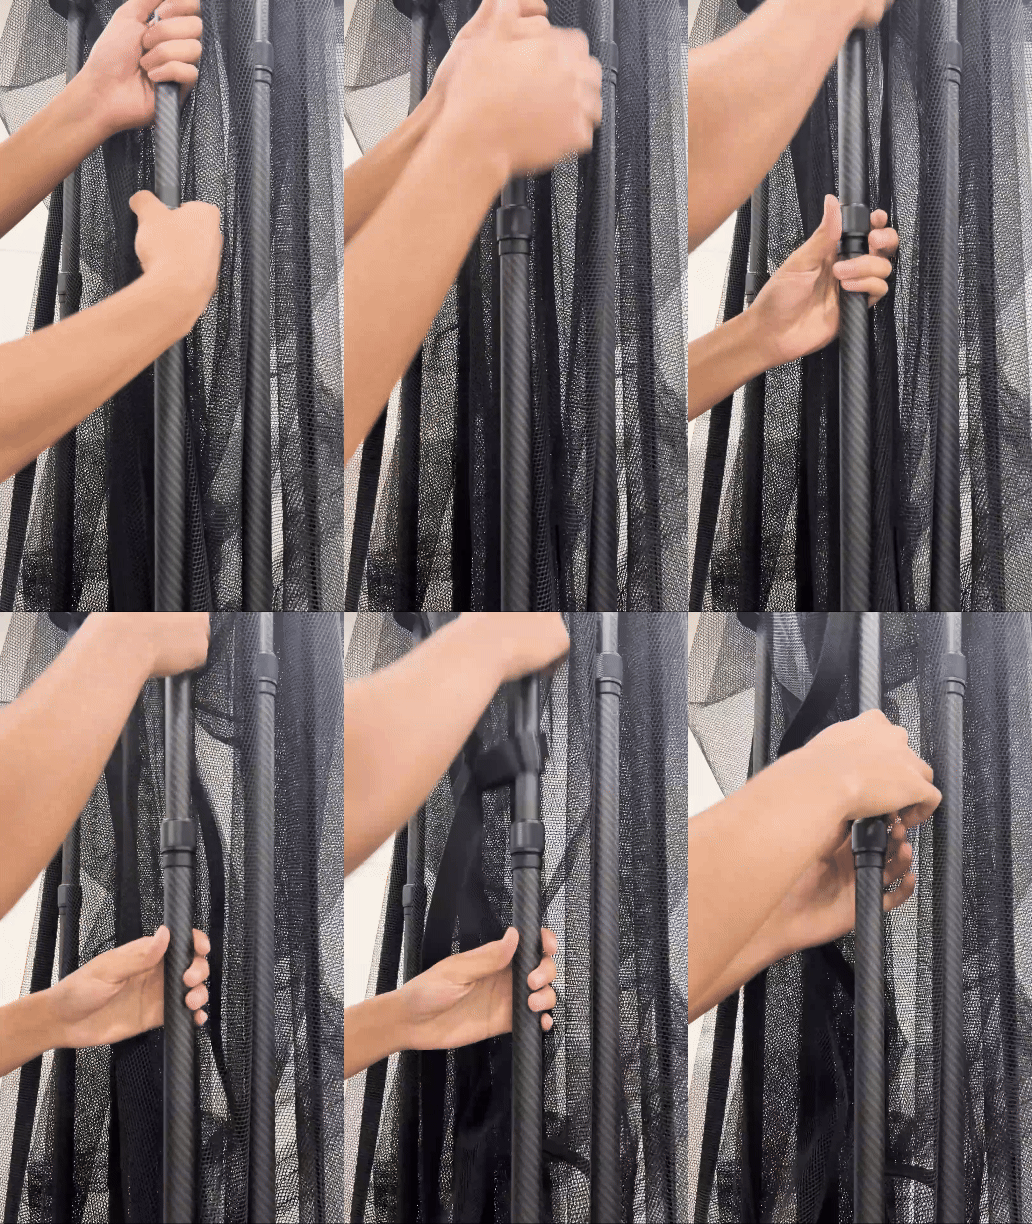
Step 11 :
Lower all rods completely until they are fully closed and resemble the indicated position.
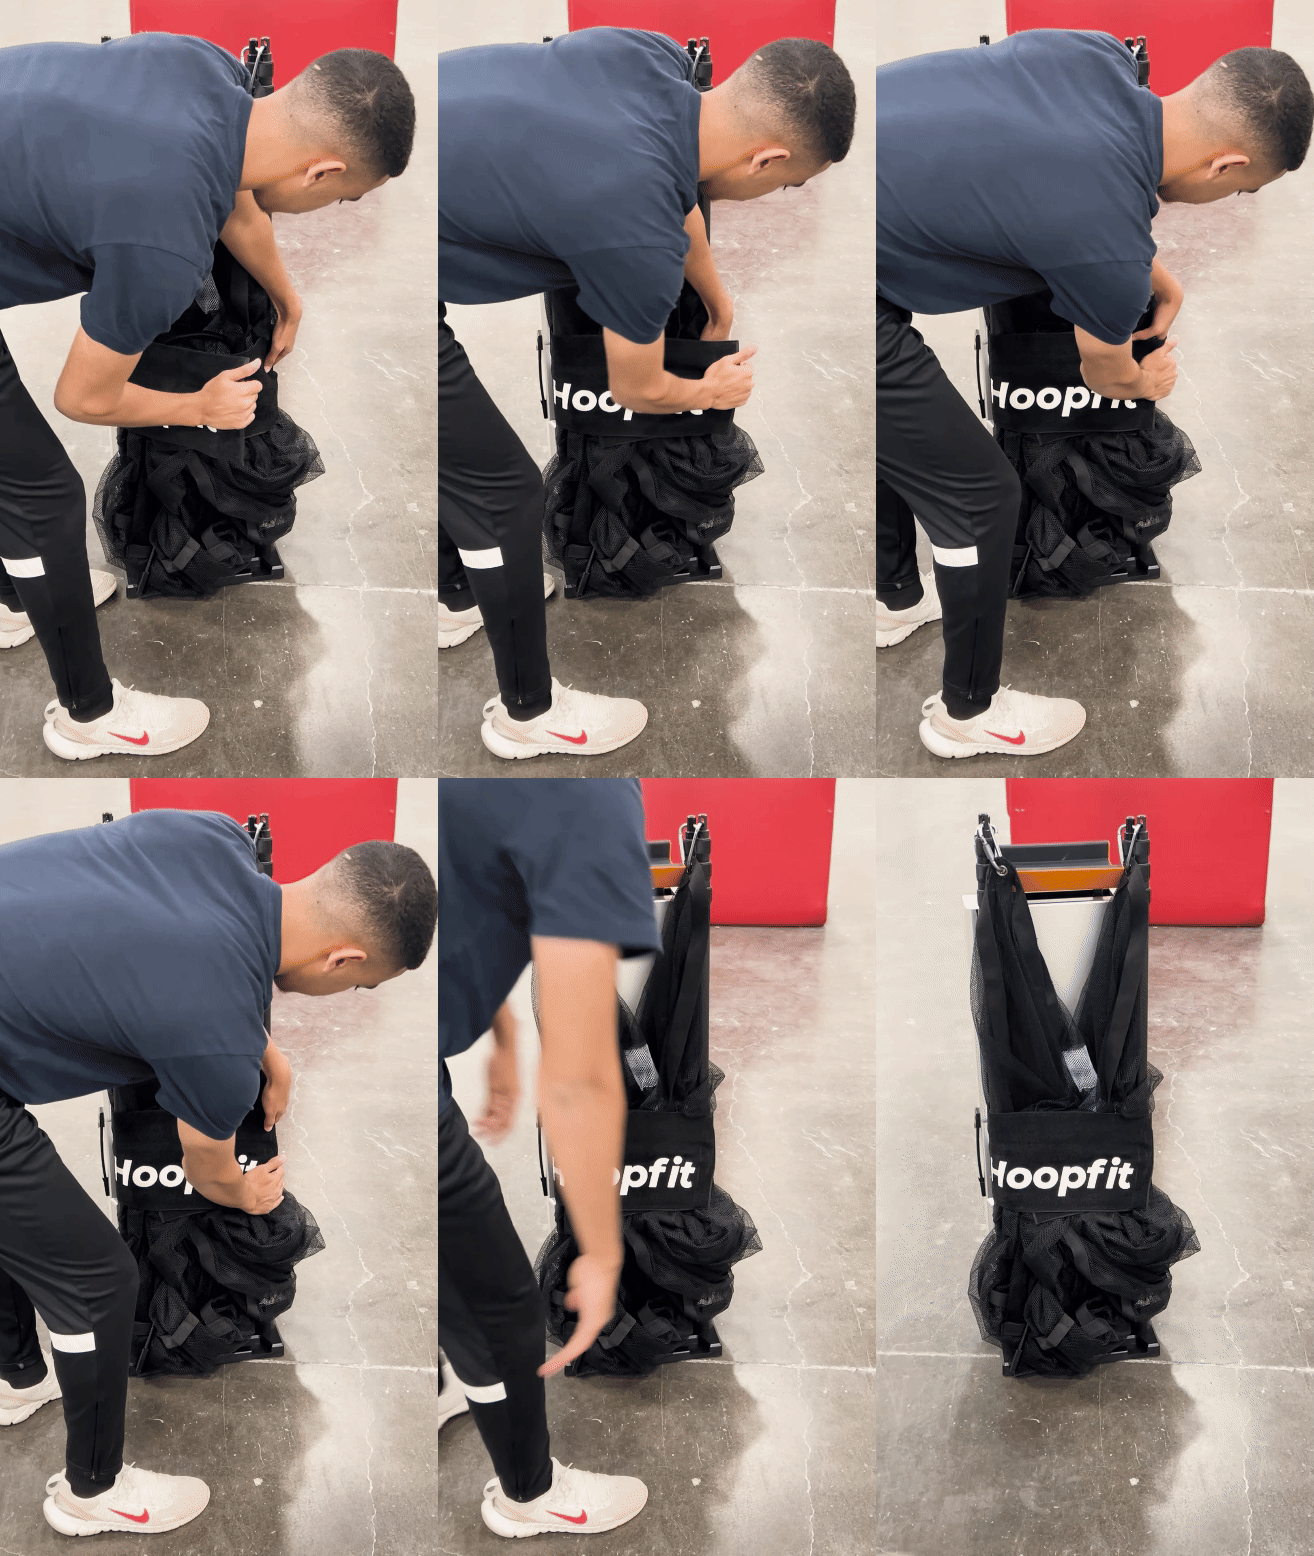
Step 12 :
Finally, wrap the provided Hoopfit cover securely around the designated area.
Other
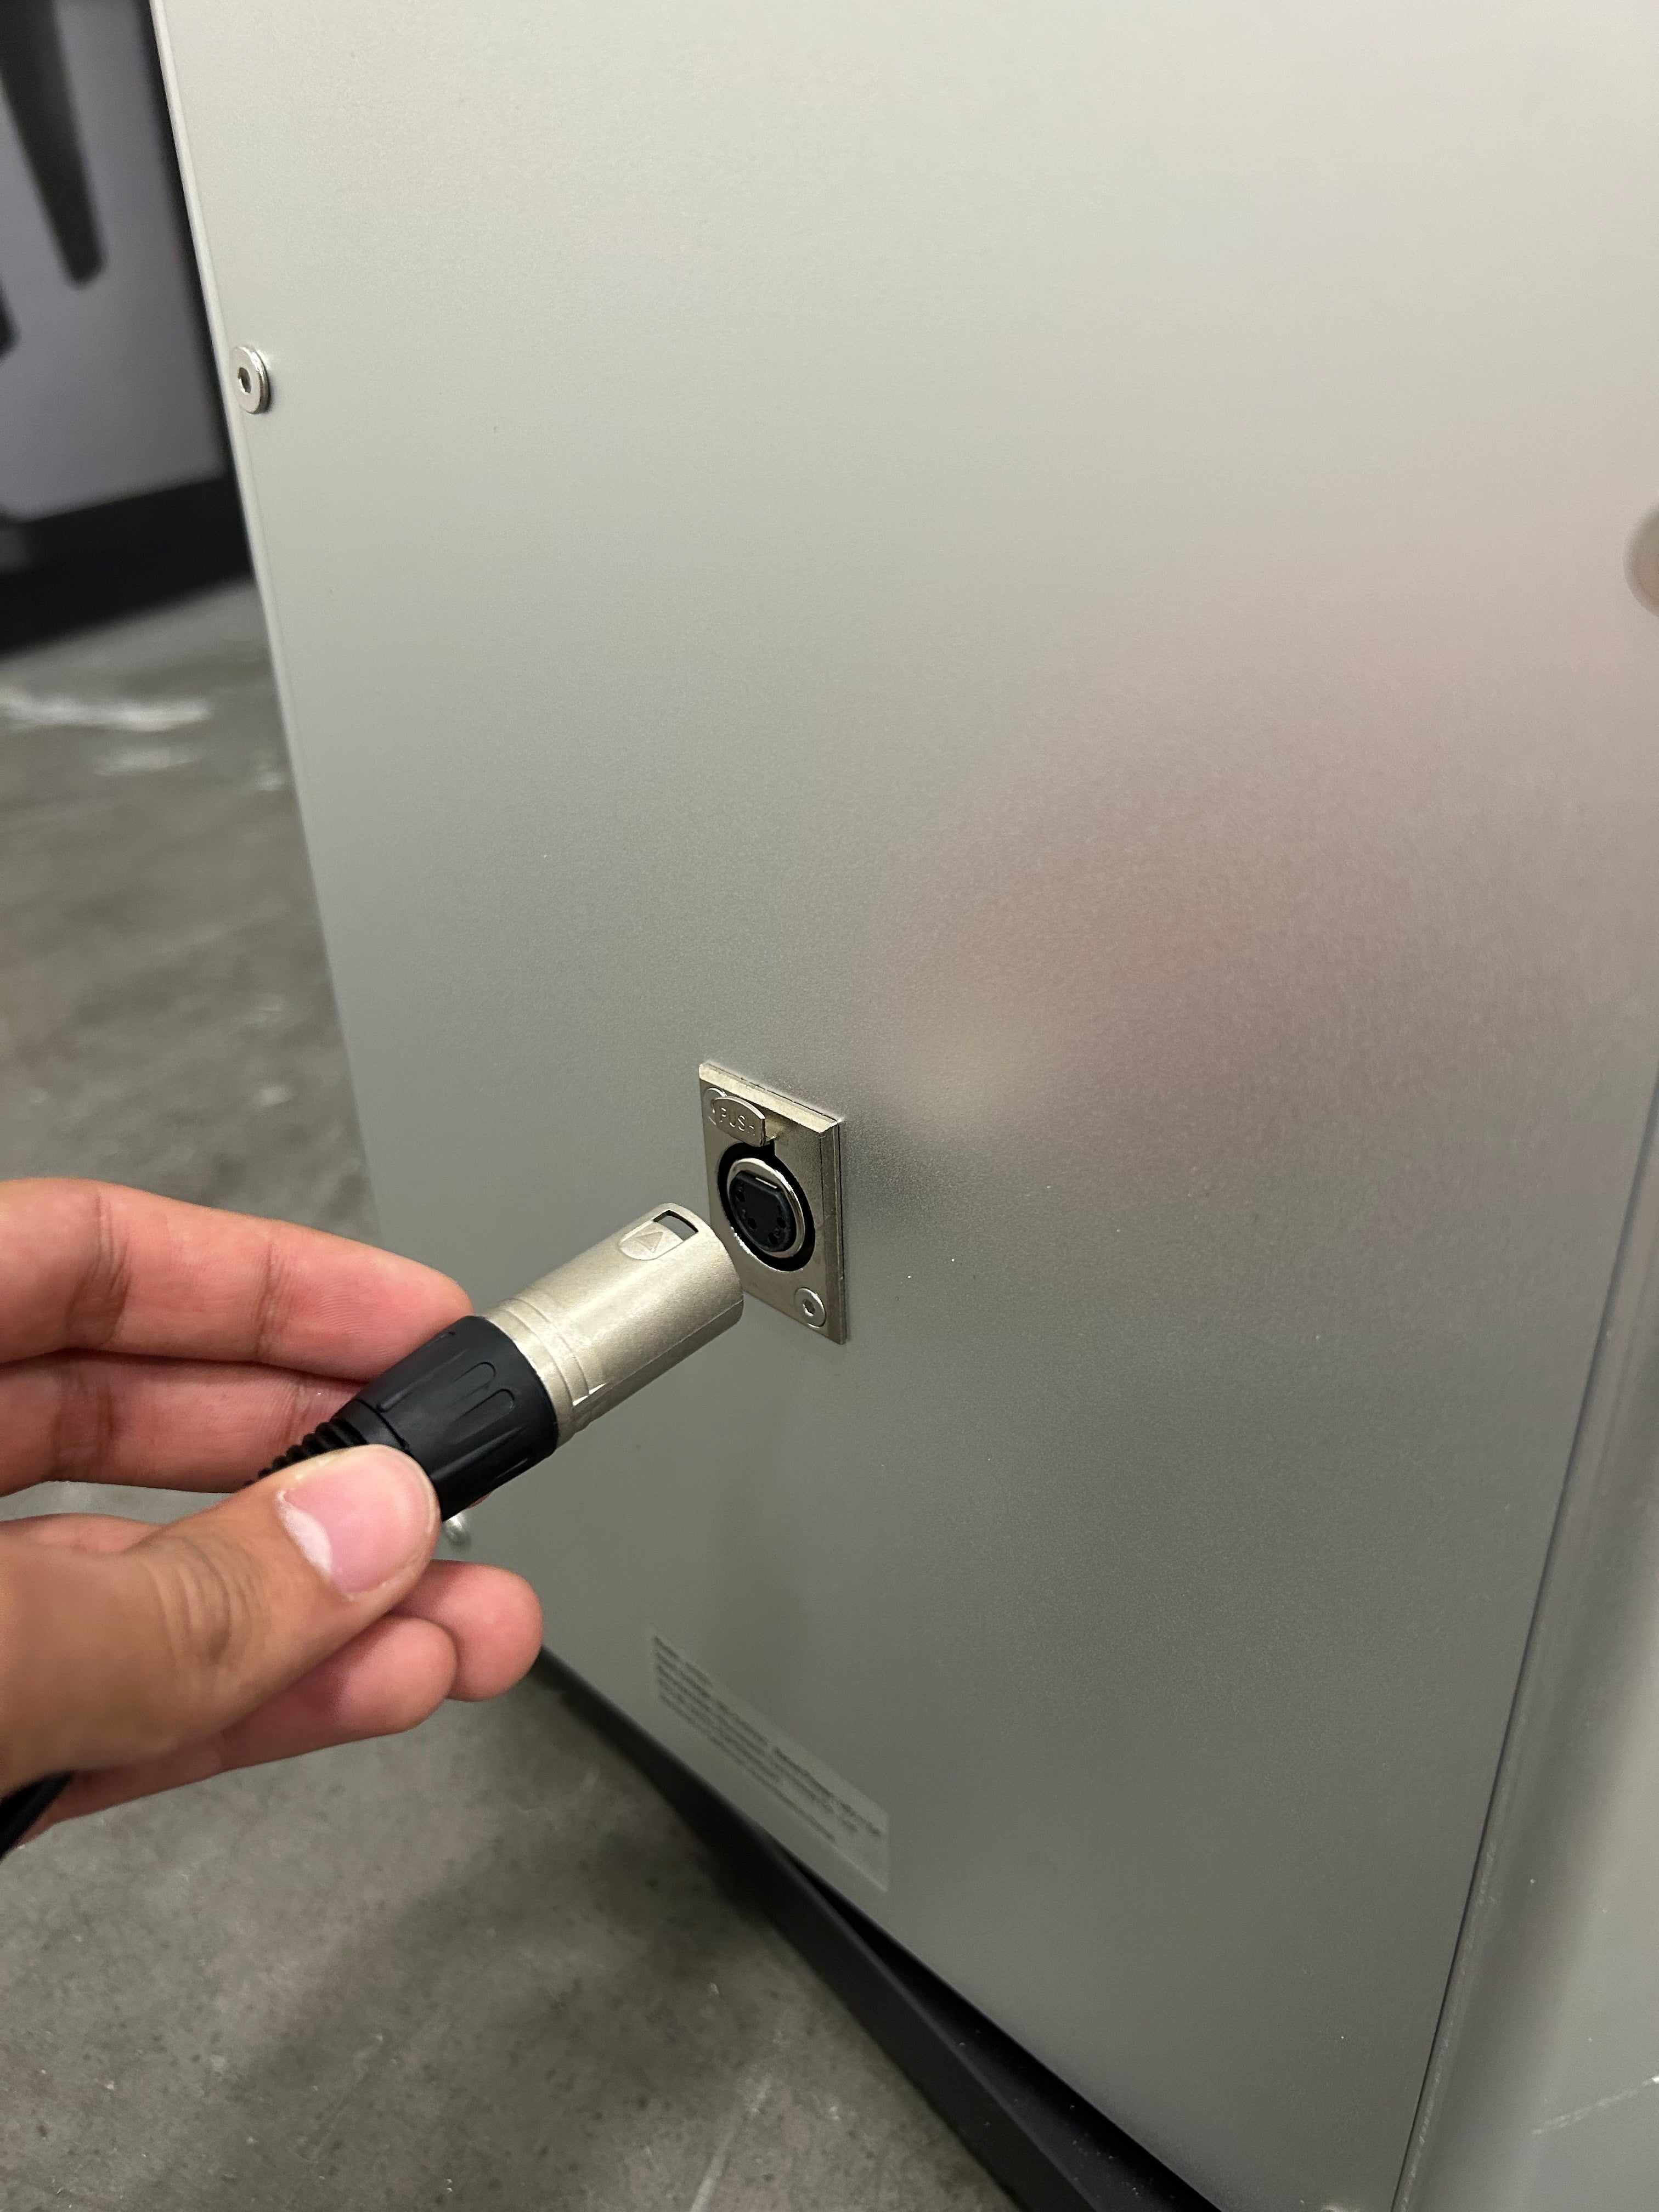
Launcher Charging
To begin charging the launcher insert the plug into the charging port located at the back of the machine, as shown.
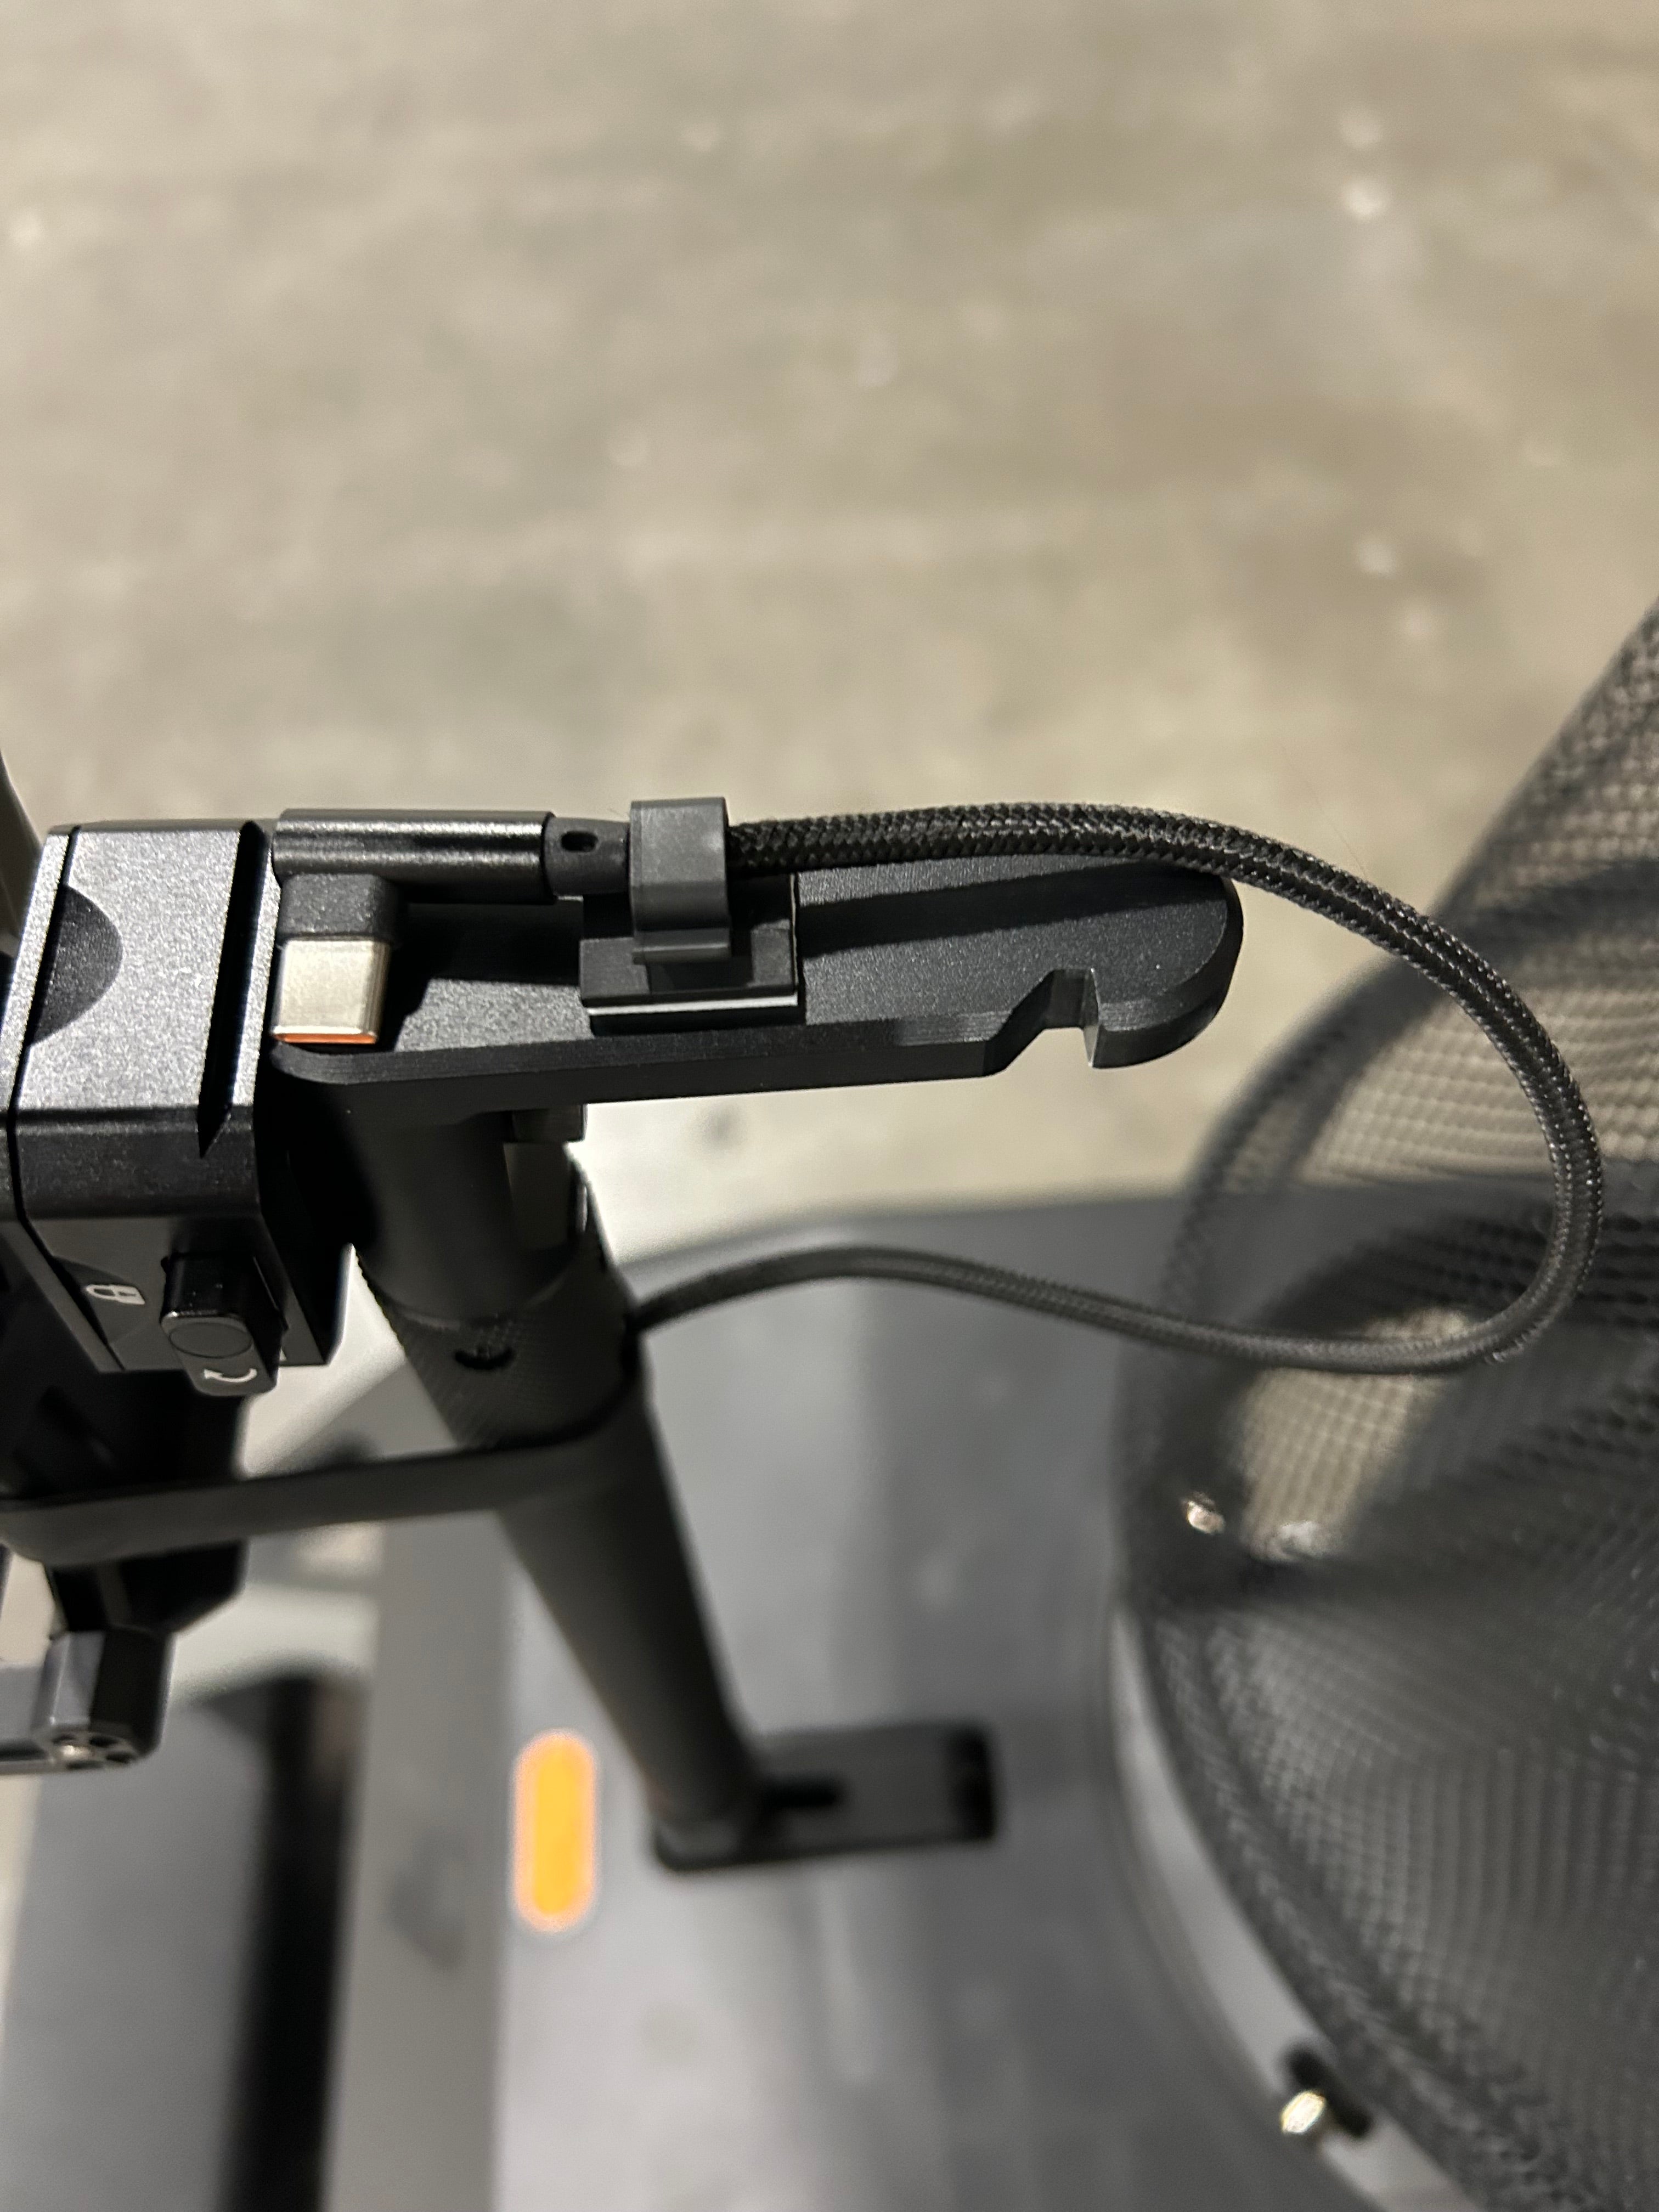
Ipad Charger
To charge the iPad while the launcher is in use, grab the charging cable on the launcher's base.
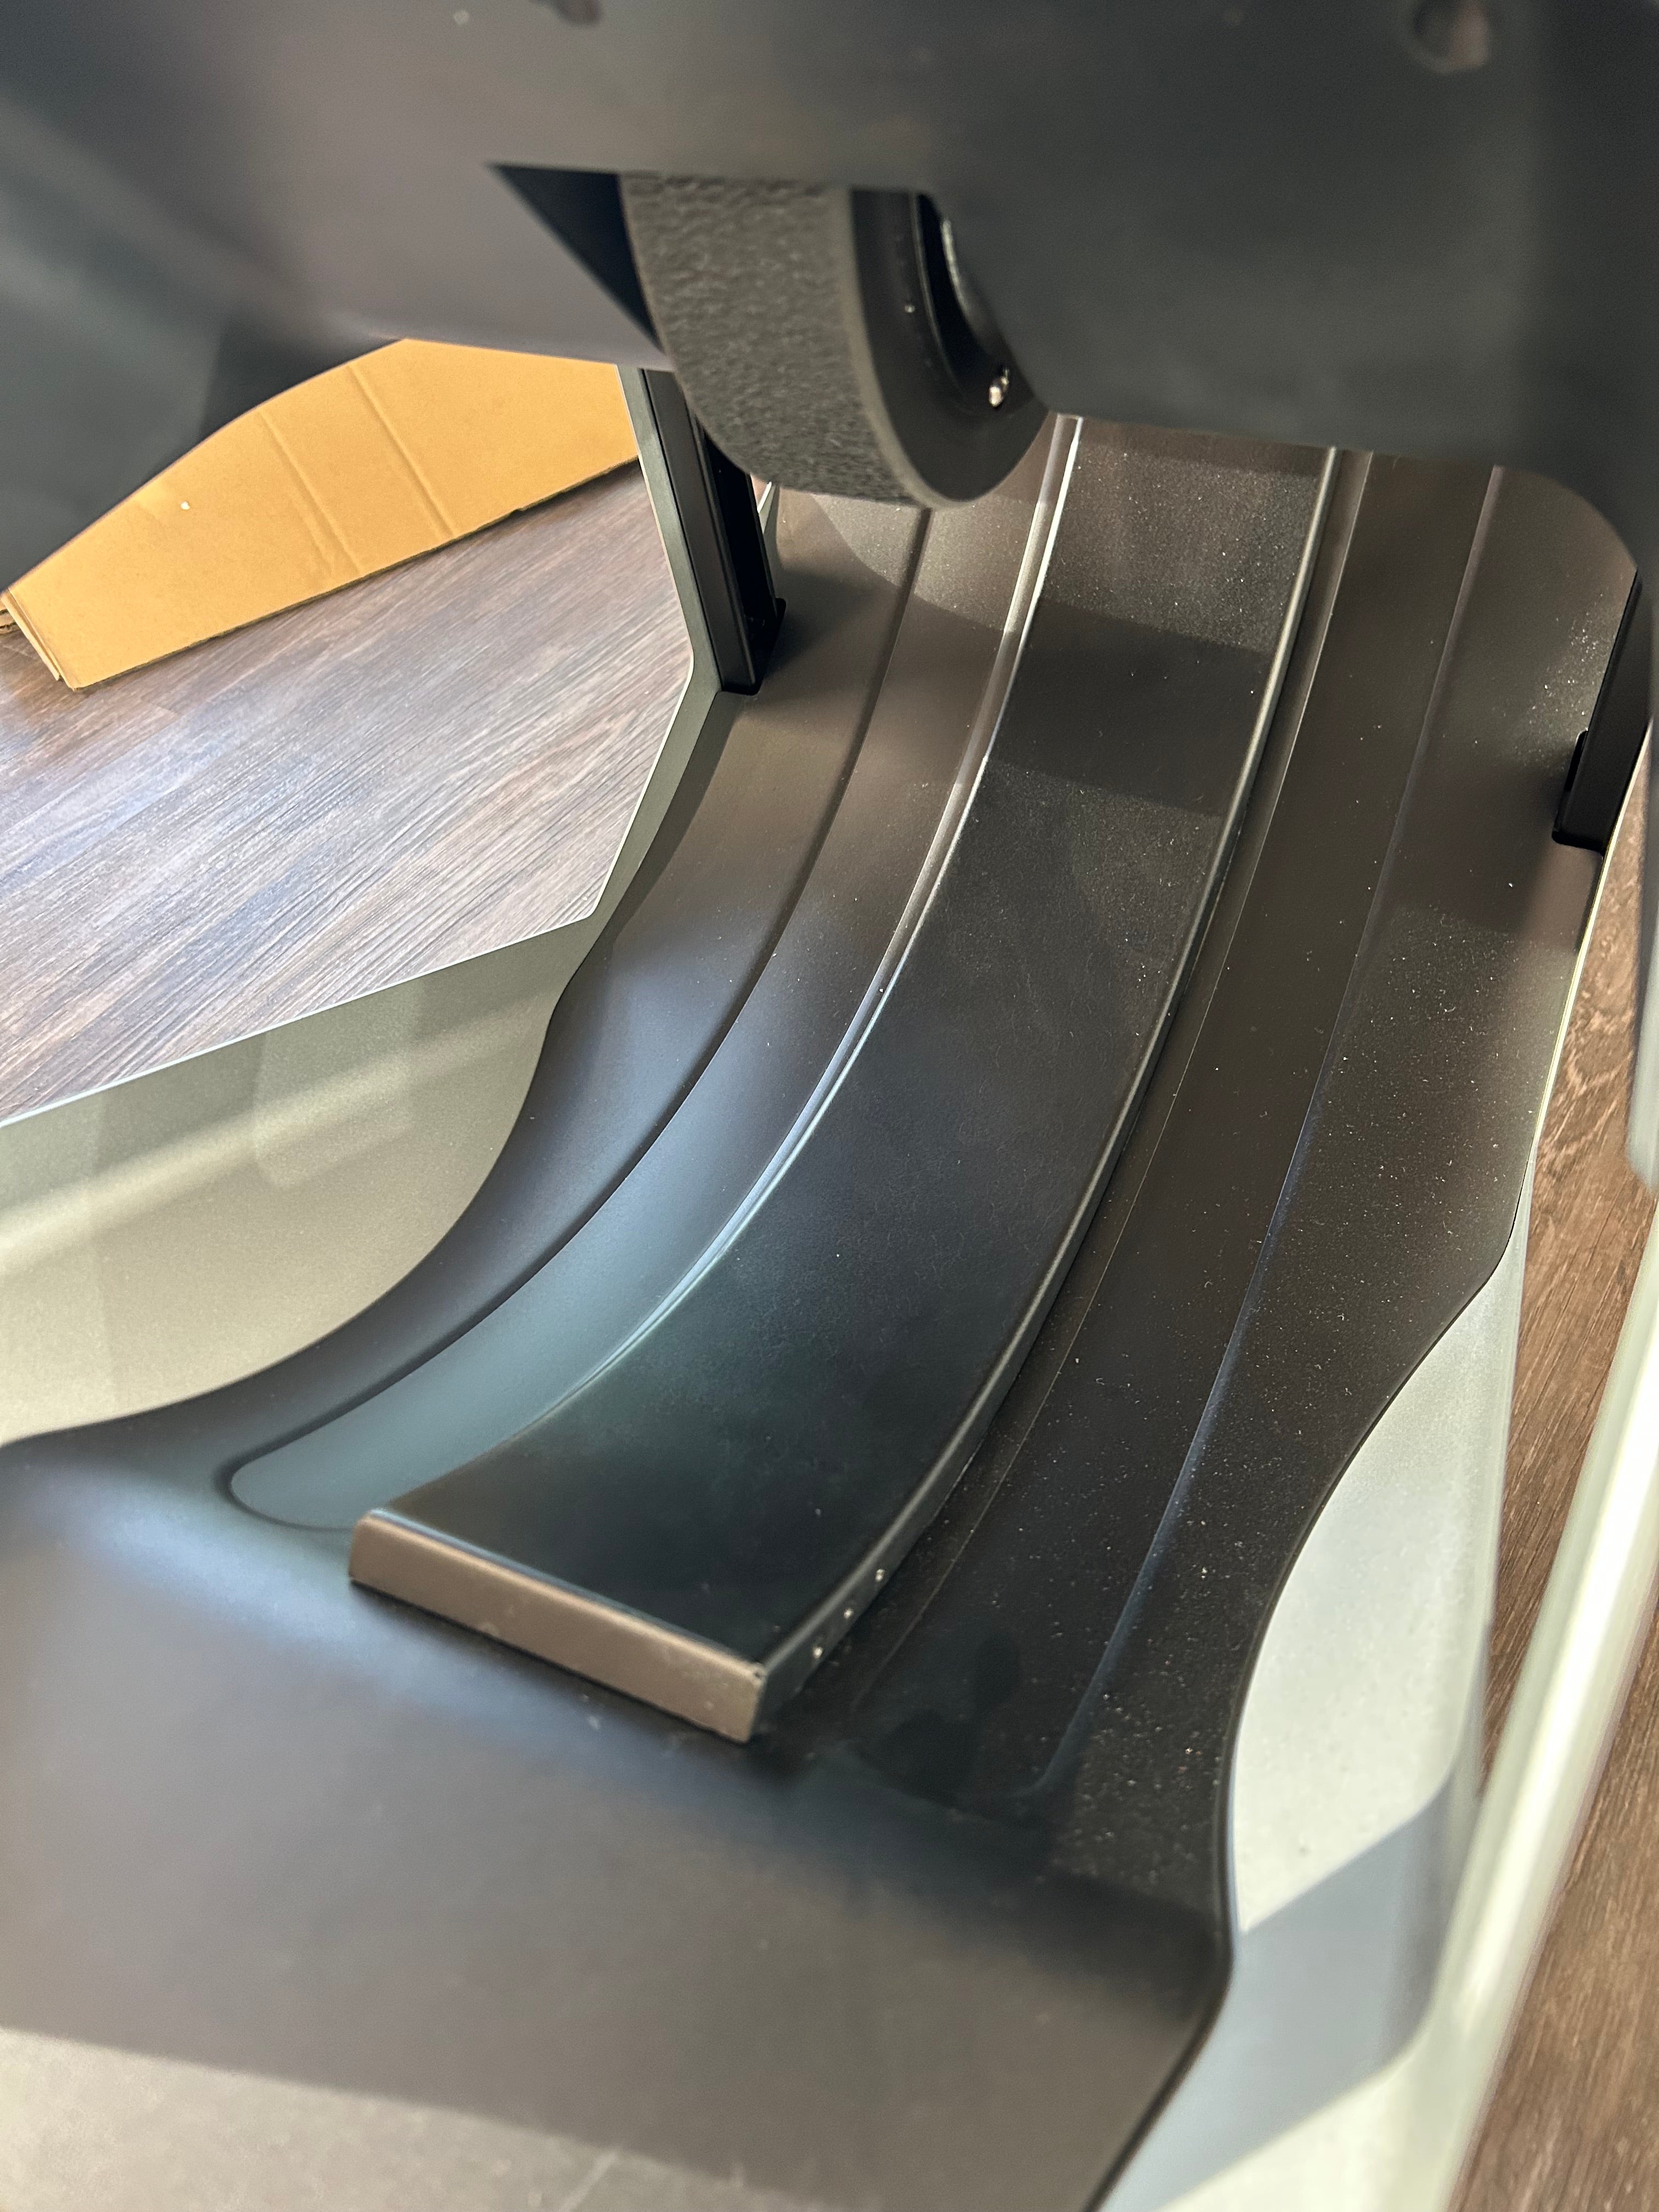
Ramp Attachment
To use HoopFit with smaller balls, attach the ramp attachment and secure it with the screw. When you're ready to switch back to a men's-sized ball, simply remove the ramp attachment.
To maintain the optimal performance and longevity of your Hoopfit device, avoid using or storing it in environments with excess moisture or dust. Exposure to water can damage internal components, and dust buildup may affect accuracy and motor function. Keep Hoopfit in a dry, clean space for best results and regular maintenance.
FCC Statement:
"This device complies with part 15 of the FCC Rules. Operation is subject to the following two conditions: (1) this device may not cause harmful interference, and (2) this device must accept any interference received, including interference that may cause undesired operation."

